Showing posts with label print and cut. Show all posts

Saturday, March 30, 2019

Hello Card - Graciellie Design

 I have been spring cleaning and uncovering layers/piles/drawers full of craft supplies that either need to be used or donated. So I sent boxes of "stuff" over to the Boys & Girls Club because I know they put all of it to good use as they have the main site plus have after school programs in 8 schools.  They are always happy to receive whatever I can share.  So it makes the giving away process so much easier!

And during that process I always seem to get invigorated and feel creative again because I am reminded of all that I have wanted to use and forgotten about - or just haven't had time.  I find ideas whirling around in my head again and it just feels so good.  So even tho my craft room is in a bit of chaos at the moment (I promise new pics soon when I CLEAN it up), it's all good.  I am rediscovering the things I love doing and starting physical lists of what I want to try as the ideas come because I just don't trust my memory anymore!  I should not say that out loud. :(

I have done the same with the kitchen and I am sure that is why I have started doing more baking and experimenting there as well - so there will be more recipes to share soon - it all feels good. And maybe that is part of what spring cleaning is all about - letting go of what gets in the way and making room for whatever it is you want to do or what feels important in the moment. So glad I am at least in the process!  Progress is often baby steps, but at least there is movement. I will take it.

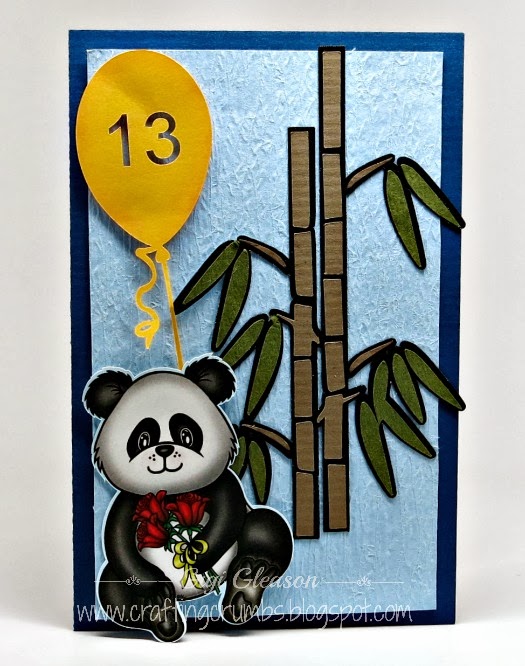
Enough chatter - on to the card.

This is one of the newer designs from Graciellie Design.  She is such an engaging artist and her artwork always makes me smile.  The image is from her "Your Kindness" collection and it was such fun to color even tho I am still a work in progress on that front!


The fun thing about coloring on vellum is that it is so forgiving whether it is markers or pencils.  You color on the backside and it is super forgiving - you don't have to do a lot of blending


This was printed in SCAL using a print and cut on the Silver Bullet Platinum.
I purposely left an edge because I wanted it to pop a little more...


And here it is from the front - so soft and the colors are 
diffused but I love how subtle the colors are - like a gentle spring day.


Here it is assembled on the card with ribbon and backing
and some foam squares to pop it up a little.


Designed in SCAL from a simple font and cut on the Silver Bullet Platinum.
Look at now narrow the lines are - cut with ease!


 Loving the finished product - hope you do too!


Pin It Now!

Tuesday, April 17, 2018

Special Card for Courageous Friend


I have a very special friend who has been fighting the dreaded "C" disease for the past several months.  She is a pillar in our community and loved and respected by all.  But cancer doesn't care how wonderful she is - and that is just one of the MANY things I hate about it. :(

I wanted to send her a little sunny encouragement and I hope this card helped.    I have been stretching to learn new things and/or use techniques that I have not used in a very long time - like distressing.  The Coredinations card stock is great for that because the white core comes through the color when lightly sanded - and I love that look with this card.

The digi image is another beautiful flower from Power Poppy - Climbing Clematis.I used the Spectrum Noir color blend pencils and gamsol to blend the colors together.  I had forgotten how incredible relaxing it is to color with pencils and I am determined to do more of it.  I just need to make more time.  I traced the image in SCAL and cut it out with the Silver Bullet and purposely left a bit of a shadow around it.  The "thinking of you" is a Hero Arts stamp, colored with a Zig Brush Marker to complement the background.


Love the closeup of the butterfly and all of the colors. The rhinestones
give the butterfly that little bit of sparkle and pop!

I highlighted the center of the flowers with Color Technik glitter gel pens.  I love the way they color - so smooth and sparkly. They are my "go to" gel pen because of the wide variety of color choices.  Well, I really love the Sakura gel pens, but they are limited in color - so I use both.


Pin It Now!

Sunday, May 14, 2017

Happy Mother's Day


First of all, I want to wish the happiest Mother's Day to my daughter, daughter in law and so many dear friends.  Even though we all know that EVERY day should be Mother's Day :), I hope today was extra special for all of the amazing mothers I have been blessed to know along the way, especially my own mother and grandmothers.  

Continuing my preoccupation with foiling (sorry -I just cannot get enough of it!), the card above was a traced stencil, scanned and printed and foiled with watercolor Decofoil. I love all of the beautiful shades in the watercolor foil.  The foiled image was cut on the Silver Bullet Professional using the print and cut method in SCAL, as was the foiled greeting tag that was threaded on the ribbon.  The tag was printed on a 3M transparency and ran through the FoilMaster with ease.  Assorted sequins and beads were added (see pics below) to give it some added interest.  


You can see the print and cut layout - above and the result below...


A perfect cut thanks to the Silver Bullet and SCAL software.


And again, the transparency foiled and then cut.  I placed small pieces of
                         removable tape behind the registration marks to make them easy to see 
when doing the laser registration.


HAPPY MOTHER'S DAY!

lebug


Pin It Now!

Friday, May 12, 2017

Birthdays and Celebrations!

It seems like I have been making a lot of get well and sympathy cards of late.  So it was a nice respite to be able to make two celebratory cards today - one planned and one unexpected - more on that later!


First up is a card for my oldest son.  It is so hard to believe that Scott is now 42.  Yikes!  We celebrated with a brunch down here a few weeks ago,  which was a win-win for me. I not only got to have a little extra time with my son, but he is part of a package deal (!), so I could also enjoy time with my daughter in law and precious grandson as well.  I felt like I was the one getting presents - so thrilled to have the gift of time with those I love.  I really cherish(ed) every minute.

I have been doing a lot of foiling and Scott's card was no different.


The dotted images was printed on a laser printer and foiled with
rainbow foil.  The greeting is from Gina K Designs.


You can see the dimension of the card here. 

I also had the opportunity to make a card for an amazing young woman.  I spend some of my free time volunteering for the Oceanside Boys & Girls Club and serve on the board.  I love the programs we offer our youth and find such joy in watching them blossom as they grow and find their way.  One young lady stole my heart a few years ago when I met her during judging for Youth of the Year. she didn't win that year, but she had an amazing story and I could see the potential in her - we all could.  She went on to win the next two years.  This year when she completed at the county level, she won and became San Diego County Youth of the Year.  The next step was the CA state competition a few weeks ago and guess what???  Yep - she won - again!  We are all so proud of her.  She graduated from high school last year with a GPA well over 4.0 at the age of 16. She is now enrolled at the local community college where she is excelling.  She is bright, charming,thoughtful, humble, and inspiring to one and all. What an amazing role model for our youth. She attended our board meeting the day after returning from the state win, so I made her a congratulatory card from the Board.  It was so much fun to do because I think the world of her and am so proud of her and excited for her.  I just know she is going to have an incredible life, no matter what happens with the remaining competitions.  There is a regional competition in June, and then that winner goes on to compete for the national title!  What an experience no matter what........I know her star will continue to shine bright for many years to come.

So with stars in mind, I used a stencil that I printed and foiled, and then created a fun little banner with the greeting.  That was printed with a gel pen in the Silver Bullet.  I don't draw with pens in the machine often, but every time I do, I make a promise to myself to do more of it because it is really so much fun and the results are beautiful.


The words on the little banner were "written" with the pen tool 
in the Silver Bullet Professional.  Then the banner was cut out.


The stars in the background were foiled in baby blue. (It's very close to the official blue color of the Boys % Girls Club of America)  It is so challenging to photography foil, but hopefully you can
get an idea.  It is so pretty in person.
Pin It Now!

Saturday, August 15, 2015

Heritage Ball Thank You


This is the last time.  Yes I have said it before but I am getting old"ER"....... and burned out..... at least with some things!  I have chaired a lot of fundraising events over the years and I love it because I have learned many of the tricks from many talented people over the years and organizing and cheering people on is easy for me.  But.....I am tired.  It takes a lot of time and energy to do a really good job and I am ready to back away. So my last one (so help me, I mean it this time) is now...tonight (Saturday!).  It is a fundraiser for one of the CA Missions which is a remarkable national historic landmark.  It is rare to have historical landmarks on this side of the country, but for whatever reason, it is challenging to raise funds for this 200 year old Mission.  Much of the existing architecture is original  and is just so amazing - historical, spiritual, and magical all in one.  The grounds are beautiful and they are opened up to all of us for the ball that is held outside in the gardens.  The venue is really breathtaking.  The powers that be have decided that this will indeed be the LAST Heritage ball - after a great 32 year run.    (I can remember attending with my parents as a young woman... it was magical even then and is full of wonderful memories...) That is a long time to hold an event and there are now a lot of other organizations and causes fighting for donor dollars from the same group of people. So it is time to move on, go out on a high, and create something new going forward.  So we all put a lot of effort into this black tie event to pull out all of the stops this year, including fireworks!  My fingers are crossed that all goes off as planned - or even better ! :)

So this year the colors were gold and green and the theme was an elegant summer garden. With the heat we have already experienced, we figured it was a good way to go. :)  (and as I write this, we are having an unprecedented heat wave and breaking records.  It will be over 90 in the heat of the day today so flowers will NOT be going on the tables until the last minutes.)  The good thing is that because the Mission is in a valley, once the sun sets, there will be a wonderful breeze through the area and everyone should be comfortable - eventually!

Over the years, when I have chaired an event, I have tried to make the committee a thank you card and mail it out the day of the event so they receive it the Monday after.  I just want everyone to know their help and support has been so appreciated and is not contingent on how well things go that night -  they helped it all come together and worked hard and that is all anyone can do.  We cannot control what happens that evening - we can only set the stage for success.


The print and cut background 


Print and cut flower with shadow layer...

I often do a cut file from the invitation, but this was a bit more challenging as it was a flowing arrangement of cascading flowers. So I ended up doing a print and cut of the background and of one single rose.  Both were backed in a solid color (the green of the theme) and then assembled. The rose is popped up on foam dots for a touch of dimension and interest.  I wanted it to look elegant and I think I achieved that, as much as possible.  Hopefully they will be delivered on Monday and the recipients will feel appreciated. They truly are....


The label on the back with the themed floral - a simple memento


Pin It Now!

Sunday, June 21, 2015

Happy Father's Day!


Sometimes simplicity needs to take over when there are no ideas in your head!  Such was the case with this card.   First of all, I needed a masculine themed card - strike one for me.  It's no secret that I have a hard time with those.  Strike two came when I realized that tomorrow(now today!)  is THE day and there was NO way I was going to get it in the mail and delivered in 24 hours. So that destroyed whatever ambition I had to get it done - which became an overwhelming obstacle for most of the day.

So I gave myself a swift kick (mentally) and vowed to at least get it up on the blog so the wishes would be there and the promise of the delivery in a reasonable time (my definition of reasonable is totally different than the post office) would have to do..........

So..... for my oldest son on his VERY FIRST FATHER'S DAY.....................


A simple print and cut with patterned "Happy" letters - found the idea on Pinterest                           (a treasure chest of ideas no matter what the topic!)


Did a little scoring to give the card some dimension and added cut off brads for interest.


Preppy Carter J!


Carter and Dad - what a pair!


Sending love and hugs and wishes for a great day with that beautifully handsome  4 1/2 month old. 
 The time is flying SO fast!


Pin It Now!

Sunday, March 15, 2015

First Watercolor Card......


A month or so ago, I spoke of a dear friend who didn't get her birthday card in time because I made a Valentine card for my new grandson instead. And she ever so graciously accepted my inability to create two entirely different cards in the same time period.  I am so blessed to have understanding friends!

I wanted to be sure to make her belated birthday card extra special.  So why did I think that now was the time to try an entirely new technique that I have never ever tried before - and experiment with different media  - and try to find the print and cut and hope that printing on watercolor paper would work.  Let's just make this project as challenging as possible, right?  Well that's what I do!  And I think I succeeded -it just took extra time.  And the card finally arrived at its proper destination so I can now share its journey!

I recently added the Spectrum Aqua Markers to my craft collection. I have their regular alcohol markers and their blendable pencils (Spectrum Noir) that I also love and I have been watching videos on all three, trying to improve my questionable skills!  I find the Aqua Markers the most forgiving and have been playing around with the best way to use them. I like to scribble the colors on acetate, spritz the paint with water and then color lightly on the watercolor paper, adding more color as needed. This paper is hot press and I was told it was easier to use because it is smoother. I will be experimenting with hot and cold press papers going forward to see which I like better.

What surprised me is how easy it was to print a digi image on my laser printer.  I had to trim the 9x12 watercolor paper to fit and used a lighter weight (90 lb) but it printed perfectly and the ink did not bleed when I added the water color - success!!


A close up of the watercoloring. Digi image is from Fred She Said.
Cut file is from Birds Cards.
Solid colored paper is from Paper Temptress.
Center of flower is highlighted with Wink of Stella glitter pens.


I am looking forward to working with these markers a lot more - and I love that this line of watercolor markers offers a wide range of colors - and they are easy to blend to create even more colors.


I put the magnolia on pop dots to give the card a little dimension and added
some flat back pearls - my default embellishment.


Happy Belated Birthday, my dear Georgia friend!


Pin It Now!

Saturday, November 2, 2013

Happy Birthday, Kendra

Where did the time go?  I cannot believe my first grandchild is turning 13!  How can that be? I still remember so vividly the day she was born.  Should it be such a stretch to imagine she is now a teenager?  I have watched her grow up into a lovely girl, yet something about entering the teenage arena just seems unbelievable to me - and exciting and scary all at the same time.  I am also extremely grateful that I do not have to go through those tumultuous years again!  God bless her Mom!

So now to the card. I am sure some of you are going to look at this and go "huh"??  I know, it doesn't look like a card for a girl embarking on a journey into the TEEN years - it looks - well much younger.  But she loves Panda bears - I mean she REALLY loves them.  Halfway through the evolution of this card I called her Mom and said, "Are you sure I should to this?  It just doesn't look like a teenager's card!"  But we both decided to embrace the young girl that still  loves Pandas - as there are many teenage years ahead of her!

And I admit to cheating a little on this card. I "should" have colored this digi image, but with all of the cards I needed to finish for October, I just didn't feel I could do it justice .  So I chose a precolored image that I used for a print and cut on my Silver Bullet Professional . I love that machine.


The print and cut with the SCAL registration marks.


The cut out image - thanks to the Silver Bullet Pro!


And the bamboo is a traced design that I added.  Love the texture of the ruchĂ© paper from Paper Temptress.


You can see the texture in the blue ruché paper and the dimension of the panda and the balloon.


The finished card. (not perfect - I accidentally crumpled the balloon 
AFTER I had taped it down with pop dots. :(

Not every card is as perfect as I might like......

HAPPY BIRTHDAY, KENDRA!


Pin It Now!

Wednesday, September 11, 2013

August and September Birthday Cards

And there are more!!

The burst of inspiration is still with me so I am taking FULL advantage of it.  This card was made from one of the designs from Birds Cards.  I do love her card backgrounds and it was fun to use some patterned paper again - but even though I chose an entirely different brand of patterned paper (First Edition), I still ended up with purple being the accent color.  It's surprising to me how many times I end up with a card that highlights purple.  I will try to break into a new color family with the next card! (see below - I did it!!)

This card utilizes several designs from Birds Cards: the Circle Square Frame, Flowers 2 and 6 and the stamens.  I also uses her digi stamp in the center of the card and did a print and cut with SCAL and the Silver Bullet Professional.  I took the sentiment one step further and used the FoilMaster to add purple foil to the greeting. I love the sheen of the foil - it is just so darn hard to photograph!

I think this frame has a lot of possibilities.


You can see how detailed the cut is -  even with it still on the mat!


And here is a much better example of the detail.  Look at those little triangles!!!


Love the foiled greeting.    The papers from Paper Temptress are Kunzite and Amethyst 
from the Mica line


Another card that went together easily (and kicked me out of my purple rut) was this one.  Monica's files are so detailed but I never have to worry how my Silver Bullet Professional will handle them.  This is her spring season file and I altered the separate tulip file in SCAL to make it shorter and two sizes.  The paper is my favorite line from Paper Temptress - the mica line (aka Stardream). It cuts like butter and I love the shimmer.


Another intricate cut from the Silver Bullet Professional Cutter.


I really like how this amber color pops on the red.

Pin It Now!