Sunday, April 27, 2014

Family Birthday Cards...... Part One - My Oldest Son!

This is the time of year when I really need to be looking ahead as I have three family birthdays in the span of a month.... my oldest son, my youngest granddaughter, and my daughter .  I am usually ahead of the curve, but not this year.  With my daughter and granddaughters visiting the week before Easter, it really threw off my timing, not to mention that Easter was SO late this year.

So last week I started on my granddaughter's card because let's face it - kids cards are SO much easier to do than adult cards.  And for me, female cards are TEN times easier than a card for a male. So poor Scott already had two strikes against him.  And it wasn't until I got about halfway through a card I needed for May, that the realization set in that I had not started my son's card yet and it needed to get in the mail.  Yikes! The panic was on!

He loves all things Disney (yes even at the age of 39, you don't outgrow Mickey Mouse and all of his friends), and is an avid golf player, but I felt like I had exhausted those topics in previous years!  So I looked and I looked and I looked. I went through all of my stamps, digi and rubber. I searched through my endless collection of card sketches and books with card ideas.  Nothing.  Even Pinterest failed me - so I knew I was in serious trouble at this point!  Finally after stepping away from it, I just decided that the greeting was the most important thing and keeping it simple was probably a good idea.

Before I go on to the card portion, I just have to say that I can hardly believe that 39 years have passed. I can remember the anticipation, fear, excitement, worry - all of those emotions that come tumbling in at once, as if it was yesterday.  The fear was because he was a big baby and he was losing oxygen fast, so they did an emergency c-section. I was terrified, but he was healthy and beautiful.  It was a tumultuous first month as the two grandmothers took care of him most of that time as I ended back in the hospital with an infection and it was touch and go for a while.  But we clearly had a happy ending.  There is nothing like your first born.  All of your children are special, but that first one is truly that first miracle - and there is nothing in the world like that experience.  He is all of my hopes and dreams wrapped into one wonderful person.  Thank God he has a sister and brother so all of the pressure is not on him!!  I love him dearly.

Now, onto the card....


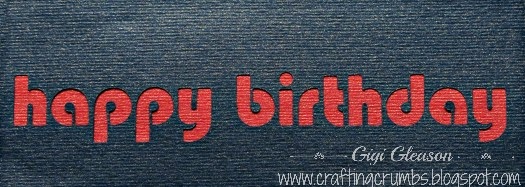
You can see the detail of the letters cut with the Silver Bullet Professonal.


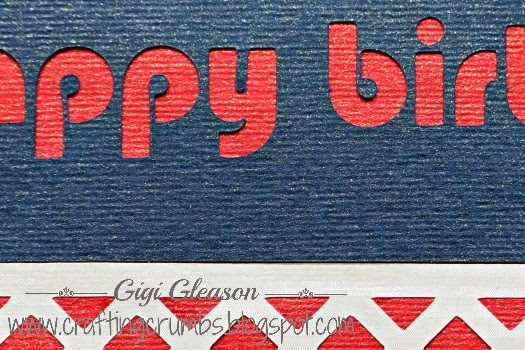
I had to do a closeup of the papers as they are so beautiful with the gold flecks running through them.  The red and blue are from the incandescent line from Paper Temptress.  
And the tone on tone white striped paper creating the lattice work is from the luster line.  
I love how these papers make everything look so special.


And here is the final product.  The file is from Birds Cards - it is her Card Cover series.  I altered it a little and added the greeting.  The buttons were made with the Epiphany Crafts Shape Punch (cuts the shape and attaches an adhesive dome to the paper shape). I have had that punch forever and realized it was time to use the tools I have!   The red and blue twine is American Crafts.

So here you have it - a very simple card, done in the colors of  his alma mater (University of Arizona). It isn't my best work, but it is full of love and I hope that is enough.


HAPPY BIRTHDAY, SCOTT!!

Pin It Now!

Thursday, April 24, 2014

Low Sugar Mixed Berry Swirled Lemon Bread

I am still working on cards, but I have one more amazingly delicious bread recipe to post first.  This was so easy and so delicious that I will definitely make it again (and soon!).  I think it would be wonderful with an apricot jam filling instead of the mixed berry too.


Low Sugar Mixed Berry Swirled Lemon Bread

(adapted from Eat Cake for Dinner)

1/4 cup oil
3/8 cup Truvia Baking Blend
1 egg
1 egg white
1 tsp. vanilla extract
1 tsp. Fiori di Sicilia (King Arthur blend of citrus and vanilla - optional)
2 tsp. grated lemon peel
3/4 cup plain Greek yogurt
1 1/2 c. flour
1  tsp. baking powder
1/2 tsp. baking soda
1/8 tsp. salt
1/3 cup mixed berry jam (used my homemade jam from an earlier post!)

Preheat the oven to 350.  Grease a loaf pan and set aside.

In a medium bowl, cream the oil and Truvia Baking Blend together.  Mix in the egg, egg white, extracts and lemon peel until well blended.  In a smaller bowl, combine the flour, baking powder, baking soda and salt.  Add the dry ingredients and Greek yogurt alternately to the oil mixture, ending with the dry ingredients.

Spread half of the batter into the prepared loaf pan.  Top with the mixed berry jam (or jam of your choice), leaving a small border around the edges.  Do not swirl the jam - it will do so naturally!  Top with the remaining batter and gently spread over the jam, covering the mixture evenly.

Bake 45-50 minutes or until a toothpick inserted in the center comes clean.  Cool in the pan for 10 minutes and then invert onto a wire rack and cool completely.

You can dust with powdered sugar or cover in a glaze, but I left it plain for this version!


You can see how beautifully that bit of jam swirls through the bread
and adds an extra layer of wonderful flavor....


Pin It Now!

Sunday, April 20, 2014

Low Sugar Banana Zucchini Decadent Bread!

So when  I decided to bake last night, I was going to make some variation of banana bread and then zucchini bread as both of those main ingredients were in the refrigerator literally SCREAMING to be used.  In a few more days they would have been permanent residents in the trash can!!!

I know - you read the title and thought - how can low sugar and decadent be on the same line.  Have I lost it?  Well that is a different blog post!  LOL   But seriously - it makes perfect sense to me because the decadent and unexpected ingredient is dark chocolate.  If you have been reading my blog recipes, you know I am in love with the King Arthur burgundy chunk chocolate pieces. They are sooooo good - the flavor is the best; they melt better than any chocolate chip or chunk I have ever used, and they add just enough richness without overwhelming the recipe.

I would never have thought to combine bananas and zucchini, but I will definitely be using this combination in other creations. The inspiration was not mine.  I found the basic recipe at Brown Eyed Baker. And the dark chocolate chunks just put it over the top.  I have made chocolate zucchini cake and banana muffins with chocolate chips - so it was natural to add in the chocolate.  It's always better with chocolate, right?  Well in this case, it definitely is!

LOW SUGAR BANANA-ZUCCHINI SURPRISE BREAD!!

INGREDIENTS:

3 cups all-purpose flour
1½ tsp. baking powder
1½ tsp. baking soda
1 tsp. ground cinnamon
1/2 tsp. Penzey's baking spice (mixture of bread friendly spices)
1 tsp. King Arthur vanilla bean crush
1 teaspoon salt
4 eggs
1 cup Truvia Baking Blend
1 cup vegetable oil
2 ripe bananas, mashed (about 1 cup)
2 cups shredded zucchini (used the large grate)
1 cup chopped dark chocolate (I used King Arthur Burgundy Chunks......SO GOOD!!)

DIRECTIONS:

Preheat the oven to 350 degrees.   Grease two 9x5-inch loaf pans and set aside.

In a medium bowl, measure the flour, baking powder, baking soda, cinnamon and salt and whisk together and set aside.

In a large bowl, whisk the eggs. Add the Truvia Baking Blend and oil and whisk until smooth and combined. Add the bananas and whisk until well blended.  Add the flour mixture and stir gently with a rubber spatula until blended. Gently fold in the zucchini and dark chocolate pieces.


Just had to capture the marriage of the zucchini and the chopped dark chocolate.
The flavors blended perfectly and fragrance was intoxicating!!


Divide the batter evenly between the two prepared loaf pans. Bake until a toothpick inserted into the center comes out clean, 50 to 60 minutes. (mine were done in 40-45 minutes, but there is less volume with the Truvia Baking Blend).  Cool on a wire rack for 10 minutes, then remove the bread from the pans and place on wire rack to cool completely before serving. Wrap in plastic wrap and enjoy every savory morsel.
Will keep about 5 days during cool weather.  Refrigerate if necessary.


This is truly as good as it looks!!  Another MUST TRY!!

Hope to be sharing some cards soon - working on a few in my head!!  Trying to get those creative juices flowing....... again!

Pin It Now!

Thursday, April 3, 2014

Jam - a gift for any occasion

Let's forget that this post was originally planned during the Christmas season.  But the concept works for any time of year, especially now if you are starting to think about all of the wonderful fresh fruits that will be beckoning you to buy them in the months ahead. I love spring and summer for that very reason - all of the glorious fruit. But if you are like me, it all looks and smells so good that you overbuy and then wonder what in the world you are going to do with ALL of that fruit before it gets too ripe to enjoy.

The answer??   Make jam!

Up until a few months ago, I had never made jam - no  - not EVER!   And I was never tempted to as it seemed like so much trouble with all of the sterilization of the jars and canning process and ugh -


The Ball Automatic Jam and Jelly Maker

Well the Ball Jam and Jelly Maker has clearly made a believer out of me -there is nothing like homemade jam and all you need is fresh fruit or good quality juice (for jelly).  Because you don't go through the canning process, the jam doesn't last forever - 3-4 weeks in the refrigerator or 6 months in the freezer. (However mine is lasting  MUCH longer than that in the refrigerator).

I know I am lucky living in southern CA because berries are in the stores just about year round. So when I was trying to think of something different to do for my neighbors this year, I quickly decided to make mixed berry jam.


How beautiful are those raspberries and blackberries?  YUM!


All crushed and ready to be made into jam.

With this special machine, it just doesn't get more gratifying.  Fresh jam in less than a half hour - love it!

Once you crush the fruit, you are ready to go. The pectin goes in the machine first and then the berries or juice (if making jelly). After a short amount of time, you add the sugar, cover it, and let it finish cooking.  I use the low sugar pectin so mine is not as sweet, but the fruit flavor is stronger.  It's a personal preference - they make a regular pectin which is used in the same quantity, but the sugar is increased. Equally easy to use.


The berries are cooking with the pectin.


Sugar has been added and the cooking finishes with the lid on.


Time to fill the jars with fruit goodness!

I had made it a few times and was pleasantly surprised at how good and easy it was!  And jam would be appreciated year round and so easy to package for any holiday or celebration.


The jam is cooling with the inner lids barely on.


Ready for the refrigerator - or delivery!


These were Christmas gifts, but they truly would make 
a welcome gift for any occasion.


Pin It Now!