Monday, December 17, 2018

Heart Cards for those Close to my Heart...

The time is flying by and I am still playing catch up. I am not even going to apologize - because that is getting old for me and for you!  I am just going to keep plugging along and sharing as best I can.

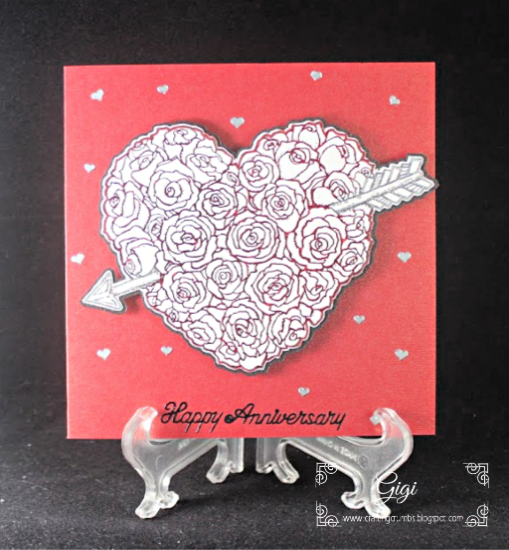
These cards were for my DEAR daughter in law  and son on their anniversary and for her birthday, about 5 days apart.   I love making cards for them because they are so appreciative of the love I put into their cards.  It's a win win for me :)

Megan's card was using a wildflower design from Crafty Vectors. Dominic has long been one of my favorite designers and I have used his floral framed designs in the past many times.  They are interspersed all over my blog! 


So for this card I cut out the design on a white card stock and then I sprinkled it with Nuvo Shimmer Powders and lightly spritzed with water to get the colors to explode. I just love the effect!


And for their anniversary card, I chose a beautiful image from Power Poppy - Follow Your Heart (I am clearly on a heart theme here!!).  I printed it on the mono laser and foiled the heart in red and silver.


I am going to try to keep these posts short so I can catch get more of these "older projects" up there to share and hopefully inspire you to be creative too!

And remember, it may be the holiday season, but it is so important to take time for yourself and do the things that make you happy and fill up your heart and soul.  xo


Pin It Now!

Monday, November 26, 2018

Dark Chocolate Raspberry Muffins - gluten free and no processed sugar!


These are so good and so moist and made even better because they have no processed sugar.  I have made these several times and they are delicious every single time.  There is nothing like the combination of raspberries and chocolate -  YUM!


Dark Chocolate Raspberry Muffins
adapted from Easy Flourless Muffins, Bars and Cookies by Amanda Drozdz

1 c. almond flour
1/2 c. unsweetened cocoa powder
2 T. ground golden flaxseed
1 1/2 t. baking powder
1/2 t. baking soda
1/4 t. salt
2 eggs, large
1/4 c. (72 g) unsweetened applesauce
1/4 c. almond butter (I like the Bare brand with no additives)
6 T. raw honey
1 T. vanilla extract (if you have Mexican vanilla, it enhances the flavor of the chocolate)
1 c. raspberries, fresh if you have them, but frozen works as well
1/2 c. dark chocolate chips or dark chocolate, chopped

Preheat the oven to 350 and line a muffin pan with parchment liners.  Set aside.

Mix the almond flour, cocoa powder, ground flaxseed, baking powder, baking soda and salt in a blender and pulse a few times until all of the ingredients are mixed well.

Pour this mixture into a medium bowl and add all of the remaining ingredients except the chocolate and raspberries.  Blend with a hand mixer on medium speed for about 39 seconds or until creamy and smooth.  Scrape the bowl with a rubber spatula to be sure all of the ingredients are well blended.

Fold in the raspberries and chopped chocolate or chocolate chips just until mixed.  Using an ice cream scoop, fill the lined muffin cups with one scoop of batter. They should be about 3/4 full each.


Bake for 24-26 minutes or until a toothpick inserted in the center comes clean.  Let the muffins cook in the pan for 10 minutes, and the place on a wire rack to finish cooling completely.


Pin It Now!

Saturday, November 10, 2018

Up, Up and Away -


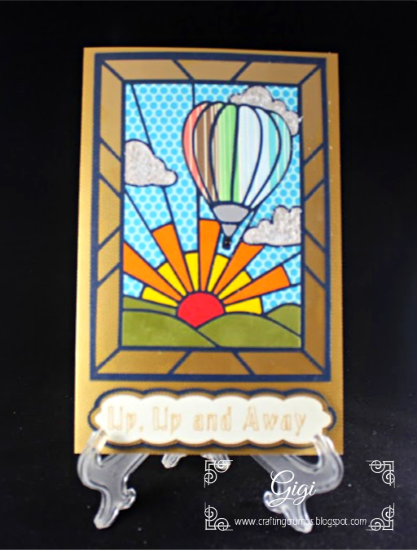
My neighbor celebrated his 65 birthday in quite a memorable way. One of his sons is training to become a commercial pilot up in Alaska, and he flew down for the day to take his Dad (and each member of the family) up in his plane for a short flight over the city.  What fun it was for all of them and what a great way to celebrate a landmark birthday!

I love this stained glass image.    The pattern was traced and cut with the Silver Bullet Platinum.  With the new two tool capability, I was able to "write" the greeting and cut out the label around it without having to change anything. What used to be a painstaking task to switch out the pen for the cutting blade all while trying not to move the image, became effortless with the two tools in place at the same time.  And it was quick too - I loved it and plan to do a lot more!


Acetate was used around the picture to add to the look of stained glass.
It was fun to pick out a variety of papers to fill in the sections of the 
hot air balloon picture and give it interest (and it was a great way to use up
some of those accumulated paper scraps!!)
I added white sparkle Flower Soft to the vellum clouds to give them
added interest and texture.  This was a really fun card to make
and it was totally appreciated by the recipient!


Pin It Now!

Monday, November 5, 2018

More Cards for Difficult Times....

It's been one of those difficult periods of time when it seems that too many wonderful people in my life are passing away.  I am grateful that I have the faith to believe that they are now in a better place, but I still with that those who loved them most could have more time with them. I suppose that is the very human side of grief and loss, right?

So these two cards were to remember a very loved and loving wife who brightened the community of Oceanside, and a very dear and loving husband of a special cousin who passed so suddenly and unexpectedly.  Nothing makes the loss easier I am convinced, no matter what the circumstances.


I kept both of these cards very simple with just a little embellishment.
It's no secret that I love using flowers when making cards, 
especially when I need them to make a statement.  
These images were artfully created by Dominic  
and are beautiful in their simplicity..


I hope these cards brought comfort and love to those left behind......... Pin It Now!

Thursday, October 25, 2018

Zucchini Chocolate Chip Muffins - gluten free and delicious for all!

I am still totally committed to the idea that anything with fruit or a veggie in it can be called healthy - or at least "healthier"!  These zucchini muffins have added "good for you" qualities because they incorporate oat flour, honey (no refined sugar), and pure almond butter.  And the chocolate used is dark chocolate so even that is good!  with the dark chocolate and honey, they are just sweet enough and are also wonderfully moist.  You will want to make these again... and again....


ZUCCHINI CHOCOLATE CHIP MUFFINS

adapted from Easy Flourless Muffins, Bars and Cookies

1 1/2 c. rolled oats
3 T. ground golden flaxseed
2 t. baking powder
1 t. baking soda
1/4 t.salt
3 large eggs, room temperature
1/4 c. whole milk
6 T. almond butter  (I like the BARE brand)
6 T. raw clover honey
1 T. Mexican vanilla extract (Mexican vanilla highlights the chocolate)
1 c. shredded zucchini (squeezed in paper towels to remove excess moisture)
1/2-3/4 c. dark chocolate chips or mini chocolate chips or a combination


Preheat oven to 350.  Line a muffin pan with parchment liners and set aside.

In a high speed blender, place the oats, flaxseed, baking powder, baking soda and salt.  Blend on high for about 20 second or until the oats are broken down into a flour.

In a separate bowl, mix all of the remaining ingredients except the zucchini and chocolate chips.  Add the blended flour ingredients and mix again just until blended - about 20 seconds on the medium speed of a mixer.  Fold in the zucchini and chocolate chips with a spatula.

Using an ice cream scoop, fill each lined muffin cup with the batter (the ice cream scoop gives the perfect amount for 12 muffins).  They should be about 3/4 full.


Bake for 15-18 minutes or until a toothpick inserted in the center of the muffin comes clean.  Remove from the oven and let sit in the tin for 10 minutes. Then remove from the tin and finish cooling on a wire rack.


These keep very well and also freeze well, if they last that long!


Pin It Now!

Sunday, October 21, 2018

A Trio of Birthday Cards - Power Poppy inspired!


I seem to be totally hooked on Power Poppy images of late.  These three cards are all thanks to the artistic talent of Marcella Hawley who is the genius behind Power Poppy.  I think I have every one of her images and I am eager to enjoy all of them in time!  These three images were all print and cuts using the SCAL Pro 5 software and the Silver Bullet Platinum that features an awesome camera for doing print and cuts.  It makes what used to be a tedious endeavor a quick and fun project with instant results!

The first card spotlights the "Wildflower Mini" image.  I used Spectrum Noir alcohol markers to color this cute image.  It went to one of my very special friends (I am so blessed to have such amazing and wonderful friends in my life).


The background image is "Branching Out" clear toner sheets
from Deco Foil.  The stamped greeting is from Pretty Pink Posh.
Sequins from 28 Lilac Lane accent the background. And
the jar is covered with Glossy Accents to give it that "wet" look.


The second birthday card features Power Poppy's "Tea Cake with Strawberries" image.  I printed it on watercolor paper and used the Spectrum Noir aqua markers and FineTec watercolors to add color.  I am such a novice at this but I try to improve with each card....


A real paper doily accents this luscious looking cake pedestal.
The greeting is a Gina K Foil Mate and cut with one of her dies and foiled.
The image is embellished with Spectrum Noir shimmer pens and 
a black glitter gel pen.  The berries are coated with
Nuvo Clear Gloss.  The sequins are from 28 Lilac Lane.


And the last card uses Spectrum Noir colour blend pencils to highlight the image of "Irresistible Peonies".  This was for a very special friend who helped me when I first moved back to CA from Arizona and spent a lot of time with me after I lost my father back in 2004.  She was a special angel in my life then, and remains one now.  I love her dearly and am forever grateful for all she did for me.


The background paper is from First Edition and the card base is
Paper Temptress Leather.  The greeting is printed on Brother Label Tape
and the card is adorned with sequins from 28 Lilac Lane.  


Pin It Now!

Saturday, October 13, 2018

Cards for Difficult Times


These two cards were meant to bring some love and care to the lives of two very special people.  One friend was facing a cancer diagnosis (caught early but still life changing in so many ways) and another had just lost her older daughter - totally unexpected. 


This "thinking of you" card was for my friend courageously fighting cancer.  She is doing well and we are all so grateful.  The beautiful flower is a digi image from Power Poppy called Dahlia.  I love how easy it was to foil it and it looks so beautiful with just a few extra touches.


The background is a Deco Foil clear transfer sheet foiled with glitter green foil 
and is held in place with simple rhinestones that hide the glue!  
I think it makes such a lovely card and so 
versatile for any number of occasions.


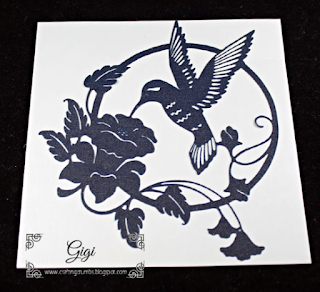
I love using the hummingbird and flower for special remembrance cards because it is so beautiful.  


I wish I could remember where I got this beautiful svg file, 
but I have used it many times.  It is one of my favorites 
because it is so detailed and elegant.  
It is cut out of Paper Temptress incandescent.   
I added sequins from 28 Lilac Lane and stamped a greeting
from Paper Smooches for the finishing touches.

Pin It Now!

Thursday, October 4, 2018

Baby Cards - Celebrating a girl and a boy!


I love making baby cards and I don't get to do them often. So what fun to actually have one of each to create in the same month.  I had a great time trying to make them as special as I could.

The baby girl card was for the precious little granddaughter of my neignbors who have become such dear friends and welcomed me into their family. How lucky am I?  This is their second grandchild and first girl. Their first is her brother, Merritt, who I have spoken of here and who I love almost as much as my own grandson.  He has stolen my heart and so has his precious sister. They came over here when she was only a week old and I got to hold her while Mom and Dad took a break.  Good thing the grandparents were gone for the evening or I would not have had that much time with her!  It was so special.  I am not sure what it is about holding a baby, but it is truly the most wonderful feeling in the world.  I am so grateful to have been able to share in their joy and their lives.

 The cutting file for this card is from Birds Cards.  Her designs are detailed and cut beautifully.  I use the Silver Bullet Platinum to easily cut the detail out of card stock from the Paper Temptress White Diamond and Pop Tones.  The background paper is from Echo Park (I hit my neglected stash box!) and I love how it all came together.


Tried to capture the dimension of this card. The greeting and the 
baby buggy are sitting atop foam squares.  I used some adhesive lace to
border the buggy and make it more feminine.  I really love it!

I was in a bit of a rush to make the card for the baby boy so I only  have one photo - but it captures the spirit of celebration.  This is for someone special who serves on the board of Oceanside Boys & Girls Club with me and he runs a local Buffalo Wings.  He and his wife are expecting their first child, a precious little boy. We are all so very excited for them.

The design is from two separate designs from Miss Kate's Cuttables and her designs never disappoint.  The papers are from Paper Temptress and the patterned background is from my stash. :) (can you tell I am trying to utilize what I have??   Making a concerted effort...)


Pin It Now!

Monday, September 24, 2018

Cuppa Buttercups - Power Poppy


I am not even going to make excuses for not posting in a while because it won't change anything.  But rest assured I have been making a LOT of cards and doing a little baking and with fall around the corner the baking and cooking will increase.  I am so ready for fall!   So I am pushing myself to get back on track.  :) And I have some fun things to share that you will hopefully enjoy. So stay tuned!

I have been working hard this summer to try new things and get out of my comfort zone. I continue to work on my "coloring" -whether it be markers, pencils or watercolor - I want to enjoy it more and worry about how perfect it isn't less!  I plan to carve out more time to practice.

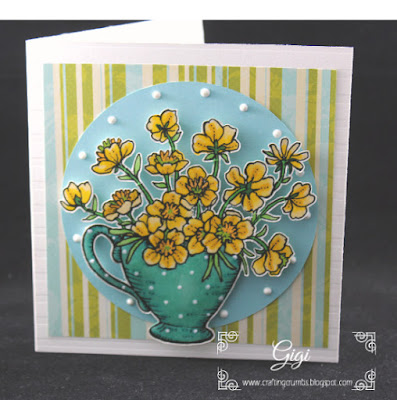
I love this buttercup design from Power Poppy. This was a digi image that I  printed on Paper Temptress cryogen card stock that has a lovely sparkle and handles markers so well.

This actually started as a challenge for Power Poppy - to use circles in the design. But I finished it way after the challenge was over. No surprise there!   I am  however glad I did it because it helped me think more creatively and I want to challenge myself more.  I like how easy it was to make the simple coloring have a dotted pattern, and then the glossy accents gave it a nice shimmer.


This shows the dimension created with foam tape and the great cutting job performed
by the Silver Bullet Platinum.

Glittered markers were used to add sparkle to the center of the flowers.  And the sequins added that final touch of interest.  

I love the final result and hope my friend did too!


Pin It Now!

Saturday, September 1, 2018

Lemon Blueberry Overnight Breakfast Cake

I was a little hesitant to try this recipe because I was not at all sure this would bake up well - but it was a nice surprise.  I love that I could get it all ready the night before and simply place it in the oven in the morning and have a delicious breakfast treat.  I liked it best served warm out of the oven and it reheats beautifully.  I hope you try it and enjoy it as much as I did.


LEMON BLUEBERRY OVERNIGHT BREAKFAST CAKE

adapted from The Kitchen Magpie

2 1/2 c. flour or white/whole wheat flour
1 1/2 t. baking powder
1/2 t. baking soda
3/4 c. organic cane sugar
1/4 t. salt
2 eggs, room temp and well beaten
1 c. buttermilk
1/2 c. lemon juice, freshly squeezed
zest of 1 lemon
1/2 c. melted butter
1 t. vanilla bean paste or vanilla extract
1/2 t. Fiori Di Sicilia (optional - from King Arthur flour - adds an added citrus flavor layer)
2 c. blueberries

Grease a 9x13" baking pan and set aside.
In a medium mixing bowl, whisk together the flour, baking powder, baking soda,sugar and salt.
Add in the beaten eggs, buttermilk, lemon juice, lemon zest, butter,vanilla paste or extract and the citrus extract (optional).  Beat with a mixer until blended.
Gently fold in the blueberries with a rubber spatula.
.
Spoon the dough into the prepared baking pan. Cover with plastic wrap and refrigerate overnight.
In the morning, remove the pan and place on the counter while the oven is warming. 
Preheat the oven to 350 °F.  Bake for 25-35 minutes, or until a toothpick inserted in the center comes out clean. 
Remove and serve while warm!  (it is good cold, but it is exceptionally good warm!)  


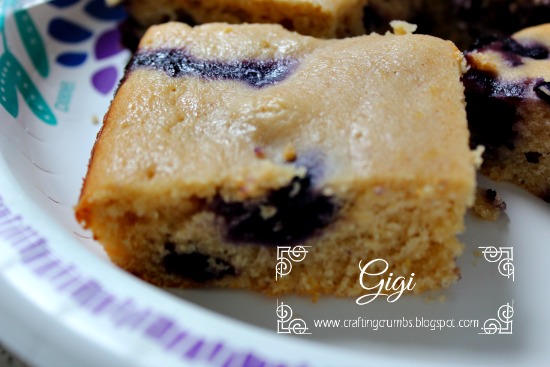
Just look at those blueberries bursting with flavor - don't they make your mouth water??

Pin It Now!

Monday, August 6, 2018

Cream Cheese Puff Pastry Danish with Berries and Lemon Glaze


OMG - these are so delicious and a treat for a special occasion or just because you want to spoil yourself or someone else!    I made these a couple of months ago and totally forgot to post the details. Shame on me.  These are just TOO GOOD to keep to not share and be sure everyone has the chance to try them.  I have not used puff pastry often and was a not sure how difficult it would be to make these shapes, but it was not difficult at all.  And the puff pastry is very forgiving which makes it easier to  cast any fears aside and go for it!!

I hope you will try these soon - I promise you will NOT be disappointed.


CREAM CHEESE DANISH WITH BERRIES AND LEMON GLAZE

adapted from Natasha's Kitchen

Danish Ingredients
1 pkg (2 sheets) puff pastry, thawed
8 oz. cream cheese, room temperature (I used Greek Yogurt Cream Cheese - perfect!)
1/4 c. organic cane sugar
1 egg yolk, room temperature
1/2 t. vanilla bean paste (vanilla extract is fine as well)
1 t. lemon zest
1 1/2 c. mixed berries (raspberries, blueberries, blackberries and/or strawberries)

Egg Wash Ingredients
1 egg
1 T. water

Lemon Glaze Ingredients
1/2 c. powdered sugar
1 t. lemon zest
1 T. fresh lemon juice


Thaw puff pastry according to package directions.  Depending on the temperature of your kitchen it should take about 30-40 minutes.  You want the dough to still be cold.Preheat the oven to 400 degrees with a rack in the center of the oven.  Line a half sheet baking pan (my favorite size for many things!) with a parchment sheet and set aside.

Unfold the first puff pastry sheet onto a clean work surface (I use either parchment paper or waxed paper underneath - either works great) and roll lightly into a 10"x10" square.  Use a pizza cutter to slice each sheet into 12 even strips. (NOTE:  If you are not great at cutting straight even strips, like me, you can mart the strips on either end every 2 cm.  the 10" is just a little over 24 cm so it's practically perfect!  This added step made it super easy for me.)


Combine two of the strips by pinching the ends together to make one long 24" strand.  Twist it gently so you have a loose spiral curl.  Press one end onto your work surface and loop the twisted strand around in a circle. (I was really afraid that these has to be perfect, but they don't. They will bake up beautifully and hide any imperfections!)  Press the remaining end underneath.  Gently press the center to depress it and make it ready for the filling, and prick the center with a fork 3-4 times to keep it from rising.  Transfer to the parchment.  Continue this for the remaining strips. You will have 24 beautiful spiral circles! (Note:  The original recipe has you fill each with cream cheese and berries and then transfer tot he baking sheet.  I found it easier to fill once they were on the sheet, but you do what works for you!  I love options.)
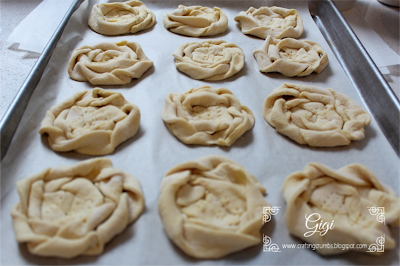

In a medium bowl, mix the softened cream cheese, 1/4 c. sugar, egg yolk, vanilla and 1 t. lemon zest. Beat on medium speed until smooth and creamy (and fight the temptation not to eat the bowl of lusciousness!)


I used a 1 T. cookie scoop to fill the center of each pastry. It was the perfect amount and there were no leftovers in the cream cheese bowl (darn!)   Then I placed raspberries, blueberries and one blackberry into the cream cheese.  As I did this I had visions of the cream cheese oozing out from the danish and becoming a runny mess in the oven - but my fears were NOT realized.


Make the egg wash, by whisking the egg and tablespoon of water.  Brush over the pastry part of the danish for added golden browning.  It makes them look beautiful.

Bake at 400 degrees for 18-20 minutes.

While the pastries are baking, blend the glaze ingredients.  I used less powdered sugar so my glaze was not as white and didn't show on the danish when I drizzled it - but the taste was awesome.  Be generous with the glaze. That lemon freshness takes them over the top!!

 Let them cool completely to room temperature so the cream cheese can completely set.  Then drizzle with the lemon glaze and serve.

These are SO good and worth every effort. And once you make them once, you will want to add them to the breakfast menu for any occasion - especially if you just want to indulge a little!


Pin It Now!

Sunday, July 15, 2018

No Churn Blueberry Crumble Ice Cream

It has been unseasonably warm here in Oceanside, even on the coast.  But I am happy to say that after a 2 1/2 year fight with the HOA here, I finally have air conditioning!  I will just say that the last week has been much more bearable with cool air blowing through the condo.  I am so very grateful...phew!  It was worth the struggle to finally be able to live comfortably when the temperature rises here.

Another thing that makes life more bearable when the sun is blazing is ice cream.  Yes - a year round treat for sure - and although it can be an indulgent sweet, it becomes a bit of a necessity in the summer.  Right?  And this no churn method that I turn to often, keeps the electricity off and produces the most delicious, creamy spoon licking dessert in no time at all!


NO CHURN BLUEBERRY CRUMBLE ICE CREAM

adapted from Sally's Baking Addiction

Ice Cream Base:

2 c. heavy cream
1 - 14 oz can sweetened condensed milk (full fat)
1 1/2 t. vanilla bean paste


Blueberry Sauce:

1/2 t. cornstarch (I use arrowroot starch)
2 t. water
1 1/2 c. fresh blueberries (if using frozen, do not thaw)
1 T. organic cane sugar


Crumble "Topping":

1/4 c. flour
2 T. packed brown sugar (light or dark)
1/4 t. cinnamon
2 T. unsalted butter, melted

To Make the Blueberry Sauce:

Mix the arrowroot starch (or cornstarch), and water together in a very small bowl. I like to use a custard cup.  Set aside.
Combine blueberries and sugar together and heat in a small saucepan over medium low heat.
Stir constantly and break up the blueberries as they heat up and start to burst.  When the blueberries have released some liquid (when you gently smash them with the spoon), add the cornstarch/water mixture. Increase the heat to medium and stir well for about 3 minutes.  Remove from the heat and let the blueberries cool completely.  The mixture will thicken as it cools. (Putting it in the refrigerator will help it cool down quicker).
Before or after cooling, the mixture can be placed in a strainer so you just have the blueberry gel.  I left it as is because I like the blueberry pieces!

To Make the Crumble:

Mix the flour, brown sugar and cinnamon together with a fork.  Add the melted butter and mix again until a small clumps form.

To Make the Ice Cream:

In a small bowl, combine the sweetened condensed milk and vanilla bean paste. Set aside.

In a medium-large bowl, beat the heavy cream on medium high speed with a stand or hand mixer until stiff peaks form, about 3-4 minutes.  Add the sweetened condensed mixture and beat on low until just combined, or fold gently together until well mixed.


I know......... YUMMMMM

Spoon about half the ice cream into a freezer container.  (I use the Tevolo tub).  Spoon about 1/4 c. blueberry sauce and half of the crumble mixture and gently swirl into the ice cream with a knife a few times.  Repeat with the remaining ice cream, 1/4 c. sauce and remaining crumble making another layer of swirls (don't insert the knife all the way down - just swirl the top layer).  Freeze until firm. at least 5-6 hours.

Save the remaining blueberry sauce to serve over the ice cream.

This is so good and you can make change it completely by utilizing a different fruit (strawberry swirl ice cream to come!)


This is SOOOOO good!

Pin It Now!

Wednesday, July 11, 2018

Losing a Second Mom...... Card...

Several weeks ago a dear lady left this earth and the world is not quite as bright as it was.  She was like a second Mom to me when I was growing up, and I adored her.  Her family and mine lived on the same block and I think I spent as much time at her home as I did at my own!  Her oldest child was my best friend from the time we were 3 years old.  All of these years later, she is still one of my dearest friends.  How lucky and blessed am I?


My girlfriend should have been my mother's daughter.  My Mom loved that she was so career oriented and a real entrepreneur.  My mom started a children's clothing store pretty much on her own in the 1940s downtown here - and it was unheard of then for a woman to have her own business, let alone have it become successful!

My girlfriend's mother was a teacher before her children were born, and then stayed home with them as her family grew.  She was a homemaker in every sense which I loved as well in later years. She spent hours knitting and doing needlework, especially needlepoint, which was also one of my favorite things to do.  She was an inspiration to me and I loved her dearly.

Sympathy cards are not anything I enjoy making, but this one was especially different.  I used a 3D embossing folder from Crafter's Companion coupled with a beautiful digi image from Graciellie Designs.I wanted something simple and elegant and I think I achieved that.


Here is a closeup of the beautiful digi image from Graciellie Designs.
                        I printed it on a laser printer, cut it out with the Silver Bullet Platinum 
and then foiled it with sparkling silver.
You can see how that foil reflects the light beautifully.


I used Nuvo embossing paste to highlight the dimension  
from the embossing folder and added small white pearls.

Again, I am painfully reminded to take time to tell my family and friends how special they are to me and to cherish every moment of every day.  Life is an amazing gift, but it has an expiration.

Pin It Now!

Thursday, June 14, 2018

Thank You Card for Special Neighbors


I really do love the condo development where I have settled. Being across the street from the beach certainly has its perks and that is amazing. But in addition to being surrounded by the beauty of God's creations, I have also met some of the nicest people ever.  This development is a mix of owners who live her full time and people who come for varying lengths of time to get away, a month at a time. Many of the people who visit come year after year, so even tho they are only here for a month or so, friendships are formed.  It is really pretty wonderful.

One of my part time neighbors are also owners, but they rent their condo about half of the year and when its not rented they come and stay a few weeks at a time.  They are a great couple who hope to retire in about five years and live here full time.  He is the cook in the family and is always appearing at my door with a new creation to share.  He and his wife are so thoughtful. The last time they were here, they brought be a beautiful orchid plant.  So I made them a special thank you card that was decorated with a lovely orchid designed by Marcella at Power Poppy!

I am still working on my coloring skills with pencils, markers and watercolors, but am determined to color more and accept the imperfections in my work as I learn.  That's a big step for me! Pin It Now!
Wednesday, June 6, 2018

Chocolate Crinkle Sprinkle Cookes


These cookies were made as a special treat for my grandson, Carter.  When it was my oldest son Scott's birthday, we met for dinner at a fabulous Mexican restaurant in San Clemente which was about half way for each of us. And I just didn't see how I could show up empty handed, so after dinner we made a trip to the car to get the surprise for Carter!!  He was SO happy!  Scott didn't quite understand why HIS son got the special present, but he felt better when Carter shared!! :)


CHOCOLATE CRINKLE SPRINKLE COOKIES
adapted from Brown Eyed Baker

1 c. (142 g) flour
1 t. baking powder
1/2 t. salt
1/2 c. (42 g) unsweetened cocoa powder
3/4 c. organic cane sugar
1/3 c. vegetable oil (I prefer to use Spectrum canola and coconut blend)
2 eggs
1 t. vanilla extract (I like to use Mexican vanilla in chocolate recipes)
1/2 c. rainbow sprinkles (or more depending on how generous you are with the sprinkles!!)

In a small bowl, whisk the flour, baking powder and salt together.  Set aside.

Beat together the sugar, cocoa and oil until thoroughly blended with an electric mixer.  Add the eggs, one at a time, and beat thoroughly.  Beat in the vanilla.  Reduce the mixer speed to low and add the flour a little at a time, just mixing until combined.  Stir well with a rubber spatula to be sure all of the flour is incorporated.  Cover the bowl with plastic wrap and refrigerate for at least 4 hours or overnight.

Preheat the oven to 350.  Line two cookie sheets with parchment and place the sprinkles in a small shallow bowl.

Shape the dough into one inch balls.  Roll each ball in sprinkles and place on prepared sheets, about 2 inches apart. Gently press down on the cookie before baking.

Bake one sheet at a time for 10-12 minutes or until the cookies have spread a little and appear set.  They will remain soft and chewy in the center. Do not overbake.


Let the cookies cool completely on the baking sheet before removing them to a wire rack.  They will keep up to one week in an airtight container.


These were a huge hit with my grandson!!  Score two points for Grammy! :)  Definitely fun to make as well and you could use a variety of colored sprinkles to fit any occasion imaginable!


Pin It Now!