Wednesday, July 31, 2013

Low Sugar Blueberry Muffins

I am so loving baking this summer with all of the fresh fruit available while trying to make it a little healthier!  I am happily surprised that compromising fat and sugar does not necessarily make for a yucky tasting disaster! In fact, these muffins proved to be some of the most delicious and moist that I have made recently.

I think you will agree when you try them too!!

Simple and readily available ingredients!


They may look a little funny,  but looks are deceiving! These are DELICIOUS!!!


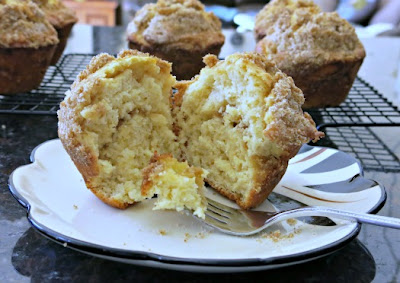
Good til the last bite!!!  Look at those blueberries bursting with flavor!!


EVERYDAY BLUEBERRY MUFFINS

adapted from Eat  What you Love by Marlene Koch

1 cup nonfat vanilla bean greek yogurt (Trader Joe's) or honey vanilla greek yogurt
1/3 cup orange pineapple juice  (orange is fine - use light for fewer calories and less sugar)
1 large egg
4 Tbsp. butter, melted
1 1/2 tsp. vanilla extract
2 cups all purpose flour
1/4 cup Truvia baking blend (or 1/2 cup Splenda or Truvia)
1 Tbsp. baking powder
1/2 tsp. baking soda
1 cup fresh blueberries

Preheat oven to 425.  Lightly spray a muffin tin (12 cups) with nonstick baking spray and set aside.

In a medium bowl, blend yogurt, juice, egg, melted butter and vanilla extract well. Set aside.

In a large bowl, mix together flour, Truvia baking blend, baking powder and baking soda with a whisk.  Add the blueberries and stir lightly to coat with flour (that will help distribute them through the batter and keep them from all sinking to the bottom!).  Make a well in the center of the dry ingredients and pour in the wet ingredients.  Blend with a large spoon just until the dry ingredients are incorporated and moist.

Spoon the batter into the prepared muffin tin, filling each about 2/3 full.

Bake for 5 min at 425, then reduce the oven temperature to 375 and continue baking about 8-10 minutes.

Cool for 5 minutes before removing to a wire rack to finish cooling.
Pin It Now!

Wednesday, July 24, 2013

Peach Melba Croissant Puff

OMG!!! I made this several months ago with blueberries as suggested on this blog.  It was fabulous then, but I think it is even more scrumptious now!

It has been a wonderful summer for fresh fruits and the peaches have been as sweet as I ever remember.  I was looking in the fridge for some inspiration and saw the peaches and raspberries and that was it -the perfect combination.

PEACH MELBA CROISSANT PUFF

adapted from "The Girl Who Ate Everything"

INGREDIENTS:

3 large croissants or 18-20 mini croissants, cut up (5-5 1/2 cups).  I use Authentic Gourmet croissants.
3/4 cup chopped peaches, peeled (about 1 medium peach)
1/2 cup fresh raspberries
1 - 8 oz. pkg. cream cheese (I used low fat)
2/3 c. sugar
2 eggs
1 tsp. almond extract
1 c. milk

DIRECTIONS:

Preheat oven to 350. 

Place the cut up croissants in a 9" square pan.  Distribute the chopped peaches and raspberries over the croissants..

In a medium bowl, beat the cream cheese, eggs, sugar and almond extract until well blended.  Add the milk gradually, beating well after each addition.  Pour evenly over the croissant mixture and let stand for 20 minutes.  Sprinkle with cinnamon -sugar. (optional)

Bake at 350 for 35-40 minute or until the center is set and and golden brown, and a knife inserted in the center comes clean.  

Serve warm sprinkled with powdered sugar!

(This can easily be doubled and baked in a 9x13" pan.)


This reheats well the next day too - if it lasts that long!!!


Pin It Now!

Friday, July 19, 2013

Another Lacé Birthday Card

I am so loving these lacé patterns from Penny Duncan Creations.  I think it's the end result that pushes me through the folding process.  I love the surprise color element and the possibilities are endless. I have been using the sorbet duo from Paper Temptress, but realized I have lots of papers that are monotone - solid on one side and textured on the other and they would make beautiful cards too. Of course I could glue thinner papers or card stock together to make my own double sided papers as well, but will work on the stash that I have for now.  :)  The base of the card is from the Pop Tone line with Paper Temptress. Yes I love her papers!  And the Silver Bullet Professional did its usual great job. Since this file is so intricate, I think the next time I cut it, I will use the detail blade!


This pattern is Penny's cutline half moon file.  Instead of scoring it this time, I took a little ruler and folded against it to get smooth folded edges and that worked well.  It seemed easier and a little quicker that way.


This file cut well and with the duo sided paper, the rest was easy!


The flower in the center is from my supply of 3D precut papers.  I continue to try to use up what I have which should keep me going for a LONG time!  I embellished the flower with yellow Stickles in the center and Kaiser pearls on the corners.


You can see the "fold and tuck" technique here and a closeup of the Stickles!


I love these files! Thank you , Penny!

Pin It Now!

Tuesday, July 16, 2013

Chocolate Zucchini Bread - LOW CALORIE!

OH MY GOSH!!! This may be my new favorite recipe for zucchini.  It was SO easy and so good.  If you have a surplus of zucchini adorning your garden, or even if you have to go to the store or the Farmer's Market to get some, it is SO worth it!  Trust me - you just HAVE to make this!


Can you see how moist this is??

CHOCOLATE ZUCCHINI BREAD

adapted from Eat More of What You Love by Marlene Koch

1/4 cup canola oil
1/8 cup Splenda brown sugar blend*
1/3 cup Truvia Baking Blend **
1 large egg
1 large egg white
1/2 cup unsweetened applesauce (I use the little individual serving cups - perfect!)
1 tsp. vanilla extract
1 1/2 cups grated zucchini
1 1/2 cups flour
2-3 teaspoons orange zest
1/2 cup cocoa powder
1 tsp. baking powder
3/4 tsp. baking soda

*Splenda brown sugar blend can be replaced with 1/4 cup regular brown sugar
**Truvia Baking Blend can be replaced with 2/3 cup Splenda OR 2/3 cup sugar

Preheat the oven to 350.  Spray a loaf pan  (9x5") with nonstick baking spray.

In a medium bowl, blend the oil, brown sugar blend, Truvia baking blend, eggs, applesauce and vanilla and whisk it well.  Add the grated zucchini and stir until well combined.

In another medium bowl, mix the flour, cocoa powder, baking powder, baking soda and orange zest.  Make a well in the center and add the zucchini mixture.  Stir just until the dry ingredients are moistened.  Pour mixture into the prepared pan..


You can see the richness in the batter, along with the zucchini!


Bake for 50-55 minutes or until a toothpick inserted into the center comes out clean.  Cool in the pan on a wire rack  for 15 minutes and then remove from pan to finish cooling. When it is completely cool, dust with powdered sugar.


All ready adorned with powdered sugar!


Sliced and ready to serve....and eat!! 
You will not believe this is low calorie but IT IS!!


This would be great with a scoop of  ice cream on top for an added treat (although that kind of ruins the low calorie part!!)  If it's too tempting, put it in the freezer sliced and take out a slice when you are ready for a treat.  Eating it frozen is almost like eating an ice cream cake without the ice cream.  YUM!
Pin It Now!

Monday, July 15, 2013

Zucchini Abounds - Lemon Zucchini Bread and Italian Crescent Pie!!

My garden is bursting forth with zucchini. I just pulled these two giants off the vine and more are coming (and the acorn squash is taking over my herb bed - wow!!)


These were large - like almost a ruler length large!!  WOW!


First on the list was Lemon Zucchini Bread from "Eat Cake for Dinner"! (love the title of that blog!)

I really didn't alter the recipe so you can click on her blog above to get it.  I DID peel the zucchini so it is really well hidden in the bread and it came out quite moist.


Fresh out of the oven~


Adorned with lemon glaze


SO moist and SO good.... you can see the texture of the zest and zucchini!
And with the peeled zucchini it is incognito!! LOL


The  Zucchini Pie is one that I have had for decades and I used a lot of fresh herbs in it tonight which I think made it the best ever. This has always been a family treat and company pleaser.

ITALIAN ZUCCHINI CRESCENT PIE


4 cups thinly slices, unpeeled zucchini
1 cup coarsely chopped onion
1/4 cup butter
2 eggs, well beaten
1/2 cup fresh parsley, chopped
1-2 Tbsp. fresh oregano, chopped
1-2  Tbsp. fresh basil, chopped
1/8 cup fresh chives, chopped
1/2 tsp. ground pepper
1/4 tsp. garlic powder
1-2 cups shredded mozzarella
8 oz. can crescent rolls
1 Tbsp. dijon mustard
parmesan cheese, optional

Heat oven to 375.  In a large skillet, cook zucchini and onion in butter till tender, about 10 minutes.  Stir in all of the fresh herbs and seasonings.


Zucchini sauteed with the FRESH herbs added - YUM!


 In a large bowl, mix the beaten eggs with 1 cup of the shredded cheese. Stir in vegetable mixture.

Take the crescent roll dough and separate it into 8 triangles.  Place them in an ungreased pie pan or quiche dish.

As you can see, you don't have to do this perfectly 
(not even sure what that would look like!!)


Press the dough evenly over the bottom and up the sides to form a crust. Spread the dijon mustard over the bottom of the crust.

It looks MUCH prettier when you pat it all down!


Pour the vegetable mixture evenly into the crust.  If desired, sprinkle the remaining mozzarella cheese and 1-2 Tbsps. parmesan cheese (if desired)  and bake for 18-20 minutes or until a knife inserted in the center comes out clean.


Headed for the oven with all of that cheesy goodness...


Cool for 10 minutes before serving.

Hot and beautifully golden


An easy way to eat those veggies, enrobed in cheese!


A closeup of all of that flavor - you just HAVE to try it!


Pin It Now!

Saturday, July 13, 2013

Lacé Birthday Card

I am still on a Dutch paper crafting kick. There is SO much I want to do and not enough hours in the day...

I have two friends with birthdays on the same day next week.  So I am trying to get a head start on the cards.  Again my inspiration came from files from Penny Duncan Creations.  This woman is so darned creative and I am so lucky to also call her a friend, so it's double fun when I borrow some of her talent to help me design a card!

Lacé (pronounced law-say) originated in Europe (they come up with so many cool things) and is also called "cut 'n fold" here in the US.  Whichever way you say it - it is so much fun I started doing this decades ago when there were no cutting machines, only metal templates, and you had to cut each angle with an exacto knife.  I cannot believe I had that much patience then, because I don't think I have it anymore!  I must have used it all up back then!  LOL  This process is SO much easier with a cutting machine, especially with the Silver Bullet Professional .  I used the double sided Sorbet Duo from Paper Temptress, so it was super easy to create the fun effect of the double colors -  the paper already determined the colors for me!!


Here are the basic lacé cuts - and you can see where I started to do the folding
on the far right.  It is easier if you score at the fold edge to get a tighter fold. 
I did the scoring by hand.


One edge all folded. Love the surprise pop of color you get from the duo paper!


I kept the center of the card front simple just using Penny's diamond shaplie. (Yes any diamond shape would work but I had her files open and wasn't sure what I was going to do until I started playing around!)


Just two simple diamond shapes with the larger center one on pop dots for added dimension.
The flower is from Prima - I just switched out the pearl for a hot pink rhinestone!

And here are all of the pieces put together..  I backed the 5x7" design with the solid color sorbet
and then put it all on the cryogen white for the card base and to pull the white all together.

I love how this turned out. Thanks Penny for a FUN file! Cannot wait to do more!


Pin It Now!

Thursday, July 11, 2013

A Neighborly Birthday Card!!

My taste-testing, recipe critic neighbor is having a birthday so she needed a special card.  I turned to files from Penny Duncan Creations this time for inspiration and my idea bank was quickly on overload.  I had a vague idea what I wanted to do, but it changed during the process as most of my cards do!!

And then of course, by the time I settled on the idea, I jumped headfirst into it at warp speed and totally forgot to take photos along the way. So you will just have to pretend that there are progress pics!!

I love all kinds of Dutch paper crafting and when I saw one of Penny's files I knew that spirelli (the art of wrapping thread around a shape in a design) would be perfect.  Here is a close up of the spirelli design using metallic thread around  Penny's Pearl Lobe Oval Shaplie.


Look at the detail of that inner circle pearl lobe - that is about 1 1/4" wide! 
The Silver Bullet Professional makes projects like this so easy.


The background is Penny's lattice rectangle cut out of the laser silver luster from Patricia at Paper Temptress. I LOVE that paper.


A closeup of the lattice detailed cuts and  you can see the striations in the paper.


The card base and the spirelli oval are cut from from the Paper Temptress mica line. 
This was a fun card to pull together.

Thanks Penny for the great files AND inspiration!!

HAPPY BIRTHDAY, Lo'Vetta


Pin It Now!

Saturday, July 6, 2013

Creme Brulee Muffins

I have really been enjoying experimenting with the many muffin flavors out there.  With my lemon tree on hiatus temporarily (the buds are bursting and little green citrus are emerging so it won't be long...), I have been forced to show my taste buds that there are flavors other than lemon -  not that I will ever give that up as one of my favorites!!

So..... this recipe for Creme Brulee muffins has been calling to me ever since I initially saw it.   I have made it one two three four  and yes...  five times in the past month or so . Yes, I was THAT determined to get it right. The first time I made the jumbo muffin size but only layered the crumb topping in the middle once.  I am glad I did it that way as it was just enough. Because I made some substitutions, the dough was REALLY thick (it is supposed to be thick but not like it was).  The second time I  made the regular muffin size so I wouldn't feel quite as guilty when I hate a WHOLE muffin.  I really try not to overindulge when sampling, but sometimes...... I just don't want to care!  I made progress, but it was still missing something.

Attempt number three was still a bit dry and I was trying SO hard to get it right.  It's not that there was anything really wrong with it, but I was looking for it to be a little lighter.  The original recipe was great, but of course I had to fool around with perfection!!  LOL  Well, the third time was not the charm!!  Nor was the fourth... it was close but just a bit too heavy.

FINALLY, the fifth time nailed it.  Phew!!!  I have been substituting Greek yogurt for the sour cream.  This time I used the Fage lowfat plain to see if that made a difference - and it did!  Up until now I had been using a variety of Greek yogurt flavors - vanilla, honey vanilla, plain  - but they were all non fat.  My neighbor who is my taste tester/critic (in the most helpful way) had suggested that maybe I needed that fat component several batches ago - but it took me a while to give it a try - and that was clearly the difference.  Thank goodness for an honest critic!!

This last time I made the jumbo variety and just layered the crumb mixture once in the middle and then on top. Here is the recipe I used:


Creme Brulee Muffins

inspired and adapted from Chef In Training

BATTER INGREDIENTS:

5 Tbsp. butter, softened
1/2 cup sugar
3/4 cup Fage (2%) plain lowfat yogurt
1/3 cup Creme Brulee creamer (CoffeeMate)
1  egg
1 Tbsp. King Arthur vanilla bean crush
 1 3/4 cups flour
2 tsp. baking powder
1/4 tsp. baking soda
1/4 tsp. salt

SUGAR CRUMB FILLING/TOPPING:

1/4 cup COLD butter
1/4 cup sugar
1/4 cup brown sugar
1/2 cup flour
2 Tbsp. mini cinnamon chips (King Arthur)

First make the sugar crumb filling.  In a medium bowl, combine the flour and sugars.  Cut in the COLD butter until the mixture is crumbly. Then toss in the mini cinnamon chips and  mix well.  Set aside.

Preheat oven to 425.

In a large bowl cream the softened butter and sugar.  Add the egg and beat well.  Next add the Greek yogurt, creme brulee creamer and vanilla bean crush and blend well.

In a small bowl, mix the flour, baking powder, baking soda and salt together.

Pour half of the flour mixture into the batter and stir with a wooden spoon just until combined.
Then add the rest of the flour and stir until just combined. The batter will be very thick - don't worry!


Grease a large muffin tin with cooking spray (I love the Everbake spray from King Arthur flour - it last a long time and does a great job).  Drop just enough batter into the bottom of each cup just to cover.


First layer of batter and crumb mixture

Sprinkle some crumb mixture (about a heaping tablespoonful) over the batter and then cover with the remaining batter. (you can make an additional  layer if you are feeling ambitious!).  Take the remaining crumb mixture and divide over the tops of the six muffins.  Press the crumb mixture into the batter a bit so it will cook into the batter and not all fall off when they are done baking!

Bake at 425 for five minutes.  Lower the temperature to 375 and bake another 20 minutes or until a toothpick inserted into the center comes out clean.  Let the pan cool on a wire rack for 10 minutes and then remove from the pan and finish cooling.


The kitchen smelled soooooo good!


The first bite - tender and flavorful!


This was moist and delicious, with flavor layers of cream, vanilla and cinnamon.


Pin It Now!