Sunday, July 27, 2014

Low Sugar "Healthy" Zucchini Carrot Cake

Still working on the overflow of zucchini here, with two more giant zucchinis in the fridge!!  Going to have to get really creative soon.

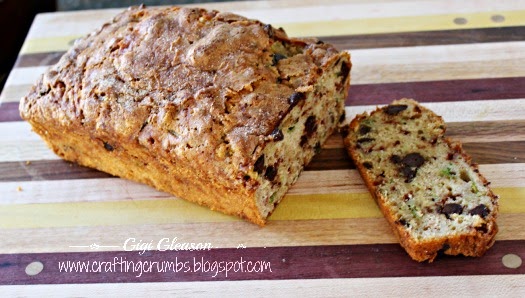
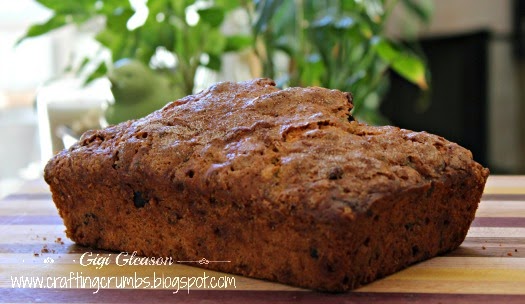
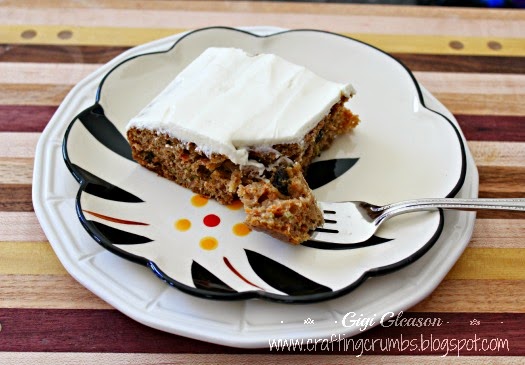
In an effort to make my way through the zucchini I have actually made this recipe twice. Yes it is THAT good.  It is moist, healthy (in my mind!), has just a touch of sweetness in the frosting that but not so much that it will stop you from eating it for breakfast.  This is truly a cake that can be eaten any time of the day or night!


Zucchini Carrot Cake

adapted from Eat What You Love Everyday by Marlene Koch

2 cups flour
2  1/2 tsp. baking soda
1 tsp. baking powder
2 tsp. cinnamon
1 1/2 tsp. allspice
1/2 tsp. ginger
1/2 tsp. Penzeys baking spice
1/4 c. applesauce, natural (no sugar)
1/4 c. oil
2 large eggs  
1 tsp. vanilla extract (I use KAF vanilla bean crush )                                                                    
5/8 c. Truvia Baking Blend
3/4 c. buttermilk, reduced or low fat
1 1/2 cup grated carrots
1 1/2- 2  cups grated zucchini, blotted dry with paper towels
1/2 - 3/4  c. raisins (based on your preference and optional)

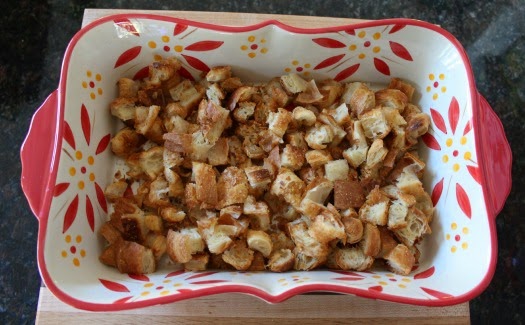
Preheat oven to 350. Spray a 13x9 inch pan with non stick coating spray..

Combine the flour, baking soda, baking powder, cinnamon, allspice and ginger in a small bowl and whisk well.
In a large bowl, combine the eggs, applesauce, oil and vanilla and whisk well.  When mixed, whisk in the Truvia baking blend and buttermilk. Then fold in the grated zucchini and carrots and raisins and mix gently until the ingredients are well distributed.                                                                                                                                                                                                                                    
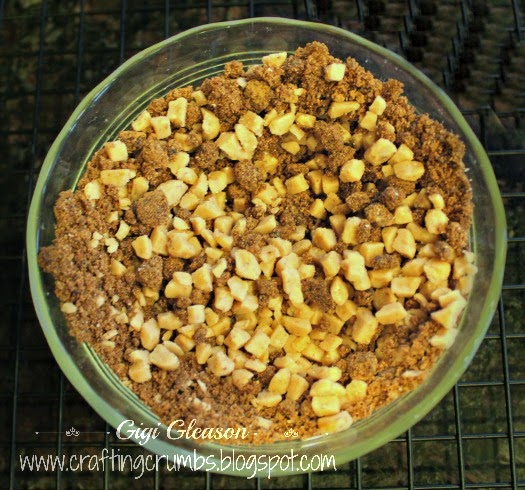
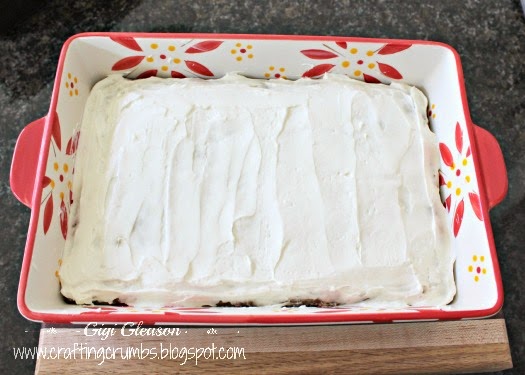
Pour the batter into the prepared pan.  Bake for 25-30 minutes or until the cake is golden brown and a toothpick in the center comes clean. Let cake cool in the pan on a wire rack.  When completely cool, frost with the Whipped Cream Cheese Frosting (below) and store in the refrigerator.

This cake is moist and delicious!


Cream Cheese Whipped Frosting

1/3 cup reduced fat whipped cream cheese
2 oz. reduced fat  block cream cheese
6 packets (1/4 cup) Monk Fruit sweetener (Truvia or Stevia work as well)
1 1/2 cups light Cool Whip
1/2 tsp. cream cheese emulsion (optional but adds to the wonderful flavor)

Beat the two varieties of cream cheese with an electric mixer on medium speed until smooth.  Add the monk fruit sweetener or Truvia and continue beating until well combined, about a minute.

On slow speed, beat in about half of the Cool Whip until fluffy and combined. With a rubber spatula, fold in the rest of the Cool Whip.  Will easily frost a 13x9" pan - and it's so good I would definitely use it for other cakes!


Pin It Now!

Thursday, July 24, 2014

Birthday Card - July friend - Fail and Success!!

July was a big birthday month for me - I had many friends with birthdays and am trying not to get too far behind.  (UPDATE: I started this post a week ago, my computer then decided to go on vacation and leave me high and dry, so I am beyond far behind.  But I am doing my best to catch up!!)

The idea for this card changed several times along the way. Initially I cut the flower image and used double sided adhesive so I would be able to make two cards from one cut!  I so love that.  All was going well...


Main piece for the first card idea


Negative pieces left on the mat

I worked with the main piece and adhered a shadow image of double sided adhesive to the negative pieces.

All ready with the adhesive for another card!

That part is safe and awaiting a project.  But something happened along the way with the main piece and I just didn't like it  It was ok, but the adhesive was buckling and it was my fault for not getting even coverage

Just not happy with how this turned out and the more I tried to make it better the worse it got.  
So it sadly went into the trash.  Just trust me that the "final product" didn't look anything like the 
card above after I got through trying to make it look better. What a mistake!!


So....... I decided to try something I never had.  (not always a good idea when you are already late - right??) I tried to make the same design with a frame attached, but I blew it!  I didn't weld the right pieces to the frame so that part was a huge failure, initially  But I still had the pieces of the  flower that cut out beautifully.  I tried making the frame from the same paper as the flower since that was my initial intent, but something was missing.  So I covered the frame piece with a different color (Paper Temptress Glimmer ), and put foam tape on the bottom to give it dimension, like a shadow box. I backed the flower cut  with the Paper Temptress mica line and then sprayed it with an iridescent glitter to give it some sparkle. Then it was just a matter of putting the frame and flower together and adding some pearls. Even though my original idea didn't work, I am happy with how this mistake transformed and it was a good lesson in not giving up!!


I used my Brother labeler (with the satin silver tape that I had never used before) and created the Happy Birthday greeting. I will definitely use that again. I am really happy with how this card turned out (and I still have the negative pieces on adhesive for another card project!!)


More to come soon......... :)

Pin It Now!

Tuesday, July 22, 2014

Cinnamon Zucchini Bread with extras

Still working on the zucchini overflow in my refrigerator.  I still have two huge (and I do mean HUGE) zucchini) and noticed that my plant is beginning to blossom again - so in another week or two I will have more if they all make it!!

I am not sure how much more zucchini bread, cake, muffins, etc. I can make, but I will keep trying to come up with new things to keep everyone interested.  My friend, Nance, sent me a recipe for a Chocolate Zucchini Bundt cake that has a chocolate ganache glaze, so that will be a definite make soon!

I made this bread last week and it was FABULOUS.  This , so far, is one of my favorite zucchini breads. I love anything with cinnamon - I think it takes me back to my childhood with cinnamon-sugar toast!! :)  YUM!  So in addition to the cinnamon IN this bread, I put a nice coating of cinnamon sugar over the top and let it bake in.  That made it pretty perfect!!  That is one step you need to be sure to remember!!


Zucchini Cinnamon Bread

adapted from Chocolate, Chocolate and More

1 1/2 c. flour
3/4 c. sugar
2 1/4 tsp. baking powder
1/2 tsp. salt
1 1/2 tsp. cinnamon
2 eggs
1/3 c. canola oil
1 1/2 c. zucchini, shredded
1/2 c. toffee bits
3/4 c. bittersweet chocolate chips

In a large bowl, combine the flour, sugar, baking powder, cinnamon and salt.  In a small bowl, whisk together the eggs and oil.  Add the egg mixture and the shredded zucchini into the flour mixture.  Using a wooden spoon or rubber spatula, stir together until the ingredients are well mixed and moist.  Fold in the bittersweet dark chocolate chips and toffee bits.

Pour the batter into a loaf pan, coated with a non stick spray.  Bake at 350 for one hour or until a tooth pick inserted in the center comes out clean.  Cool on a wire rack and remove from the pan after 20 minutes of cooling.


A good shot of that luscious cinnamon sugar crust!


Another yummy view...


You can easily see the generous sprinkling of of the dark chocolate chips.  So good....


And yes, this was good to the last bite!!

Pin It Now!

Tuesday, July 15, 2014

Iris Folding with Ribbon


This was so much fun to make

I love iris folding. I find it relaxing and creative and just plain fun.  I used to always use paper when I filled different designs, but of late I have enjoyed using ribbon for the variety and different textures that it can add.


The back of the iris folding is not pretty, but is well hidden in the final product!


I needed to make a baby card for a special friend who is having a little girl any day now.  The papers are from Paper Temptress (Pop Tones) and the design is the cute little ducky from the SCAL shape library, along with the rounded square that finishes the piece.  The printed paper is a scrap piece!


Before assembly...


 A closeup of the right side of the iris folding...

The iris folding pieces are all ribbon, and the duck is accented with a little oval rhinestone for the eye.  The background pink paper is embossed with the Stardust folder from eBosser.


A happy duck to welcome a new baby girl!

The second card uses the same image just reversed and a pattern filled with ribbon too.


Another detail shot of the iris folding. The middle piece is sparkly - like a holograph

The card base is from Paper Temptress - the BASIS line and it was embossed with the eBosser using the Embossalicious folder - Petite Dot.  The printed cardstock is a scrap and the iris folding was done with three types of ribbon.  A small blue rhinestone brings sight for the little ducky!


Another closeup of the iris folding pattern...

The letters were cut out of vinyl with the Silver Bullet -  you can see how fine some of those letters are - incredible, and shadowed with Paper Temptress Mica.


I love the detail of the fine lettering

I used the cutout of the duck on the inside of the card - I don't normally decorate the insides much, but this one was extra special!


A little ducky peeking out of the inside...


If you haven't tried iris folding, I highly recommend it.  
It's a great stress reducer and looks great with minimal effort.  Hope you enjoy it!

Pin It Now!

Sunday, July 13, 2014

Zucchini Croissant Puff

With all of the zucchini making its presence known in a BIG way in my garden, I have been trying to come up with creative ways to put it to good use.

So I decided to take a break from muffins and bread and all of the sweet baking and make a light dinner. Using the blueberry croissant puff recipe as a basis that I made last fall, I played with the ingredients and made a really delicious zucchini puff.

I had shredded zucchini left over from the chocolate zucchini breads, so this was perfect.  Once again I used the mouthwatering frozen (ready to bake) croissants from QVC. I always have at least one bag in my freezer for emergencies or cravings!!  They are a great basis for a casserole, sandwich - and especially handy as a breakfast on the run!


Zucchini Croissant Puff

3 large croissants (about 5 - 5 1/2 cups cubed)
2 c. shredded zucchini
1/4 c. dried minced onion (an afterthought!)
4 large eggs
2 c. milk
1 - 8 oz. pkg. cream cheese
1 pkg. Athenos crumbled feta cheese, tomato and basil variety
2 c. shredded mozzarella cheese
1 sprig fresh rosemary (4")
1 sprig fresh oregano (4 ")
1 tsp. salt
1/2 tsp. pepper

One of several relatively new flavored fetas - so good!


Fresh rosemary and oregano from my garden.


Preheat the oven to 350.

In a 13x9 " pan or 3 quart casserole, cover the bottom of the container with the cubed croissants.  Sprinkle the shredded zucchini over the top and then add the minced onion.  Sprinkle 1 cup of the shredded cheese over the top.

In a Vitamix (or use a mixing bowl and electric hand beater), combine the eggs, milk, cream cheese, feta cheese crumbles, rosemary and oregano leaves  (discard the stems), and salt and pepper.  Pulse off and on for about a minute until it is well mixed . (With the Vitamix there is no need to chop the herbs; the blender will do that job.  If using a mixer, chop the herbs before adding).

Pour the mixture over the zucchini and croissants and let sit for 20 minutes.  Add the remaining cup of shredded cheese over the top and then put into the preheated oven. Bake approximately 25-30 minutes or until the mixture is set in the center and golden brown.

This is great only as a light dinner - just add a tossed salad - or serve as an accompaniment to a simple chicken or fish entree.


Bite sized croissant pieces


Shredded zucchini makes up the next layer


The egg mixture and cheese make this oven ready


This is delicious for breakfast, lunch or dinner!  
And it can be the main feature or a hearty accompaniment.
So versatile!


Pin It Now!

Friday, July 4, 2014

Blueberry Streusel Toffee Muffins

Tired of zucchini recipes?  I have more to come, but will give you a little break with this recipe.  I may be my new favorite blueberry muffin. The streusel topping (also in the middle) really makes it!


Blueberry Streusel Muffins

Muffin Ingredients:
1/2 c. butter, softened
1/2 c. sugar
1/4 c. muscovado sugar (light or dark brown is fine)
2 large eggs
1/2 c. Greek yogurt (my preference)
2 tsp. vanilla extract
1 3/4 c. flour
1 tsp. baking soda
1 tsp. baking powder
1/2 tsp. salt
1/4 c. milk
1 1/2 c. fresh or frozen (unthawed) blueberries

Streusel Ingredients:
1/2 c. muscovado sugar
1/2 c. toffee bits (Bits o' Brickle)
1 tsp. cinnamon

Preheat oven to 425.  Spray a muffin tin with nonstick spray and set aside.

First make the streusel. Combine the muscovado sugar, toffee bits and cinnamon and set aside.


Toffee mixture

In a medium bowl, beat the butter on high speed until smooth and creamy, using a stand or handheld mixer, for about a minute.  Add the sugars and beat on high until creamed which will take about two full minutes.  Scrape down the sides and bottom of the bowl  as needed.  Add the eggs, yogurt, and vanilla extract.  Beat on medium speed for one minuted, then increase the speed to high and continue until the mixture is combined and uniform in texture. 

In a large bowl, whisk together the flour, baking soda, baking powder and salt.  Pour the wet ingredients into the dry and slowly mix with a whisk.  Add the milk, gently whisking until combined and little lumps remain. 
Layer 1 T. batter in the bottom of each muffin tin.   Top each with a little of the streusel topping.

Now fold in the blueberries with a rubber spatula. Mix as little as possible. Add more batter onto the top of the streusel with a big scoop of batter. Fill to the top. Top with more streusel - be generous.

First layer of muffins


Second layer before final topping (forgot to take the photo!)

Place in the oven for 5 minutes; then lower the temperature to 350 and bake for about 15-18 minutes or until a toothpick inserted in the center comes out clean.  The total time for the muffins to cook is 20-23 minutes.

Cool in the pan for 10 minutes, then gently remove from the muffin pan and continue cooling on a wire rack.


SOOOOO good!


A morning treat that quickly disappeared!
Pin It Now!

Tuesday, July 1, 2014

Birthday Card with New Techniques!


It has clearly been ages since I have posted a card on this blog. And those of you who know me, know that I love making cards.  I get in a real funk if I go too long without crafting. There is something about making cards that just fills me up - it is like adrenaline for my soul.  It just gives me a sort of energy that nothing else does, and I feel so good when I actually complete something and can deliver it to the recipient.

And it was really fun to try some new things.  This was way out of my comfort zone, but it's good to stretch every now and then  - right?

The inspiration started from Splitcoast Stampers. I love getting their new techniques every Wednesday.  I usually just read them and file them in One Note so I can refer to them later. But this time, it really caught my eye  - heated copper embellishments.  And I desperately needed to get a birthday card made for a dear friend.  So I just went for it , not really sure what would happen, and honestly I hope I can do more of that in the future because this was really fun.

I had a piece of copper that has been waiting for a little attention, so I decided to go for it and heat it with a butane torch.  Of course the one in the kitchen was out of fuel (why does that always happen?!?) - so once I got the refill it was good to go and I had a blast!!  This is how it turned out and for a first time it wasn't bad.

Wherever you see silver, that means I over-heated it a bit, but it also adds a nice effect.  It's one of those things that I don't think you can really plan - you just have to be open to the process and I was.  I gave up control and that was hard for me!  Then I put it in an embossing folder (Ornate Butterflies from Embossalicious) and ran it through my eBosser.  I love how beautiful the embossing looks with all of the colors.

Isn't this cool??  Heated and embossed copper sheet.

Of course I went into this not really sure how the card was going to develop.  So once I saw the colors I thought of the Shimmer Sheetz that I had. They too were gathering dust in my craft room.  So out they came.  I used a great file from Penny Duncan called the jagged flower and I will definitely make it again with more layers.  It would look better fuller, but this worked for the effect I wanted....


These cut out so easily and perfectly with the Silver Bullet Professional.

After they were cut out with my Silver Bullet, I heated them slightly to give them a little curl. Then I decided to emboss them which was a bit backwards and I hate to fight to get them flat in the embossing folder, but I won!  Then I heated them again to get a little curl back.  I cannot wait to play with the Shimmer Sheetz more in the future - they were fun as was the copper!


Embossing the flowers - so easy and fun!


Four layers of iris Shimmer Sheetz attached with glue dots
and enhanced with a large rhinestone.

I mounted the copper on Paper Temptress Azalea mica card stock as it has a good weight and handled the weight of the copper easily. (and yes, I have ordered some light and medium  weight copper to play with it and see if I can heat it as well without melting it!!  Stay tuned for that one!)


I had a stash of thin ribbon that I ran over the corner of the card and put a Peel and Stick birthday greeting on the ribbon - I didn't want to clutter the card so that was just the touch I wanted.


The card base is Orange Sparkle.  You can see the detail of the Happy Birthday Peel Off Sticker.


Really happy with how the flower pulls in all of the colors of the card 
and adds a lot of interest and texture.


I hope you love this card as much as I do and will try some of the techniques.
You will be addicted!

Pin It Now!