Sunday, April 20, 2014

Low Sugar Banana Zucchini Decadent Bread!

So when  I decided to bake last night, I was going to make some variation of banana bread and then zucchini bread as both of those main ingredients were in the refrigerator literally SCREAMING to be used.  In a few more days they would have been permanent residents in the trash can!!!

I know - you read the title and thought - how can low sugar and decadent be on the same line.  Have I lost it?  Well that is a different blog post!  LOL   But seriously - it makes perfect sense to me because the decadent and unexpected ingredient is dark chocolate.  If you have been reading my blog recipes, you know I am in love with the King Arthur burgundy chunk chocolate pieces. They are sooooo good - the flavor is the best; they melt better than any chocolate chip or chunk I have ever used, and they add just enough richness without overwhelming the recipe.

I would never have thought to combine bananas and zucchini, but I will definitely be using this combination in other creations. The inspiration was not mine.  I found the basic recipe at Brown Eyed Baker. And the dark chocolate chunks just put it over the top.  I have made chocolate zucchini cake and banana muffins with chocolate chips - so it was natural to add in the chocolate.  It's always better with chocolate, right?  Well in this case, it definitely is!

LOW SUGAR BANANA-ZUCCHINI SURPRISE BREAD!!

INGREDIENTS:

3 cups all-purpose flour
1½ tsp. baking powder
1½ tsp. baking soda
1 tsp. ground cinnamon
1/2 tsp. Penzey's baking spice (mixture of bread friendly spices)
1 tsp. King Arthur vanilla bean crush
1 teaspoon salt
4 eggs
1 cup Truvia Baking Blend
1 cup vegetable oil
2 ripe bananas, mashed (about 1 cup)
2 cups shredded zucchini (used the large grate)
1 cup chopped dark chocolate (I used King Arthur Burgundy Chunks......SO GOOD!!)

DIRECTIONS:

Preheat the oven to 350 degrees.   Grease two 9x5-inch loaf pans and set aside.

In a medium bowl, measure the flour, baking powder, baking soda, cinnamon and salt and whisk together and set aside.

In a large bowl, whisk the eggs. Add the Truvia Baking Blend and oil and whisk until smooth and combined. Add the bananas and whisk until well blended.  Add the flour mixture and stir gently with a rubber spatula until blended. Gently fold in the zucchini and dark chocolate pieces.


Just had to capture the marriage of the zucchini and the chopped dark chocolate.
The flavors blended perfectly and fragrance was intoxicating!!


Divide the batter evenly between the two prepared loaf pans. Bake until a toothpick inserted into the center comes out clean, 50 to 60 minutes. (mine were done in 40-45 minutes, but there is less volume with the Truvia Baking Blend).  Cool on a wire rack for 10 minutes, then remove the bread from the pans and place on wire rack to cool completely before serving. Wrap in plastic wrap and enjoy every savory morsel.
Will keep about 5 days during cool weather.  Refrigerate if necessary.


This is truly as good as it looks!!  Another MUST TRY!!

Hope to be sharing some cards soon - working on a few in my head!!  Trying to get those creative juices flowing....... again!

Pin It Now!

Thursday, April 3, 2014

Jam - a gift for any occasion

Let's forget that this post was originally planned during the Christmas season.  But the concept works for any time of year, especially now if you are starting to think about all of the wonderful fresh fruits that will be beckoning you to buy them in the months ahead. I love spring and summer for that very reason - all of the glorious fruit. But if you are like me, it all looks and smells so good that you overbuy and then wonder what in the world you are going to do with ALL of that fruit before it gets too ripe to enjoy.

The answer??   Make jam!

Up until a few months ago, I had never made jam - no  - not EVER!   And I was never tempted to as it seemed like so much trouble with all of the sterilization of the jars and canning process and ugh -


The Ball Automatic Jam and Jelly Maker

Well the Ball Jam and Jelly Maker has clearly made a believer out of me -there is nothing like homemade jam and all you need is fresh fruit or good quality juice (for jelly).  Because you don't go through the canning process, the jam doesn't last forever - 3-4 weeks in the refrigerator or 6 months in the freezer. (However mine is lasting  MUCH longer than that in the refrigerator).

I know I am lucky living in southern CA because berries are in the stores just about year round. So when I was trying to think of something different to do for my neighbors this year, I quickly decided to make mixed berry jam.


How beautiful are those raspberries and blackberries?  YUM!


All crushed and ready to be made into jam.

With this special machine, it just doesn't get more gratifying.  Fresh jam in less than a half hour - love it!

Once you crush the fruit, you are ready to go. The pectin goes in the machine first and then the berries or juice (if making jelly). After a short amount of time, you add the sugar, cover it, and let it finish cooking.  I use the low sugar pectin so mine is not as sweet, but the fruit flavor is stronger.  It's a personal preference - they make a regular pectin which is used in the same quantity, but the sugar is increased. Equally easy to use.


The berries are cooking with the pectin.


Sugar has been added and the cooking finishes with the lid on.


Time to fill the jars with fruit goodness!

I had made it a few times and was pleasantly surprised at how good and easy it was!  And jam would be appreciated year round and so easy to package for any holiday or celebration.


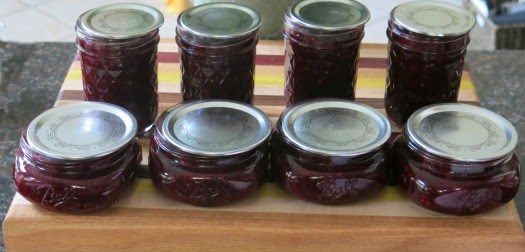
The jam is cooling with the inner lids barely on.


Ready for the refrigerator - or delivery!


These were Christmas gifts, but they truly would make 
a welcome gift for any occasion.


Pin It Now!

Thursday, March 27, 2014

Teabag Folding Card - Learning Again!

It was time to go back to my roots again - well where I started making cards once I branched out from straight computer cards. I chuckle when I think about it now.  Remember when printing cards on the computer with all of those programs were all the rage and we were so proud of ourselves for "making cards"???  Don't get me wrong - those programs were great and I still use them on occasion for printing the inside of my cards.  But the transitions were interesting. I belonged to a cardmaking group in the mid 90s - and we shared things we were doing.  It started with using glitter glue on the cards and making bookmarks that were attached to the card with perforated scoring so it could be detached - so many fun things.  But when I tired of that, I turned to the Dutch papercrafting that still intrigues me. I loved learning different things and I still love returning to these very hands on crafts from years ago.

I haven't done any teabag folding in years - okay if the truth be known it it at least a DECADE!  So I had to
"re-teach" myself when I decided to try it again. I am not sure what got me thinking about it, but when I explored the internet I was amazed at how much was still out there. There is even a website that will take any image and turn it into a page of teabag tiles whatever size you want..  So there is no limit to what can be created.  For those who are not familiar with teabag folding, it is done by basically taking a square shape, folding it into a different configuration and then repeating that with other squares and interlocking them into a final shape, usually called a medallion.


One of the 2 1/2" squares  printed from the internet.

 Is that as confusing as it sounded??  If all of the squares have the same pattern then the design has a very defined look, like the image I used in the card below. But you can also use gift wrap, newspaper, random patterns and create an entirely different effect.  I plan to do more folding in the future and share some of the interesting options with you.


For this card, most of the papers used were from Paper Temptress.  The white backing and lacey leaf frame are from the luster canvas line - I love how textural it looks.  The frame is from Monica's lacey frames.  Most of her patterns are very detailed and they cut beautifully on the Silver Bullet Professional.  The teabag was printed from a jpg file I found and converted into a sheet of 12 tiles or squares. I only used 8 for this medallion.


This is the beginning of the folding.  The final pattern is determined
by how it is folded, so you want to be sure all are folded 
with the same pattern visible..


Spotlighting the center so you can see the intricacy of the lace frame and also 
some of the detail in the medallion.  If I flipped it over, it would have a different appearance.


It is really quite easy and fun to do.  I used a blue Spectrum Noir marker to color a clear crystal to complement the color of the card base and then put some Wink of Stella clear glitter over it for a bit of sparkle.  The purple striped iridescent ribbon is also from Paper Temptress.


I love the texture of the Luster paper...

I learned a lot while playing with this technique again and am eager to practice and share more.

This was made for a very special friend who has had quite a difficult month. I am hoping it will make her smile and bring a little cheer into her day.  She brings sunshine into all the lives of those she touches.


The final product. I hope it travels well!

Pin It Now!

Friday, March 14, 2014

One More Sympathy Card...

Am back with one more sympathy card.

The next one is utilizing a file I really like (cannot remember where I got it )!  I have used it before with an acrylic and glitter background and it cuts like a dream. There is something so serene about  a gentle hummingbird flitting gracefully  from flower to flower.  I am highlighting a closeup of the hummingbird feathers because of the detailed cut I was able to get with the Silver Bullet Professional.  You can see how minute those feathers are and the machine just sped through those.  I always worry when I have it cutting so fast that it may not be able to handle the details if there are a lot and/or they are tiny, but it never disappoints.  The cardstock is from the incandescent line (candido and nero) from Paper Temptress - they both have what looks like thin gold threads woven through the paper.  It is so elegant and why I chose the gold pearl accents for the hummingbird eye and the flower.  I used a gold leaf pen to get that rich gold color.

I think this is one of my favorite cards.


Wanted to share this closeup so you can see the fine detail of the cut - 
so exact and 


Pin It Now!

Wednesday, March 12, 2014

Sympathy Cards - Made with Love...

The ideas have been seeping into my head and I am trying to do a better job of writing them down as bits of creativity slip in and rapidly out of my brain.

It has been a sad couple of weeks.  I have spent the past few days making sympathy cards.  It is such a heart heavy reminder just how fleeting life is and how important it is to make the most of every day.  We all get hung up, it seems, with projects and meetings and just the demands of daily life. But I am acutely aware now (and hope I don't forget the lesson) that it should not be so hard to schedule lunch or coffee with a friend.  That time should be much more important than any other meeting or "thing to do". When it comes right down to it, it's about making the most of the time that has been gifted to us, and the older I get, the more I realize just what a gift it is, and how quickly it can be taken away.  So..... a renewed commitment to make time with friends a priority - the other "stuff" can wait.......

So here is a brief glimpse of what I have been working on - trying to make each different and personal to the recipient.....  and I am determined to make simpler cards.... my version of clean and simple.  I could accomplish much more if I simplified things.  Also on the list of things to do is to utilize the stamps I have.  Lots of goals , but that's a good thing.  It keeps me motivated.  But first things first...

The first card is a very nice cross from dear friend, Penny.(Penny Duncan Creations).   It is her Fancy Christian Cross.  I love her files and can always count on them to cut beautifully.   This paper is from Paper Temptress and is the incandescent paper - blumarino and candido.  They are elegant and make any card look more special!


Love the simplicity yet beauty of this cross.


A better look at the detail......


You can see the richness of the colors in the closeup.

And the next one I am choosing to share also utilizes a file from Penny.  I got  the idea from something I saw on Pinterest and I used Penny's file as the foundation to make a medallion.  This is a fleur de lis from Penny's embellishments - Deco Items.  I wanted it to look like ribbon was running along the side of the card and was anchored by these embellishments, so I took Penny's design and and a frame design in the shape library of SCAL, and welded them together - success.  It was very easy to do and I love the way it looks.
As you know, I almost always use papers from Paper Temptress as they are my all time favorites to use when creating cards, but I found a rather large stash of Coredination papers while reorganizing my craft room and liked the two tone colors of the paper.  It has a sort of tweedy look on one side and a smooth color on the other.  I shortened the width of the front so the inside would show when the card was closed and complement the embellishment.  I love how it looks and how simple it is.  I felt like this card needed more, but I held back and just "let it go" without adding clutter to it.  The stamp was an old one from my stash - I think it is the Clearly Inspired line....


Again, thanks to Penny for inspiring these two cards.  It really jump started my ideas.

Will be sharing one more in a few days.


Pin It Now!

Sunday, March 9, 2014

Surprisingly Good Banana Chocolate Chip Muffins

I realize the title of this post makes no sense.   There is absolutely nothing surprising about the fact that bananas and chocolate are good together.  It's like peanut butter and jelly, cinnamon and sugar, cheese and crackers....... it's a perfect pairing.

But the surprise to me, was what a difference a little change in a recipe can make.  I had very ripe bananas that were literally screaming to be used.  I wanted to try something different and found a relatively simple recipe on Real Life Dinner .  But I decided to tweak it a little.  I am a huge fan of the burgundy chocolate chunks from King Arthur, but decided just to put one on top of each muffin and stay with the mini chocolate chips in the batter so the chocolate would not be overwhelming. But what I did want to add was the flavor of brown sugar to the muffin, but not just any brown sugar.  I am a huge fan of muscovado sugar so I used a 3:1 ratio with that and the granulated sugar keeping the total sugar required the same.  The flavor ended up so rich and moist - and I am eager to incorporate it into more recipes when I want that added "wow"!


BANANA CHOCOLATE CHIP MUFFINS

3 large ripe bananas
1 tsp. vanilla bean crush
1/4 cup granulated sugar
1/2 cup muscovado sugar (can substitute with light or dark brown sugar)
1 egg, beaten
1/2 cup butter, melted
1 tsp. baking soda
1 tsp. baking powder
1/2 tsp. salt
1 1/2 cups flour
1/2-3/4 cup mini chocolate chips
burgundy chunks for garnish (incredible dark chocolate chunks from King Arthur Flour)

Preheat the oven to 375.
Mash the bananas well and then add the vanilla, sugars, and egg and mix until well combined.  Add the slightly cooled melted butter.

In a separate bowl, combine the dry ingredients and whisk until blended.  Add the wet ingredients into the dry ingredients and mix gently just until the dry ingredients are moist and mixed.  Fold in the mini chocolate chips.

Spoon the batter into a prepared (lightly greased or paper lined) muffin pan. Place one burgundy chunk in the center of each muffin and bake for 15-20 minutes or until a toothpick inserted in the center comes out clean.

Cool on a wire rack for 10 minutes and then remove from pan and finish cooling,.  Waiting for them to cool completely is the hard part!

Makes 12 muffins


This is definitely a comfort food.  It is great in the morning with a cup of coffee, as a snack in the middle of the day, or even a late night treat. And they stay moist for days.  I have clearly found a new favorite way to use my neglected bananas!  If you have not tried muscovado sugar, it is worth the search.  It adds such a depth to baked goods.  I think I have become a dark brown sugar snob!


Rich deliciousness... You have to try these....... NOW......

Pin It Now!

Tuesday, March 4, 2014

Quilted Birthday Greetings...

The second card this week was a bit of a surprise, an embarrassing one for me to admit.  I have long been a fan of Technique Junkies and have all of the yearly cds along with the specialty ones that Pat Huntoon has produced.  But have I used any of them??  Nope... I go through the paper copy of the newsletter when it comes, but I rarely go back when I need ideas.  So on a fluke I put in her latest cd called Designer Paper Perfection and wow.....so many great ideas for making fun backgrounds with a variety of mediums. I was in awe of the creativity and then.. there it was..... the idea for my next card.  It is a quilting background and the birthday card I need to make is for a dear friend who loves to make quilts.  It was the perfect answer.

So.....for this one I used two complementary designs from Echo Park papers. The card base is linen from Paper Temptress that I embossed with Petite Dots from Embossalicious.  The quilt pieces were also embossed to make them look more like material with the Gun Metal folder, also from Embossalicious.  The quilt pattern is achieved by using a combination of circles and squares - so simple really,but it has made me want to look for more quilting patterns and see how many I can adapt to cards because this was really fun - and relatively easy too!  I love the added dimension of the embossing folders.


Look at the shimmer of the lunar blue card stock from Paper Temptress. It is so pretty.


Embossing the card base is something I rarely do, but I love the added texture.


So happy with the finished product - a fun quilt, no sewing required. 
I know I will be making more of these!


Pin It Now!

Sunday, March 2, 2014

An Oscar Worthy Evening!

So it's Sunday night in southern California and the stars are out - literally - as it's Academy Award night...that special time of year when celebrities don their best and show up in force to vie for that golden statue!  You may think that every good Southern CA born and bred girl celebrates Oscar night with a party, fun foods, fancy clothes -but not this girl! If the truth be known - there was a time when I did just that!  We had a local non profit organization that had an Oscar night fundraiser and everyone dressed up, entered on a red carpet, and helped raise money for a domestic violence shelter and program.  It was great fun and very festive.

But that was then and this is now.  I am in my pjs and slipper socks and baking in the kitchen.  So are you imagining delectable delights being prepared to munch on while I drool over the jewels and gowns parading across the TV screen???  Well, you are wrong.  I am baking dog treats.  Yes, you read that right -  homemade treats for my dogs.  Just one more glamorous evening in sunny (yes the sun did come out today) southern California!

I knew nothing about this clever contraption until a friend of mine visited me a couple of weeks ago and brought me a surprise.  Little did I know the gift was really for Roxy and Honey, my faithful companions. And if they had known the true value of what was in the box, they would not have let it sit on the kitchen table for even a day without whining at me until I put it to work!!

I am the first to admit that I am a sucker for kitchen gadgets. I love them.  But I doubt I would ever have bought this for myself.  It just didn't seem practical.  But getting it as a gift shed a totally different light on it and made it fun to play with and experiment.  And that I did!

So...let me introduce you to...... BAKE A BONE!!!  Yes - it does exactly what it says it does - it bakes bone shaped dog treats for the canine in your life!!


The only con I can find is that it only bakes 4 at a time. But the positives so outweigh that small negative.  The treats cook in 5-10 minutes.  They easily slip out of the best non stick surface I have ever seen.  They smell delicious.  It comes with 30, yes THIRTY assorted recipes and you can tailor them to your pets needs/allergies. Once done they cool for 30 minutes and have a biscuit like soft interior.  You can make them crunchy by putting them in a a preheated oven, turning off the heat, and leaving them in there for 4-6 hours.

We all know how much dogs love peanut butter, so that was what I decided to make first. Just 4 ingredients - flour, milk, peanut butter, and baking powder. Does it get any easier than that?? And because I have one dog with a lot of food sensitivities, I used all oat flour and coconut milk.  I love being able to choose what ingredients are in their treats.  You do have to follow the directions and overfill the mold.

 My first few batches were not as high so did not have the details that future batches did.  
Just a little learning curve!!

 I attempted to fill the molds with a spoon or spatula as suggested, but found that difficult.  So I made the batter a little thinner (about the consistency of thick pancake batter) and used a plastic dispenser to squeeze the batter into the molds.


This was a Wilton candy/frosting dispenser - just cut off the tip to make it larger for the batter!


So much easier.  You can see the "rows" of batter in the top picture but the fill out  
and puff up once baked!   Success!!


This recipe made about 34 treats and they were large - 3 inches each! 


I clearly have something they want.....


I had their FULL attention!

 Honey and Roxy were eager to taste test the soft treats and they loved them. They must have been good as  not a crumb of evidence remained!  The anticipation was almost better than the actual treat!  Love how eager they were to get those bites.

If you are interested, you can find it at the link above or on Amazon. The company also makes four different treat mixes for the machine, but honestly, it is so simple to make and provide your own fresh ingredients, that I don't find them necessary.

So.....this was my exciting Oscar evening.  The girls are now snoozing on the couch with tummies full of peanut butter treats and I am quite comfy in my pjs knowing that, in their eyes, I won the Oscar tonight for best culinary performance by a dog owner!  And that makes me quite happy and content......

Hope you had a wonderful Academy Award evening too!


Pin It Now!

Friday, February 28, 2014

Dutch Papercrafting Revisited - a Lacé card


The past few months have not only drained my energy, but I have been wanting to find the desire to make cards or bake and that was as far as I got - my thinking about it was not producing any tangible results! I poured over cards posted on Pinterest, looked at my favorite blogs, looked through my COLLECTION of card making books..... nothing sparked an idea.  So once again I went back to my first card making efforts - Dutch papercrafting.  And the ideas started.  I knew Penny Duncan  (Thank you , Penny! had created some cutline designs  also known as lacĂ© so I used her arch design to make a card for a friend recovering from surgery.  She just returned home, in record time, so I am glad the inspiration surfaced.

The printed paper is from my stash and it is double sided so that made the folding easy.  The solid colors are all from Paper Temptress of course - Neenah green, and bubble gum and banana split from the Pop Tones collection.  Her papers always make my projects look pulled together.  The sentiment is from the Cats Meow (line discontinued) and the pearls are from Kaisercraft.  Both the lacĂ© file and the tag were cut on the Silver Bullet Professional.  If you have not tried cutline or lacĂ© designs, well you just have to!  They are such fun and there are a wide variety of shapes that lend themselves to every type of card.  So give it a try!

I apologize for the camera settings. They were clearly off when I took the pictures and didnt catch it til I went to edit the photos.  Unfortunately the next few posts will be "off", but will work at getting them better going forward........  Oops!


The process of cutting and beginning to fold.  Instant gratification! 


The design with the backing contrast color...


Voila!!  So simple... 


The end result


The finished card


Pin It Now!

Tuesday, February 18, 2014

An Unexpected Part Two!

Well this is certainly a year of surprises for me.  I never dreamed when I shared my "Holiday to Remember" saga that there would be an epilogue!  As far as I was concerned, the "adventure" was over, but .......

Six days after returning home (and 24 hours after my last post!) I was back in the emergency room with a repeat performance.  I felt scared and defeated and was convinced that my own body was my worst enemy. I could not believe this was happening all over again... only this time it would be a three week hospital stay and a second surgery!  Happy New Year?... not so much :(

As I write this, I have been home for two weeks and am still recovering, having surrendered to my "new normal" and living by doctors' orders.  I realize it could have been so much worse and am confident I will soon resemble the person I was before all of this.  I am not used to having limits on what I can and cannot do.  I am truly grateful to have received excellent care and be on the path, albeit bumpy and twisted, to long term healing (fingers and toes crossed!).  I have accepted that there are more doctor visits and consultations in my future.  So I will take the baby steps to progress and continue to look for the little positives in every day...

Acceptance .....  Patience ..... Perseverance ..... Peace .....

I am working on all of the above.  It commands a daily commitment on my part to accept life as it is now, to be patient with myself and my body's ability to heal, to persevere on the bad days knowing they will not last forever, and to find a place of peace in each and every day.


And GRATITUDE...... my heart overflows with gratitude for the overwhelming kindness expressed in so many ways by family and friends.  Even though I am physically alone, I never really experience the isolation of loneliness.  My two faithful cuddling companions are quite content to have me back home where I belong.  (Are they not the cutest??!!??)


I am fortunate to have an abundance of  love and care in my life and deeply appreciate the time gifted to me by an amazing support system.  Carefully prepared meals have materialized at my door; the phone rings often with offers of help; and emails fill my inbox with warm and caring messages.  I am so very blessed.

I am looking forward to crafting and cooking again.  I miss both and am definitely eager to get back into doing all of the things I enjoy.....

See you soon .......... Pin It Now!