Tuesday, November 14, 2017

Even Sweeter Seventeen!

It is so hard to believe that my oldest granddaughter turned 17 the end of October.  How could that be possible when I still remember the day she was born so clearly??  Where has the time gone?  She is now a senior in high school and making college plans - yikes!

So what do you get a 17 year old for her birthday. For many years, when the girls were little, I got them clothes for their birthdays and toys for Christmas.  But Kendra is too old to have her Grammy picking out her clothes so I had to find something else to do for her that she would like.  She loves mandalas, so I had fun finding some great coloring books for her to enjoy and got her a huge collection of glitter gel pens.  I had started doing a little coloring on cards myself, so I at least had an idea of what products were good.  She was thrilled with the Amazon birthday delivery!

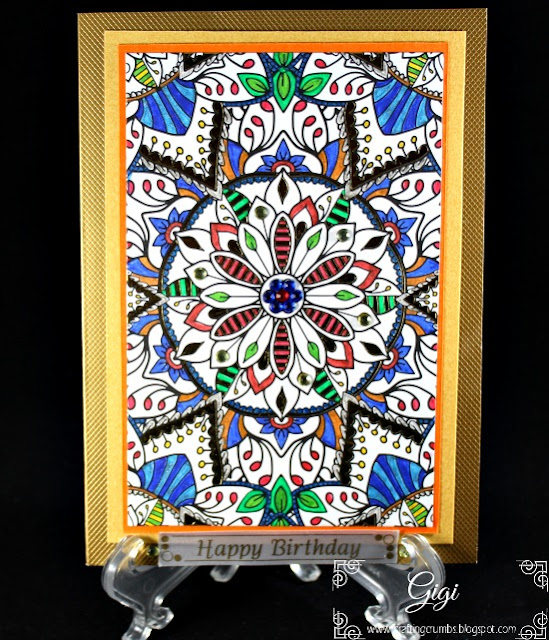
And I used her love of mandalas as inspiration for her birthday card.  I found a cool site - Monday Mandala.  They have a lot of downloadable mandalas and saved quite a few of them.  I like the variety and the one I chose for her.  This one is called Sunny Day - just right for a "happy" birthday card!

I printed it out and did a print and cut to make it a little more interesting on the card.  I did all of the coloring with glitter gel pens (they are addicting so consider yourself warned...) and enjoyed every minute of it.  Every time I color a card like this, I understand the popularity of adult coloring books.  It is relaxing and stress relieving. 


Here is the mandala all ready to be cut. I printed it on Paper Temptress
Cryogen  - it has a beautiful sparkle and is the perfect media for coloring 
with pencils, markers or gel pens and more.


You can see the perfect precision of the print and cut.


Here is the cut out mandala all ready to be colored. 
I tend to cut out first just in case I make a mistake setting
up the print and cut. I don't want to go to all of the work of coloring 
and then make a user error setting up the print and cut.


Almost finished - I like leaving some white for contrast - I think it lets 
the other colors shine be the stars!


I added two shadow layers to compliment the colors in the mandala and used small pearls to accent the outer edges. Foam dots were added to the back of the mandala when mounting it to the card front.

I was really happy to send this to my granddaughter, and happier that she loved it as much as I did!


Pin It Now!

Sunday, November 5, 2017

Happy 6 Year Anniversary!

I try to do something special when it comes to anniversary cards for my kids, and this time was no different.  But it was actually the first time I had ever made a gate-fold card. What was I waiting for?  Monica's files are SO detailed, but this cut beautifully with the Silver Bullet.  I wasn't sure exactly how I was going to pull it all together, but I am happy with the final results.


I can hardly believe that Megan and Scott have been married for six years.  Where has the time gone?  For their anniversary card this year, I turned to the beautiful and intricate files from Monica's Creative Room.  She has a wide variety of projects and cards and you can tell she puts many hours into the creation of each one. I have never been disappointed by her work and am in awe of it!


You can see the detail even with it still on the cutting mat. The 
card stock is Paper Temptress Vintage Luster - one of my all time favorites
You can see the beautiful texture in all of the photos...


Here is the file all cut out and ready to become a card.
I cannot get over the beautiful detail.


I cut a sheet of colored vellum just inside the card dimensions 
(choose inner shadow in SCAL) and glued it around the edges  
 to line the card and highlight the cut areas.


A closeup of the front all finished and ready for the mail.  
The pearls gave it a bit of elegance and interest.


I tried to "spotlight" the Happy Anniversary greeting,
 but it still didn't show up very well.

I wrote my personal message on a separate piece of paper and tucked it in the envelope behind the card so it wouldn't interfere with the design!  

May they have many more happy anniversaries!πŸ’•πŸ’•πŸ’•


Pin It Now!

Tuesday, October 31, 2017

Happy Birthday, Megan!

Even though the card arrived late to celebrate the birthday of my daughter in law, the blog post is even later!  But then as we get older we are supposed to celebrate the whole month, right??  So I am!  That's my excuse, for today, and I am sticking to it!


I have started experimenting a little more in card making, and I recently added an assortment of coloring cards from Anna Griffin to my "collection" of goodies. So I thought this might be a fun way to make Megan's card. I had a supply of glitter gel pens and they needed to be put to good use. So it was a fun plan that just needed to be implemented.

I underestimated how much time it would take to color in this card because you want to work in small areas and let the gel "set" so you don't smear it.  So I tried to work from the inside out and that was pretty effective. 

As I am sure you know, adult coloring books have been the rage for some time and I even have a few (empty of course!), but after making this card and a few others, I totally understand why it has become a "thing" for so many.  It honestly is relaxing and fun and stress reducing. There are no rigid rules and you can just express yourself however the mood takes you.  You can color every single space or you can leave some white space (as I have chosen to do here) to let the other areas shine.


Closeup of the center of the card with added rhinestone embellishments


The "Happy Birthday" was printed on white satin ribbon with the P-Touch Ribbon printer.
It is really fun to design the greetings with premade frames and so many options available.


If you have not ventured into the coloring book arena, I highly recommend it. You don't need expensive tools or special art mediums - anything works from colored pencils to markers of any kind, watercolor paints, gel pens (plain, metallic, glitter and/or neon), or anything else you can dream up.  I would recommend if you are coloring with markers, get a book that only has art on one side and put a sheet of paper on the back side so the color doesn't bleed through to the next image.  You can also find a wide variety of line art or mandalas online for free. I will have some info on that in a future post.  It's a great way to get in touch with that inner child in all of us!


Pin It Now!

Wednesday, October 25, 2017

A Birthday "Tweet"!

So the title of the post is a little corny, but it got your attention - right?  This was a fun card using images from Birds Cards.


I was able to keep it pretty simple since the background paper added the perfect "setting" and I didn't want to overdo it!  

The greeting was simply printed on vellum with an inkjet printer and embossed. It's one of the easiest ways to get a glossy raised image on any printing - it stays just wet enough to add embossing powder and heat.

A few sequins and pearls finished off the look.  I really had a good time putting this card together!!

Pin It Now!

Saturday, October 21, 2017

Condo Decorating with the Silver Bullet

So finally...... I can share with you a project that I created about a year and a half ago.  I have been waiting until all of the remodeling and patching and painting - and more patching and painting was finished so I could hang them and really show you the finished product in its new habitat!

The idea for these pictures came from Bed Bath and Beyond a couple of years ago. They had stenciled "art" hanging on the wall of the store and they were selling for about $15 apiece. I thought... "hmmm... I can do that!"  So I did!!  And it probably cost me less than $15 for all four of them. What a deal!!

I hope you enjoy these and that it gives you some ideas for super easy and fun decorating. They really add a nice touch to my beach condo.


The mirrored card stock behind the cut out stenciled image
is amazingly reflective and really looks like expensive mirror glass.
It makes it a very cost effective and fun project.


I love this angelfish (at least that is what I have always called them!


The pelican looks pretty laid back and relaxed to me!


Enjoying the many inhabitants of the ocean and the shore helps me totally unwind.  I can (and do) sit and stare at the beautiful view daily.  And whether I just have a few minutes or longer, I love it!


Finally these are hanging up in my home - two on the left wall of the entry....l


....And two on the right wall of the entry!

Pin It Now!

Thursday, October 12, 2017

A Special Two Year Old Birthday

My SeaHawk loving neighbors have such a precious grandson.  His name is Merritt and he is about six months younger than my grandson.  He is such an adorable boy and has easily won my heart.  When he comes to visit his grandparents, he goes out on the patio and yells my name - seriously!  There is nothing cuter than hearing this little voice calling "Gigi" as loud as he can.  It's so adorable.

The funny thing is, that when my grandson,Carter, comes to visit, he will go out on my deck and look down and say "Where's John?"    Those two little boys have us all wrapped around their little fingers - and we don't mind in the least!!

Recently, Merritt had his second birthday and his grandma needed a birthday card.  How could I say no??!!??  I was kind of stumped until I remembered a file from Ducky's Designs that I had used many years ago.  (By the way, we have been talking recently and she is slowly redoing all of her files and her website as well.  I am so excited to see what she comes up with so stay tuned!!)  Anyway,  her "Look Who's Turning ___" was perfect for Merritt.


I wanted it to be bright and fun.  He loved it!  (his grandma suggested that I just make all of the numbers and they can just trade the number out each year and keep using the card!!)

I love how the #2 came out - all glittered.  Who says boys can't have a little sparkle in their lives...right??


You can certainly see the sparkling prisms in the number 2!

And I do have a bit of a confession to make. I normally do not go into a lot of detail on the inside of the card. I just don't take the time.  I will often print a greeting on vellum and heat emboss it for the inside, but that's about it.  However..... I wanted to make this card extra special for Merritt, so I used some mirror card stock in the frame so he could see himself when he opened the card.  You can see the reflection of the "Happy Birthday"  on the left side of the card in the mirrored card stock.  Too fun!


Pin It Now!

Tuesday, October 10, 2017

A Special White Rose - to Honor the Loss of a Loved One...

Not too long ago, a dear friend of mine suffered the loss of her husband.  It had been a long well-fought battle against cancer, and unfortunately the cancer just would not give up.  We all know so many people who are fighting this dreaded disease right now and my prayers for strength go out to all of them.

So...how do you send a card to someone who has experienced such an extreme loss.  The words are difficult as are the images to choose.  So I thought about their love and how devoted they were to each other, and felt the white rose was the best image to express the beauty of their love that I know lives on into eternity.


A bit of a closeup of the Power Poppy Rose & Chamomille digi stamp.
I love the detail in the drawing and how delicate it appears...

This is the first part with the large rose sparkle embossed on
platinum vellum. I added a few gold pearls to compliment the gold card base.


 I created the center bud pop out so I could add it to the rose image
and get a dimensional effect.  I think it made it look even more ethereal.


God bless and be with my dear friends who may be physically separated, 
but  forever together in heart and soul.
I love you so.

Pin It Now!

Saturday, October 7, 2017

A SeaHawk Birthday Card

My neighbor (the same one who got me hooked on the Traeger) is a die-hard SeaHawk fan.  His enthusiasm for the team is only surpassed by that of his wife's.  Oh how they love their team!

So when his birthday rolled around recently, and just happened to coincide with the football season's first game - the theme of his birthday card was a no brainer!

I found a logo online, traced it, tried to duplicate the colors as much as possible - and created this fun card.


The Happy Birthday greeting is a digi stamp from Graciellie Designs, Elegant Greetings.  It is printed on a laser transparency and then foiled.  It's an easy and fun way to 
add an interesting background.


I tried to get the coloring of the foil, but also got the reflection of the transparency.


I had to include a closeup of the mascot!  And yes, there is green shimmer in his eye!


Pin It Now!

Tuesday, October 3, 2017

A Community College Retirement

I don't think I have ever made a retirement card before - and this one was SUCH fun. This special lady devoted her career at our local community college to overseeing the scholarship department.  She was so dedicated to every one of those students and she knew their hopes and dreams and rejoiced in their successes. She touched the heart of everyone who met her.  So I am sad to see her leave, but excited for the adventure ahead of her. She deserves to travel and kick up her heels!


So when I found a this "paradise" image among the stenciled clip art designs that I have, I knew it was the one to use for her card.  I wanted to make a happy, colorful card, and I think I managed that.  It was fun to use up a variety of paper scraps and emboss some of them for detail.


You can see the design in the sand from one embossing folder, and a different
one was used on the tree trunk.  Also used Nuvo Glitter Drops on the layers
of the water.  I sprinkled glitter onto the sun after it was coated in Glossy Accents.

The sky was painted with Distress Oxide inks - those are so much fun to use and they glided and blended easily over the glossy card stock.


I hope she is on an island somewhere...... sipping a cocktail and soaking in the sun...... AND relaxing!

Bon Voyage my friend!

Pin It Now!

Saturday, September 30, 2017

Mexican Delight Burrito Bowl - Part 2

So your mouth is now watering after reading about that delicious cauliflower rice - right? And you may be wondering how this could possibly get better - but it does with the addition of the pork carnitas. This was the first time I have attempted carnitas, but it will definitely not be the last.  This was SO good. (and SO easy!)

I had not planned to post this recipe so didn't take the normal array of photos - just one quick one at the end.  There are great photos at Carlsbad Cravings (link below) - in fact she has tons of mouth watering recipes along with fabulous photos.  Enjoy!

Pork Carnitas (slow cooker recipe)

adapted from Carlsbad Cravings

*these ingredients were for a 4-5 lb pork shoulder roast, but I only had a 3 1/2 and it was fine.  Just  makes this recipe more versatile!

4-5 lb. pork shoulder roast
1 T. olive oil
1/4 c. orange juice
1 t. liquid smoke
2 bay leaves
1 onion, chopped
1 jalapeno, deseeded and chopped
juice of one lime

Wet Spice Rub
3 T. olive oil
2 T. tomato paste
1 T. coconut aminos (or soy sauce)
1/4 c. coconut sugar (or brown sugar)
1 T. cumin
2 t. dried oregano
2 t. salt
1 t. chili powder
1 t. garlic powder
1 t. onion powder
1/2 t. smoked paprika
1/2 t. pepper
*1/2 t. Cuban Island spice (from Savory Spice Shop)

Heat the tablespoon of olive oil over medium high heat and sear the roast on all sides until it is lightly browned.  I used my Instant Pot (*love*) so was able to do everything in one pot.

After the roast is seared, place it on a cutting board or large platter and let it cool a bit.

In the meantime, whisk together all of the Wet spice ingredients in a small bowl.  When the pork has cooled to the touch, coat the roast with the spice rub on all surfaces and place it in the slow cooker or Instant Pot.  Add the orange and lime juice, liquid smoke and the 2 bay leaves.  Top the pork with the onion and jalapeno.  Cook on LOW for 8-10 hours or until the pork is fall apart tender and shreds easily with a fork.

Carefully remove the pork to a cutting board, shred it and return it back to the juices in the pot.  Cook on low for 20 minutes.  While it is cooking, preheat the oven to 450 degrees.  Line 1-2 baking sheets with foil (depending on the size of the roast.  A smaller roast will only need 1 baking sheet.

After 20 minutes, remove the pork from the slow cooker and place the shredded pork on the baking sheet(s) in an even layer.  Drizzle with some of the remaining juices and bake for 15-20 minutes, then broil until the meat begins to crisp.  Watch it carefully so it doesn't burn.  Drizzle with additional juices as desired and toss.

Serve over rice, the loaded cilantro cauliflower rice (YUM!), in a tortilla, on a salad - however you like.  Top with diced tomatoes, diced avocado, chopped green onion, chopped cilantro, - whatever you desire.

I sprinkled cotija cheese on top for an extra layer of flavor.

Pin It Now!

Thursday, September 28, 2017

Mexican Delight Burrito Bowl - Part 1 (the healthy part!)

Just to show I don't spend all day making cards (although I am not sure what would be wrong with that!) I have two recipes to share.....because after making them together, it was a definite "party in my mouth" experience!  And yes, you could certainly enjoy one without the other, but just this first time - make both!!

First of all, have you jumped on the cauliflower rice bandwagon??  I know - I had a hard time wanting to even try it and I like cauliflower - but the whole thing seemed too "different".  But I was so wrong - once again!  I have made several variations over the past few months and each was okay as a rice substitute, but THIS one is undeniably the best.  You can close your eyes and eat every morsel and never taste cauliflower.  You will be convinced you are eating a wonderfully flavored Mexican rice because of all of the luscious savory bites.  And you can prep a lot of it ahead of time - which is always a bonus!

Loaded Cilantro Lime Cauliflower "Rice"

adapted from Cooking Classy

1 medium head cauliflower (around 2 lbs)
2 T. olive oil
1/2 c chopped green onion plus more to garnish
3 cloves garlic, minced
1 1/2-2 c. frozen corn, thawed and WELL drained)
1 can black beans, rinsed and drained
1 firm avocado, diced
1 large Roma tomato, diced
1/3 c. fresh  cilantro, chopped (with more for garnish)
2-3 T. fresh lime juice ( I love lime juice in all things Mexican!)

Cut the cauliflower into florets and discard the core.  Some pulse the florets in a good processor, but I like the uniformity of grating it.  Set the grated cauliflower on paper towels to absorb any excess liquid.  You want it as dry as possible.

Heat the olive oil in a 12" skillet over medium high heat.  Add 1/2 c. green onions and the garlic and saute about 30 seconds. Add the grated cauliflower (aka cauliflower rice) and saute an additional 6 minutes or till crispy tender.

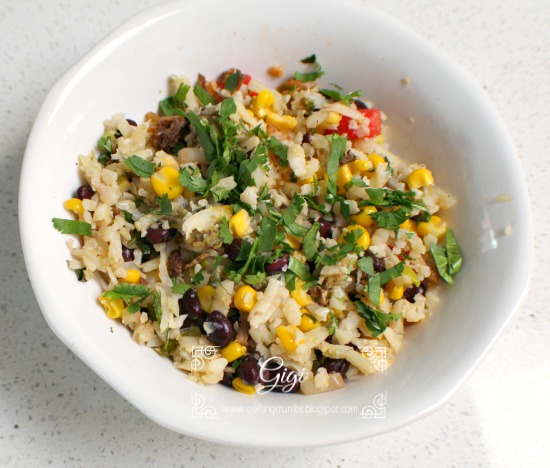
Add the corn and black beans, season with salt and pepper, and heat through a few minutes.  Remove from the heat and add the avocado, tomatoes, cilantro and lime juice and toss well.  Serve immediately.


If you are lucky enough to have leftovers, this reheats beautifully.  I used it as a base for a burrito bowl, but it would make a great side dish alongside a plate of enchiladas or tacos. It is SO good...

Stay tuned for Part 2 to see how I turned this into a fabulous main dish! Pin It Now!

Tuesday, September 26, 2017

Foiled Flowers - Part 2

This summer, thanks to Patricia at Paper Temptress, I became acquainted with the artistic images from Graciellie Designs.

The detail in that rose is incredible.  And it was such fun to do and relatively easy.

First I traced the image in SCAL and created a cut file for both the large rose and the center bud.I printed the digi images on regular card stock using a monolaser printer, foiled the images with the FoilMaster and then cut them out with the Silver Bullet. I also created a shadow image of the larger rose and cut out of a black card stock to make the image pop.


Always challenging to capture the beauty of the foil and the card at the same time!
Love the shimmer of the Paper Temptress Mica card base.


The rose image is from her Strong and Courageous collection.
The sentiment is from her Classic Greetings.


This view shows a little of the dimenwion -  
both the large rose and the center are on foam dots.


Pin It Now!

Saturday, September 23, 2017

Foiled Flowers - Part 1

The first card I would like to share uses a digi image from Power Poppy.  I love the intricacy and beauty of her drawings and wish I had 1/10th of her artistic talent.  But at least I can enjoy what she creates and share it with others.

This card was a process, but it was a reminder to me that sometimes you just have to stick with something until you get it right!  I decided I wanted to foil this image and originally printed it on colored card stock.  But no matter how I tried to frame it after it was foiled, the colors in the foil just washed out.  A lesson learned - a white background can be the best way to highlight a design as it doesn't interfere with it! So once I printed it on the white card stock and foiled the image, it was much better, but the lines were so thin it was a struggle to see the color variations in the foil.

I was ready to give up, but then remembered that I had the DecoFoil glue.  So I traced the already foiled image with the glue.  The tip was super fine and it was much easier to do than I thought it would be. It was really a dream to use.   I waited for it to get tacky and then reapplied the foil.  SUCCESS!  I had the result I wanted - and I was delighted. The photos just don't do it justice.                                                                                                           


This digi image is Tulips in Hobnail Pitcher from Power Poppy!


Trying to highlight the many colors in the foil and the dimension.
It is so pretty in person.


Although this was the finished card, it was difficult to get the right angle to capture the foiling.
But you can certainly see what a beautiful image this is!
See the photo below to catch a better view of the variegated foil.


Pin It Now!

Thursday, September 21, 2017

Birthday Blooms

So many August and September birthdays - which just means lots of cards to share!

I have been cleaning and reorganizing my craft room (seems to be a bi-monthly project!) and paused an extra minute or two when I ran across the two bins full of 4x6 patterned card stock pads.  Because most of the cards I make are larger, I forget to incorporate these smaller patterns. So with this card I realized I could cut it in half and use it as a great accent on a larger card. It worked out so well that I am eager to try it again!

The greeting was simply printed in SCAL on a monolaser printer, foiled in gold Deco Foil, and then cut into a tag image.  It was super simple but gave the card a nice finishing touch.


The main pattern for this card came from one of my Dover Electronic clip art books. Their images are royalty free and they easily convert into vector images for cutting.  And there are lots of options with each one - you can actually make a stencil, or cut out the pieces to mimic a stenciled design as I did here.

Here is another card using the Dover Electronic Clip Art.  I loved the soft image of the large butterfly and the flowers.  I used Paper Temptress Glimmer Text paper for the main image against the dark blue PT Incandescent.


I added some rhinestones for interest. I love this butterfly!

It felt like it needed a little something to stand out more, so I added glitter to the flower images and love the result. It often doesn't take a lot to make a statement.


A closeup of the flowers, embellished with Glamour Dust crystal glitter.

I totally forgot to take a final photo of the entire card as the glitter was an afterthought, but hopefully you get the idea!  It's a fun and sparkly card!


Pin It Now!

Sunday, September 17, 2017

Butterfly Wishes

I have a fun butterfly card to share today. When I look back at what I have created over the past two months, there has definitely been a recurring theme of sorts...butterflies, foiling, and florals.  Clearly, those are all things I love and I have enjoyed doing a lot of experimenting. Stay tuned for more!


First is just a simple foiled butterfly that I made for a dear friend.  The butterfly image is one of many from Crafty Vectors.  I printed it on a laser monoprinter, ran it through the FoilMaster with a variegated foil, and then cut it out using the SCAL software - it makes it so easy and is so exact.  The rest was just a matter of layering the card pieces together.  I love the simplicity of it.


Ready for the print and cut. 


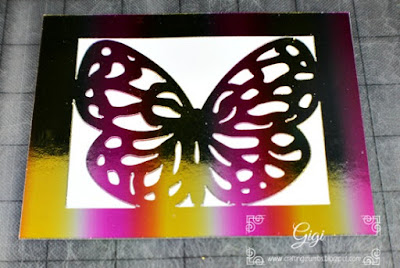
A closeup of the cut lines before it was pulled off the mat.

Oh - before I forget to highlight it, the "Happy Birthday"  ribbon is printed with the Brother P-Touch Embellish new ribbon and tape printer.  I have not used it a lot, but it is definitely fun to be able to print on ribbon and I will be glad when they come out with more ribbon options.  And it doubles as a tape printer so I love that it is multipurpose.

Lots more to come soon!


Pin It Now!