Showing posts with label dessert. Show all posts

Tuesday, July 2, 2019

Ambitious Kitchen Tahini Brownies - GF and fabulous!


I am still enjoying cooking and baking with Tahini and trying new things.  This recipe was on the Soom (my favorite tahini) website and I have been eager to make it.  Trust me - it doesn't disappoint.  Even better, these brownies are gluten free, grain free, and have no refined sugar (if you don't count the chocolate chips!)  These are delicious on their own or with a scoop of vanilla ice cream on top.  Major YUM!  I will be making these often!


AMBITIOUS KITCHEN'S TAHINI BROWNIES
adapted from Soom Foods

1/2 c. Chocolate Tahini
1/2 c. Tahini
1/3 c. coconut sugar
3 T. vanilla infused maple syrup (regular pure maple syrup is fine)
1 t. vanilla bean paste
2 eggs
1/4 c. unsweetened cocoa powder
1 T. coconut flour
1/2 t. baking soda
1/4 t. salt
1/4 c. dark chocolate chips

Preheat oven to 350.  Line an 8x8 inch pan with parchment paper.  Set aside.

In a large bowl, mix the chocolate tahini, regular tahini, coconut sugar, maple syrup, vanilla bean paste and eggs until smooth.

Gently fold in the cocoa powder, coconut flour, baking soda and salt until combined.  The batter will be thick.  Finally, fold in the dark chocolate chips until they are well distributed.

Spread the batter into the prepared baking pan.  Bake for 23-26 minutes until a toothpick inserted in the center comes clean.

Cool the brownies completely on a wire rack before cutting.  Enjoy!

Makes 16 bars


Pin It Now!

Monday, June 10, 2019

Luscious Lemon Bars


Luscious Lemon Bars

adapted from Once Upon a Chef

The Crust

94 g. unbleached flour (3/4 c.)
31 g. arrowroot starch (or cornstarch) (1/4 c.)
1/2 t. salt
58 g. powdered sugar (1/2 c.)
1 stick unsalted butter, cold and cut into 1/2" pieces

Line a 9 inch square baking pan with aluminum foil.  Push the foil into all of the corners and up the sides of the pan, using two pieces if necessary to ensure that the foil overlaps all of the edges. (the overhang will make removing the cooked bars from the pan so easy).   Spray the foil with nonstick cooking spray,  or grease it with butter.

Put the flour, arrowroot starch or cornstarch, powdered sugar and salt into the bowl of a food processor.  Add the steel blade attachment and pulse for a few seconds.. Add the chilled butter cubes and pulse to blend until the mixture resembles coarse meal, about 10 seconds.  Sprinkle the mixture into the prepared pan and press firmly with your fingers into an even layer, building up a thin edge around the sides to keep the filling from oozing under the crust.  Refrigerate for 30 minutes.

Be sure the oven rack is in the middle of the oven and preheat the oven to 350.  Bake the crust until light golden brown, about 15-20 minutes.

Lemon Topping

3 large eggs
300 g. raw cane sugar (1 1/2 c.)
2 T. lemon zest
5 T. fresh squeezed lemon juice (from 2-3 lemons)
 25 g. unbleached flour (3 T.)

In a medium bowl, whisk the eggs, sugar, lemon juice zest and flour together.  When the crust is baked, give the lemon mixture a final whisk and gently pour over the top of the crust.  Return the pan to the oven immediately and bake another 20-25 minutes or until the topping is set and firm.  Let cool on a rack to room temperature, about 45-60 minutes, and then cover and chill in the refrigerator until cold.  The bars will cut more easily when cold.

To serve, using the foil overhang, lift the baked lemon bard out of the pan and onto a cutting board.  Loosen the foil from the edges of the crust and remove.  Using a sharp knife (or a pizza cutter), trim the edges off (if desired), then cut into 2" squares.  Use a fine sieve to dust the squares with powdered sugar.  Store in the refrigerator and serve chilled.

These are not super sweet - they have a nice tartness to them.  I prefer a slighly tart lemon bar - SO GOOD!!


Pin It Now!

Thursday, March 2, 2017

Zucchini Chocolate Cake - the BEST!

I made this cake a few days ago and almost didn't get a picture of it.  Have had neighbors and family enjoying it (and I snuck a few bites in there as well) and kept forgetting to snap a photo.  So finally grabbed a couple last night and even included one "a la mode".

Actually - that paragraph was written back in December and then life got away from me.  So....... it looked like I needed an excuse to make this delicious cake again - so I did!!  It is unbelievably easy to make and the zucchini makes it so moist that you think it it much more decadent than it is.  Adding the dark chocolate chips makes it a bit "healthier"  - right?? 


Best Chocolate Zucchini Cake

adapted from Mel's Kitchen Café

3 large eggs
1 T. vanilla extract (I use Vanilla Bean Extract Crush)
1 1/2 c. organic cane sugar
1/4 c. plain Greek yogurt
1/2 c. milk
1/2 c. oil (melted coconut, avocado or canola  - I used coconut oil)
2 c. shredded zucchini
1 1/2 c. flour
1/2 c. unsweetened cocoa powder
3/4 t. salt
1 t. baking soda
1/4 t. baking powder
1/2 c. mini chocolate chips (added to the batter with the zucchini)
1/2 c. dark chocolate chips (totally optional but purely divine!)

Preheat the oven to 350.  Grease a 13x9" pan with cooking spray or oil and set aside.

In a large mixing bowl, whisk the eggs, vanilla, sugar, buttermilk and oil until well blended.  Stir in the shredded zucchini.

Add the flour, cocoa powder, salt, soda and baking powder. Stir until well combined and no streaks of flour remain. Do not over mix.

Spread the batter into the prepared pan. Sprinkle the 1/2. c. dark chocolate chips over the top. They will melt in and just add more delicious flavor.

Bake in the oven for about 25-35  minutes or until the top of the cake springs back when lightly touched and/or a toothpick inserted in the center comes out clean.


Let cool completely.  You can sprinkle powdered sugar on the top right before serving, frost it with your favorite frosting, serve it a la mode, or just enjoy it plain. It is so moist and good and with all of that zucchini and dark chocolate - it's even good for you!! (well, I can rationalize just about anything!)  You will want to make this again and again! 
(I cut half of it into bars and put them in the freezer.  It helps to keep it out of sight for times when temptation takes over! And it's also a treat to open up the freezer and realize there is a delicious snack/dessert whenever I want it!)


The ice cream takes this moist wonderful cake to dessert nirvana!


It is as moist and luscious as it looks.....


Pin It Now!

Tuesday, June 2, 2015

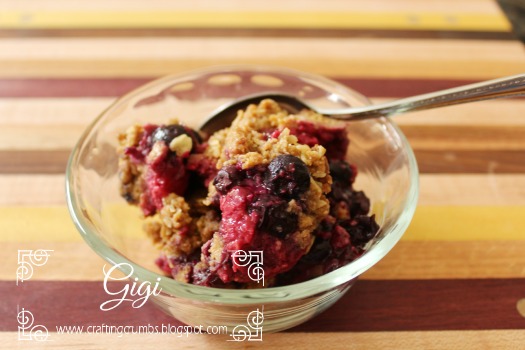
Mixed Berry Cobbler Crisp

This dessert coincided nicely with the Memorial Day weekend with the red and blue  (and of course a scoop  of vanilla ice cream or a dollop of whipped cream would be the perfect touch of white for a patriotic theme.)


Also, at least in CA right now, berries are a great price so I had beautiful fresh blueberries and raspberries in the fridge.   And I played with the original recipe and used coconut sugar to make it a little healthier (gives a lighter caramel taste and you don't get such a sugar rush) and added rolled oats, because they I can justify a few bites for breakfast - right??  I do the same with oatmeal raisin cookies - if they have oats in them, they are okay any time of the day :)  Some call it cheating but I call it healthy eating!  I can rationalize about anything!


Mixed Berry Crisp

adapted from Bake or Break

3 c. assorted berries (I used 2. blueberries and 1 c. raspberries)
1/2 Tbsp. lemon juice
1 c. organic all purpose flour
1/2 tsp. baking powder
1/2 tsp. salt
1/2 c. butter (1 stick), softened
3/4 -1 c. coconut sugar (if  you want it sweeter, use the 1 c. as coconut sugar is not as sweet as brown sugar.  I was perfectly happy with the 3/4 c., however)
2 tsp. vanilla extract
1/2 c. rolled oats

Preheat oven to 375.  Grease a 9x6" rectangle pan or an 8-9" round baking dish.

Place the clean and drained berries in the prepared baking dish. Drizzle the lemon juice over the top of the berries - no need to mix.

Whisk the flour, baking powder and salt in a small bowl and set aside.

For ease of clean up, I prepared the topping in a food processor.  (If you prefer, you can beat the butter, sugar and vanilla together until creamy and then mix in the flour mixture until crumbly and proceed).
Place the softened butter, vanilla and coconut sugar in the food processor and pulse until it is nice and creamy and well blended. You may need to scrap down the sides once, but this will blend quickly! Add the flour mixture and the oats and pulse a few quick times until you have a crumbly mixture that is well incorporated.


Ready for the oven...

Sprinkle the mixture evenly over the top of the berries so they are covered evenly.

Bake for 30 minutes, or until the top is lightly browned and the fruit is bubbly.


Freshly baked...

This is SO delicious. You could easily double the fruit and use the same amount of topping if you want . And this would be delicious with peaches or apples or apricots or.....  I cannot wait to make it again and doing most of the work in the food processor made it even easier!


Pin It Now!

Sunday, September 7, 2014

Low Sugar Peach Crisp......heavenly!!


Have you noticed how sweet and juicy the peaches are this summer?  I mean they are usually delicious, but they are even sweeter this year - or at least they seem like they are!!

I love to make apple crisp in the fall, but often forget that other fruits taste delicious baked with that slightly chewy wonderfully buttery oat topping.  That is my favorite part of the crisp!

I decided that I wanted to try to reduce the sugar in this and I am so glad I did because it tastes just as good as the full sugar recipe but it's healthier (as long as you don't focus on all of the butter that goes into the topping.  Can't win em all!!

I took my inspiration from a recipe on Cooking Classy, substituted the sugar with Truvia Baking Blend and Splenda brown sugar blend, and added a few more spice flavors.  For the final touch, I sprinkled some almond macaroon granola over the top to add a little extra crunch to the topping. I am so glad I did that!

I hope you enjoy it as much as I intend to!! (and as far as I am concerned, peach crisp is not only a dessert, but works well for breakfast with a spoonful of vanilla yogurt on top.  Anytime you want to entice your taste buds with peachy cinnamon goodness is the right time for this!

LOW SUGAR PEACH CRISP

adapted from Cooking Classy

Filling
3 lbs peaches (about 7 medium ), peeled, cored and sliced into thick wedges (about 3/4")
2 Tbsp. fresh lemon juice
1/8 cup Truvia Baking Blend
1/2 tsp. LorAnn Cinnamon Baking Emulsion (optional)
2 Tbsp. flour

Topping:
3/4 cup flour
3/4 cup regular oats
1/4 tsp. salt
1/2 tsp. cinnamon
1/8 tsp. ground nutmeg
1/8 tsp. ground ginger
1/4 tsp. apple pie spice (optional)
3/8 cup Splenda Brown Sugar Blend
10 Tbsp. unsalted butter, chilled and cubed in 1/2" pieces
1/3 cup granola (optional - for added "crunch")

Preheat the oven to 350.  Toss the peaches with lemon juice in a large bowl.  Sprinkle the Truvia Baking Blend and flour over the peaches and lightly mix to coat evenly.  Butter a 11x7 or 13x9 inch pan and pour the peach mixture into the pan.


Sugared peaches....


Ready to bake oat topping...

In a food processor (you can do this step by hand, but it's easier this way!), mix the flour, oats, salt, and spices.  Add the Splenda Brown Sugar Blend and the chilled cut up butter and pulse until the mixture is crumbly.  Pour over the top of the crisp and sprinkle with additional granola (if the taste and crunch is desired).  Bake for about 35-30 minutes or until the topping is golden brown and you can see the fruit bubbling.  Serve warm or cold with whipped cream, Cool Whip, or vanilla ice cream.


Fresh out of the oven...


Oh yummmmm....


And a dollop of whipped cream makes it even better...


And don't forget a dusting of cinnamon sugar on top.  You really need to make this now and enjoy every single bite.....  This is now the ONLY way I want to eat peaches!...


Pin It Now!

Saturday, November 9, 2013

Gorgonzola Cheese Ball and Chocolate!!

No I am really not recommending that you eat the two together!  But they were served in one within a few hours of each other, which I am sure makes the title more palatable!

This cheese ball is a hit whenever I bring share it with friends or family and it is SO easy to make.  The original recipe calls for toasted pecans which add a delicate nutty flavor, but since I had guests that were not crazy about a nut coating, I used chopped chives, straight from the garden.  I love being able to pick fresh herbs as I need them.

So this is how the evening began...... I cannot even find the words to tell you how tantalizing (and somewhat addicting!) this is.

Disclaimer:  Yes I blew it. I was so intent on getting everything done that I totally forgot to take pics of the ingredients and all of the steps for both recipes.. So feel free to use your most vivid imagination!


Almost ready to be served....

GORGONZOLA CHEESE BALL

adapted from Best of the Best Fast And Fabulous Party Foods and Appetizers

1/2 stick butter, softened
1 - 8 oz. pkg. cream cheese, softened (I used the low fat variety)
1 - 8 oz. pkg. gorgonzola cheese, crumbled
1 - 8 oz. can chopped ripe olives
1/2 cup. fresh coarsely chopped chives OR
1/2 cup  coarsely chopped pecans, toasted (optional)

With an electric mixer, beat the butter, cream cheese and gorgonzola cheese on low speed until very smooth. Stir in olives and chives and chill.

When firm, shape the mixture into a ball and chill until ready to serve (this can be done the day before).

Before serving, roll in either the chopped chives or toasted chopped pecans.  Because I had company who did not like nuts, I used the chives and it was delicious. It is equally delicious with the toasted pecans.

Serve with an array of crackers and apple slices.


Honeycrisp apples and multigrain crackers adorn the cheese ball. YUM!

After dinner we came  home to celebrate some special occasions.  I neglected to get photos as we cut into these delicacies because I think we were all too engrossed in watching the stream of chocolate 
flow out of these little indulgent cakes.  O.......M........G!!!

So forgive me for not including the luscious chocolate river..... but just use your imagination!


Delicious blend of ingredients.....


WARM CHOCOLATE BROWNIE CUPS

adapted from Best of the Best Recipe Hall of Fame Guilty Pleasures

6 oz. bittersweet chocolate, coarsely chopped (I used Ghirardeli - easy to find)
3/4 cup unsalted butter
3 eggs, room temperature
3 egg yolks, room temperature
6 Tbsp. sugar
2 Tbsp. pure vanilla extract
1/2 tsp. salt
5 Tbsp. flour
Garnish with fresh raspberries and créme fraiche

Preheat oven to 375.  Butter and flour 6 - 6 oz. custard cups. Set aside.  In a medium saucepan, melt chocolate with butter over low  heat.  Let cool slightly.  In a medium bowl, combine eggs, egg yolks and sugar.  Beat until mixture is pale and a ribbon dissolves quickly when the beaters are lifted, about 10-12 minutes of med. high beating.  Add vanilla and salt.  Beat in flour.  Add chocolate mixture and beat until thick adn glossy, about 5 minutes.  Pour batter equally into the cups. (At this point the cups can be covered with plastic wrap and refrigerated overnight or frozen for a short time.)

When ready to serve, remove from the refrigerator or freezer, place on a baking sheet, and immediately in the preheated oven.  Bake until each cake is set around the edges, but moves slightly in center, about 10 minutes,, or 15 minutes if frozen; don't over-bake.  Let cool slightly.

Run a knife around the edges and invert onto dessert plates.  Garnish each with a spoonful of créme fraiche and fresh raspberries.

A Note...... at first bite we were all sort of disappointed. Our taste buds were expecting something sweet and fudgy and over the top rich. But instead we got a gentler, less sweet chocolate. It was almost disappointing at first.  It took a minute for the struggle between expectation and reality to settle down - and then bite after bite it just got better and better! Had it been a darker sweeter chocolate, it would have been too over the top and hard to eat. This was a happy surprise!


The perfect ending to any evening!


Pin It Now!

Tuesday, October 15, 2013

Amazingly EASY Peach Cobbler

I love it when I find something that is so incredibly easy AND good.  I really like to try to bake as much as I can from scratch. But there are times when there just isn't the time or the energy to take those extra steps.  So when I ran across this recipe I was more than willing to give it a try, and it was unbelievably easy and surprisingly good.

I will admit to having my fair share of cake mixes stored away in the pantry that I have picked up on sale. There is always a need for something quick and easy, and I have all of the Cake Mix Doctor cookbooks that put this supply to good use.  It is always comforting to have a back up plan , right?

So this recipe was not only easy, but delicious, and I imagine you could easily substitute apples or any combination of berries.


Oops - forgot the blueberries in the picture!

SUPER EASY PEACH COBBLER


There is actually very little that I changed with this recipe because when there are only FOUR ingredients, there isn't much leeway!

1 box cake mix (I used Butter Golden)
1 (12-oz can) diet Seven-Up
4-5  cups fresh peaches, chunked
1 cup fresh blueberries
2 TBSP cinnamon-sugar

Peel and slice fresh peaches into chunks. Place into a 13x9 inch pan that has been sprayed with non-stick spray. Scatter the blueberries over the top of the peaches.


Step 1 - add the fruit!


Sprinkle the dry cake mix directly on top of peaches. Use a spoon or rubber spatula to gently press the cake mix down into the fruit.

Pour the can of soda on top of the cake mix,, making sure to cover the cake mix completely. It will bubble up and look rather inedible!


The Seven-Up is foaming!

Preheat the oven to 350 degrees. Do not preheat earlier because you want to give the cobbler time to sit and bubble and just be!

Sprinkle the cinnamon-sugar on top of the soda. It will pop some of the bubbles, but it will still be very runny on top.


Adorned with cinnamon-sugar.


Bake cobber for 1 hour. Remove from oven and let cool for about 5 minutes. Serve with vanilla ice cream or whipped topping! 


The smell of this right out of the oven is heavenly!


Yum!!  You can leave the whipped cream off
and eat it for breakfast too!
Pin It Now!

Monday, September 2, 2013

Peach Melba Cobbler

I don't know about where you are living, but, but the peaches that have been available here this year have been incredible.  I am not always a huge peach fan, I think because I have had my share of mushy flavorless peach mpostors. You know the kind? They look so good on the outside,but you cut into them and you just know that first bite will not be memorable, at least not in a good way.

But this summer has been an entirely different experience.  Ohhhhhhhhh goodness....... they have been juicy and sweet and just plain delicious, bite after bite........pound after pound!  So I have been eating them for snacks and cooking with them.  And when I saw this recipe on Iowa Girl Eats (love her!), I knew I had to make it with a twist. She used peaches and blueberries, but I reverted to my Peach Melba obsession and used raspberries.  AND...... I made it low sugar.   It was so delicious. The only thing I would change is to put it in a smaller, deeper dish so the fruit layer has more depth and then the cobbler would cover it completely - or at least almost!

It is delicious plain, with whipped cream or Cool Whip, with a scoop of vanilla ice cream or Healthy Choice vanilla bean yogurt (see pictured below) and works either hot or cold.  You just cannot go wrong!!

And in my world,  when it is mainly fruit, it works for breakfast too! :)


Low Sugar Peach Melba Cobbler


adapted from Iowa Girl Eats Peach A Berry Cobbler

1 c. flour
1/4 c. Truvia Baking Blend (or 1/2 c. sugar)
1 1/2 tsp. baking powder
1/2 c. milk
1/4 c. butter, softened
1/8 c. Splenda Brown Sugar Blend (or 1/4 c. brown sugar)
1 Tbsp. cornstarch
1/2 c. cold water
3 c. sliced fresh peaches, skin on (3 large peaches)
1 c. fresh raspberries
1 Tbsp. butter
1 Tbsp. lemon juice
1 Tbsp. Truvia Baking Blend (or 2 Tbsp. sugar)
1/4 tsp. cinnamon

Preheat the oven to 350.

Topping Mixture:

Combine the flour, 1/4 cup Truvia baking blend, and baking powder in a large bowl and stir to combine.  Add milk and butter and stir until relatively smooth and set aside.

Fruit Mixture:

In a large saucepan, whisk together the Splenda brown sugar blend, cornstarch, and water until smooth.
With heat on medium, add the peaches and raspberries,  and cook until mixture is thick and bubbly, mixing with a wooden spoon.  Add the remaining butter (1 Tbsp) and lemon  juice and stir until the butter is melted.

Pour mixture into an ungreased 1 1/2 quart baking dish (I used a 10"x10" glass dish. Next time I would use a smaller, deeper dish for more fruit concentration and a better coverage of cobbler batter.)  Spoon topping mixture over the top of the fruit.  It does not have to be even or cover completely.  Blend the cinnamon and sugar and sprinkle over the top.

Place baking dish on a cookie sheet and bake for 30-35 minutes or until a toothpick inserted into the center of the dough comes out clean.


Are these not the most beautiful peaches???


Peaches and raspberries simmering goodness...


All cooked and waiting  for the cobbler dough!


Ready for the oven with a sprinkle of  cinnamon  sugar.


All cooked and ready for a taste test!!

This is delicious on its own, with vanilla frozen yogurt or ice cream, or whipped cream or topping.


I love the individual serving cups of frozen yogurt from Healthy Choice!


Who wants the first bite???


Pin It Now!

Thursday, August 1, 2013

Blueberry Crumb Bars - Low Sugar

I am sure you  have noticed -I cannot seem to get enough blueberries over the past few months. Every time I go to the store they look and smell better and are bigger and brighter?  How is anyone supposed to resist?  Clearly I haven't!

So armed with a fresh supply of these juicy morsels I happily baked - and have a stack of things to try over the rest of the summer as long as the weather isn't too sweltering here in CA!

The prep was fun and easy!

BLUEBERRY CRUMB BARS

adapted from the Brown Eyed Baker

CRUMB CRUST:

3 cups flour
1/2 cup Truvia Baking Blend (or 1 c. sugar, Splenda or Truvia)
1 tsp. baking powder
1/4 tsp. salt
1 cup cold, unsalted butter,cut into cubes
1 egg

FILLING:

4 cups fresh blueberries
1/4 cup Truvia Baking Blend  (or 1/2 c. sugar, Splenda or Truvia)
4 tsp. cornstarch
juice of 1 lemon
zest of 1 lemon

DIRECTIONS:

Preheat oven to 375.  Lightly grease a 13x9" pan.

(The original directions called for using a pastry blender and feel free to do that. But I used a food processor and it came out perfectly crumbly!  So those are the directions I am using!)

In a food processor bowl (at least 9 cup capacity), add flour, Truvia Baking Blend, baking powder , salt and cold butter in cubes.  Quickly pulse the ingredients just until it seems blended and then add the egg and pulse a few more times.  If you overprocess, it will come together like a dough!

Press  half of the mixture (about 3-3 1/2 cups) into the baking pan.

In a large mixing bowl, whisk together the remaining Truvia Baking Blend, cornstarch, and lemon juice.  Then fold in the blueberries and lemon zest and gently mix until the berries are coated.  Spread the blueberry mixture over the crust, distributing the juice over the filling too.  Crumble the remaining mixture over the top of the blueberry filling. (I sprinkled some mini cinnamon chips over all - purely optional).

Bake for 45-50 minutes or until the top is light golden brown.  Cool before cutting into squares.

DELICIOUS!!


And the finished product was even better!!

Pin It Now!

Tuesday, July 16, 2013

Chocolate Zucchini Bread - LOW CALORIE!

OH MY GOSH!!! This may be my new favorite recipe for zucchini.  It was SO easy and so good.  If you have a surplus of zucchini adorning your garden, or even if you have to go to the store or the Farmer's Market to get some, it is SO worth it!  Trust me - you just HAVE to make this!


Can you see how moist this is??

CHOCOLATE ZUCCHINI BREAD

adapted from Eat More of What You Love by Marlene Koch

1/4 cup canola oil
1/8 cup Splenda brown sugar blend*
1/3 cup Truvia Baking Blend **
1 large egg
1 large egg white
1/2 cup unsweetened applesauce (I use the little individual serving cups - perfect!)
1 tsp. vanilla extract
1 1/2 cups grated zucchini
1 1/2 cups flour
2-3 teaspoons orange zest
1/2 cup cocoa powder
1 tsp. baking powder
3/4 tsp. baking soda

*Splenda brown sugar blend can be replaced with 1/4 cup regular brown sugar
**Truvia Baking Blend can be replaced with 2/3 cup Splenda OR 2/3 cup sugar

Preheat the oven to 350.  Spray a loaf pan  (9x5") with nonstick baking spray.

In a medium bowl, blend the oil, brown sugar blend, Truvia baking blend, eggs, applesauce and vanilla and whisk it well.  Add the grated zucchini and stir until well combined.

In another medium bowl, mix the flour, cocoa powder, baking powder, baking soda and orange zest.  Make a well in the center and add the zucchini mixture.  Stir just until the dry ingredients are moistened.  Pour mixture into the prepared pan..


You can see the richness in the batter, along with the zucchini!


Bake for 50-55 minutes or until a toothpick inserted into the center comes out clean.  Cool in the pan on a wire rack  for 15 minutes and then remove from pan to finish cooling. When it is completely cool, dust with powdered sugar.


All ready adorned with powdered sugar!


Sliced and ready to serve....and eat!! 
You will not believe this is low calorie but IT IS!!


This would be great with a scoop of  ice cream on top for an added treat (although that kind of ruins the low calorie part!!)  If it's too tempting, put it in the freezer sliced and take out a slice when you are ready for a treat.  Eating it frozen is almost like eating an ice cream cake without the ice cream.  YUM!
Pin It Now!