Friday, June 27, 2014

Chocolate Chunk Zucchini Bread


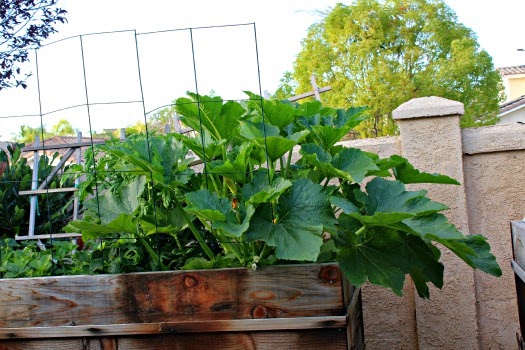
More zucchini from the garden dictated that part of the day would be spent baking.  I now have 4 LARGE zucchini just about filling the vegetable bin in the fridge!!  I may just do a simple zucchini saute tomorrow with a sprinkling of parmesan cheese - that is hard to beat. I also remember seeing a recipe for zucchini lasagna.
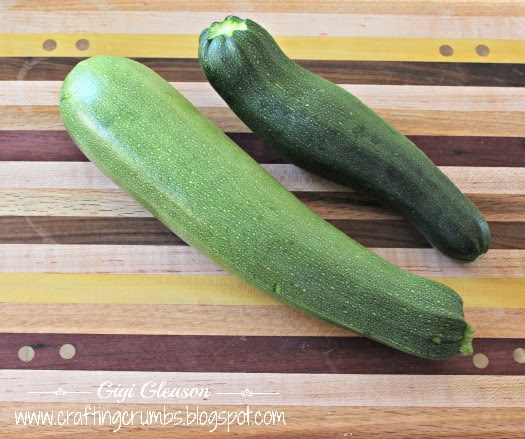
These extra large zucchini would be perfect!

I am not sure that the four cups of zucchini in this bread recipe is enough veggie to counteract the decadence of the chocolate chunks... I mean can you really have a slice of this for breakfast?????  I won't tell if you don't!.  Clearly the chocolate inclusion has not stopped me from indulging!

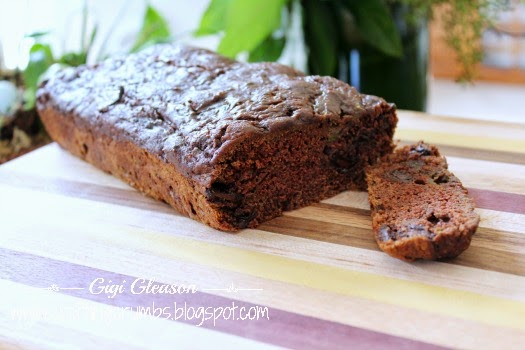
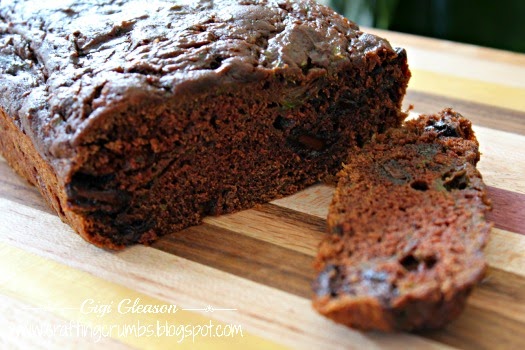
So here it is - the absolute BEST EVER chocolate zucchini bread.  It gets better with age (I keep it in the fridge) and gently warming a slice in the microwave creates little puddles of lusciousness in every bite.
Consider yourself warned!!


CHOCOLATE CHUNK ZUCCHINI BREAD

adapted from Your Cup of Cake

4 c. grated zucchini
2 1/2 c. bread flour* (or regular flour)
1/2 c. unsweetened cocoa powder (I prefer Dutch process)
2 tsp. baking soda
3/4 tsp. salt
1 c. sugar
1/2 c. muscovado sugar (can use regular brown sugar)
2 eggs
3/4 c. butter (1 1/2 sticks), melted
1 tsp. espresso powder
1/2 tsp. almond extract
1 tsp. vanilla extract (I like to use vanilla bean crush from King Arthur Flour)
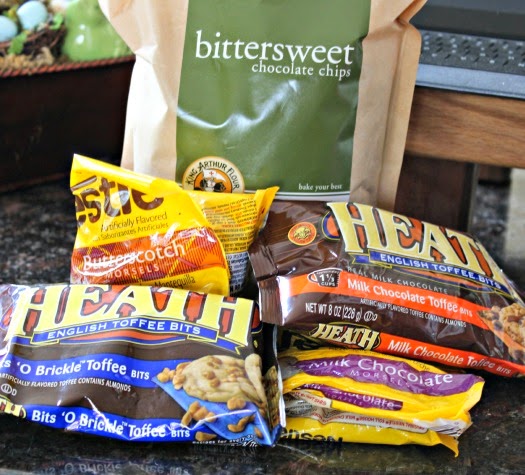
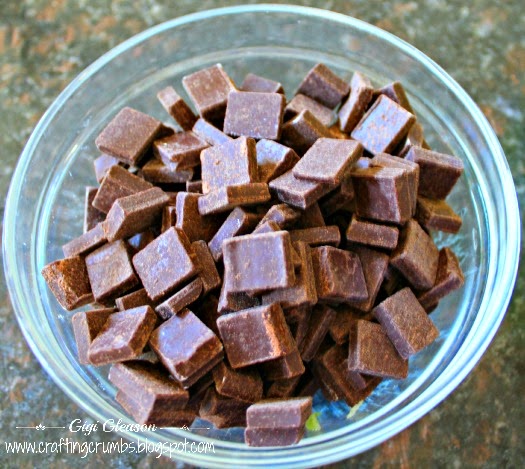
1 1/2 c. dark burgundy chunks (King Arthur Flour) - regular chocolate chips can be substituted

Preheat the oven to 350 degrees and grease two loaf pans (9x5"). Can also just use one and make a larger loaf.

Grate the zucchini in a food processor and set aside.
In a medium bowl. mix the flour, cocoa powder, baking soda and salt.   In a large bowl, combine the sugars, eggs, melted butter, espresso powder, almond and vanilla extract.  Slowly add the flour mixture to the wet ingredients.  Do not overmix; the batter will be thick.
Add the grated zucchini and chocolate chunks and stir until just mixed.  Pour into the loaf pan(s) and bake 45-50 minutes or until a knife inserted in the center comes out clean. (Bake closer to 50-60 minutes if making one large loaf)


A LOT of shredded zucchini!


Dark burgundy chunks (King Arthur Flour)


Let cool for 10 minutes and then remove from the pan to finish cooling on a wire rack.  The flavors develop even more the next day.  Refrigerate if not using within 2-3 days.

This is my new favorite recipe for chocolate zucchini bread.  It is incredibly moist and delicious.


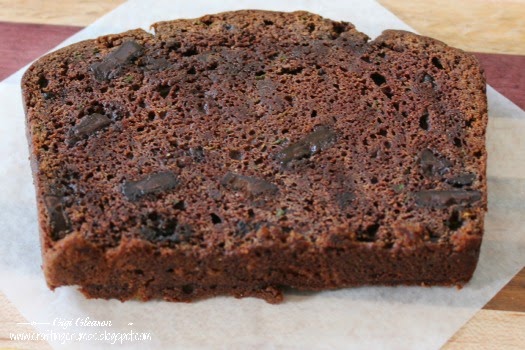
Can you see ALL of those chocolate chunks???


And it's so moist!


Dark chocolate IS healthy, especially with zucchini!


Pin It Now!

Monday, June 23, 2014

Baked Zucchini Fries


My healthy and prolific zucchini plant - yes just one!


You can see some of the first in this photo...


Zucchini is bursting out all over and I couldn't make one more loaf of zucchini bread and none of my neighbors or friends want to see any more of it either! (recipes coming soon)... so.... when I found this recipe I knew it was the perfect thing to go with some grilled chicken breasts, and it was really perfect.  My results were a bit different because I used panko crumbs and real Parmesan cheese which were both a bit bulkier than the original recipe, but they were still delicious and fun to eat!

Zucchini Fries with Dipping Sauce

adapted from Yummy, Healthy, Easy
1/2 c. Panko breadcrumbs
1/2 c. finely grated/ground Parmesan cheese*
1 tsp. garlic powder
1 tsp. Italian seasoning mix
1 1/2 tsp. salt
1/2 tsp. pepper
2 tsp. flour
1/4 c. milk
4 medium zucchini

Dipping Sauce:
1/4 c. plain Greek yogurt**
1 1/2 tsp. dry ranch dressing mix
1 tsp. milk (optional)

Preheat the oven to 425.  Line a cookie sheet or baking pan with parchment paper. This step is a great mess saver!

In a small bowl, combine the Panko crumbs, Parmesan , spices and any leftover flour *.  Mix together.


Cut the ends off the zucchini and slice in half lengthwise. Depending on the size of your zucchini, cut each half into fourths or sixths and then cut in half again crosswise.

Pour the milk in a flat bowl.  Dip the zucchini sticks in the milk, and then dredge in the Panko-cheese mixture and place on the cookie sheet in a single layer.  When all are done, bake for 15-20 minutes or until golden brown and crisp..

While the zucchini is baking, mix the dipping sauce ingredients, adding the milk if needed to thin the dip.

Serve with the zucchini fries and enjoy. These were a fun treat!


Breaded and ready for the oven...


Golden brown done!


A plate of healthy tastiness...


*The original recipe called for powdered Parmesan cheese. I don't keep that in the house, so I grated a small amount of Parmesan cheese and then put it in my Vitamix blender to get an even finer grind.  Since it was a little moist, I added some of the 2 tsp. flour to absorb the moisture and help the cheese become as fine as possible.

Parmesan cheese ground fine in the Vitamix


**I have been making plain Greek yogurt in my Cuisinart yogurt maker for several months now and LOVE it.  The dip recipe was made using my homemade Greek yogurt. It is SO delicious and doesn't have any of the additives that you get when you buy it at the store.  More on my new addiction/pleasure/taste treat in the near future!


The cool tangy dip with the hot flavorful zucchini is the perfect summer duo

Pin It Now!

Thursday, June 19, 2014

Low Sugar Raspberry Swirl Lemon Poppy Seed Bread

There was a great sale on blueberries, raspberries and blackberries this week at the local health food store and I stocked up.  I knew I wanted to make blueberry jam and raspberry jam, and finished those this morning. I love being able to make my own jam with the Ball Electric Jam Maker (see earlier post).

Once they cooled and were refrigerated, I decided to put some of the excess raspberry jam to good use.  I would not have thought to layer the jam in the middle of the quick bread without the ingenuity of other food bloggers. This recipe is delicious and the original recipe is linked below.

I love trying new things, changing ingredients just a little, and still have it turn out delicious.  And I really didn't think I loved poppy seeds that much, but in this bread, they melt in your mouth and add great flavor!


This tastes as good as it looks - maybe even better :)

Low Sugar Raspberry Swirl Lemon Poppy Seed Bread

adapted from Eat Cake for Dinner

1/4 c. butter, softened
3/8 c. Truvia Baking Blend
1 egg
1 egg white
2 tsp. vanilla extract (or 1 tsp. double vanilla extract)
3/4 c. non-fat vanilla bean Greek yogurt (I used Fage FroYo vanilla)
1 1/2 c. all-purpose flour
1 tsp. baking powder
1/2 tsp. baking soda (if using regular sugar, decrease the baking soda to 1/4 tsp.)
1/8 tsp. salt (otherwise known as a dash!)
2 Tbsp. poppy seeds
1/3 c. raspberry jam (I used my low sugar homemade raspberry jam)


Lemon Glaze

1 c. powdered sugar

2 Tbl. lemon juice
1 tsp. meringue powder (optional) to help harden the icing.  A great tip from Jen!


Preheat oven to 350 degrees.  In a medium bowl, cream together the butter and Truvia Baking Blend.  Add the egg, egg white, vanilla extract, lemon zest and mix until well blended.   In a separate bowl, combine the flour, baking powder, baking soda, salt and poppy seeds and whisk together  Add dry ingredients and Greek yogurt alternately to the batter, starting and ending with the dry ingredients and mix until just combined. Do NOT overmix.
Spread half of the batter into a 9x5-inch lightly greased loaf pan.  Top with raspberry jam, and spread over the batter leaving about 1/2" border of batter.  Do not swirl the jam.  Top with the remaining batter and carefully spread out evenly to the edges, being sure to cover all of the jamBake for 45-50 minutes or until a toothpick inserted in the center comes out clean. Cool in pan 10 minutes, then invert to a wire rack and cool completely. Meanwhile, make the glaze.


Drizzle the glaze over the cooled bread (see photos) or cover the whole loaf with the glaze, your preference.


The jam is my  homemade low sugar raspberry jam. YUM!


This will definitely be making a return appearance often at the breakfast table.  
It is the perfect complement to a cup of coffee - and makes a great mid afternoon snack too!


Pin It Now!

Saturday, June 7, 2014

Low Sugar Blueberry Muffin Coffee Cake

This post was supposed to go up early last week, but I got distracted with cards!  So the timeline is a little off, but the end result still works!
-----------------------------------------------------------------------------------------------------------
I was going to bake all week, but my air conditioning died and I didn't want to add any additional heat to the house.  It started malfunctioning a week ago, Memorial Day of course, with water all over the garage floor. My first thought was the water heater, but I had just replaced it less than a year ago.  So it must be a broken pipe somewhere, right?  So the next morning a plumber was here after at least four phone calls to make it happen, only to find out that there was no broken pipe, and I was $90 poorer!!  It was the furnace! Never would I have thought that the furnace would leak water, but it was from the condensation that builds up from the air conditioner . (I know - TMI!) The pan had mysteriously broken and so was not catching the water, hence the mess on the floor!  Ugh.  So it took a couple of days to see if it was still under warranty,find the part, order it , etc etc. The part is supposed to arrive tomorrow and then they will get the air back up and running again, just in time for the weather to cool off for a few days.Just my luck!

So......I decided that I was going to bake anyway, but start really early in the morning.  I had three baskets of blueberries waiting for me, so that narrowed down my options.  I had just run across this recipe a few days ago, so the decision was easy!


It IS as good as it looks!


Low Sugar Blueberry Muffin Coffee Cake
adapted from The Baker Chick


Cake Ingredients:
2 c. flour
1/2 tsp. baking powder
1/2 tsp. baking soda*
1/2 tsp. salt
1/2 c. butter, softened
1/2 cup Truvia Baking Blend (if using regular sugar,increase to 1 cup)
2 eggs
2 tsp. Vanilla Bean Crush (King Arthur Flour)
1/2 c. lemon Greek yogurt (plain or vanilla is also fine)
2 cups blueberries, fresh or frozen
*Omit the baking soda if using regular sugar.The soda helps increase the volume if using the Truvia Baking Blend.

Topping Ingredients:
2 Tbsp. muscovado (molasses) sugar
2 Tbsp. butter, melted
1 Tbsp. flour
4 Tbsp. rolled oats
1/4 tsp. cinnamon

Mix the topping ingredients together until crumbly and set aside.
Preheat the oven to 350. Lightly grease or spray an 8x8 square pan.
In a small bowl, combine the flour, baking powder, baking soda and salt.
Whisk lightly.

In a large mixing bowl, beat the softened butter and Truvia Baking Blend until light. Beat in the eggs, one at a time, and then add the vanilla extract and yogurt and mix until smooth. Add the flour and stir by hand, just until combined. Fold in the blueberries gently.

Spread the batter evenly in the pan - it will be thick.

This is ready to go in the oven with the topping scattered over.


Pour batter into the prepared pan and sprinkle with the topping.
Bake at 350 for 40 minutes or until golden brown and a toothpick inserted in the center comes clean.
This really is a muffin in a pan - 
the taste is wonderful with all of those plump blueberries!

Cool and enjoy!


UPDATE ON THE A/C:  The part DID arrive and it was up and running last Monday...... but now, six days later and there is water all over the garage floor again this afternoon, and a new leak up above.  I am feeling pretty jinxed right now.  Luckily the company is so wonderful that the guy who helped me is leaving a job TWO HOURS AWAY and driving back tonight to help me.  Talk about restoring my faith in humanity and the kindness of others.  So am hopeful it won't be another week of problems, but they just have to figure out why this keeps happening!
Pin It Now!

Tuesday, June 3, 2014

Get Well for a Dear Friend

A very special friend has been recovering from surgery and I finally got this card in the mail to her.  I hope it makes her smile.  This is one of those projects that looked one way in my head and entirely different when it was all done.

I started with the focal point - the doily from one of Monica's files - and cut it out from Paper Temptress glimmer paper.


Monica's Doily (#91) and two shadow layers

I made a very thin lattice background to help the doily stand out a little (I need to learn to plan it out first rather than adapt as I go!)


The negative space left from the very thin lattice cut for the background (see photo below). Yes I forgot to take a separate photo of the lattice before it was glued on!

I added different sizes of turquoise and light green rhinestones for the finishing touches.  Even though this was a get well card, it would work for any occasion.


The finished card set on incandescent card stock from Paper Temptress. (note the thin lattice 
over the black card stock, cut, peeking out on the sides!)


A close up of the final product!  Hope you like it.

Get Well my friend!


Pin It Now!

Sunday, June 1, 2014

Decadent Chocolate Chip Cookies

I have been craving cookies for a while now.  I try not to bake them too often because they are clearly my weakness. They are just too easy to grab.  I have been known to have coffee and a cookie for breakfast

I wasn't sure these would be good because I overdid some of the ingredients - imagine that?


Not the most professional photo , but you get the idea -lots of flavorful ingredients


Here they all are just waiting to be mixed in the dough...YUM!!

The recipe called for light brown sugar and I used my new favorite muscovado sugar. I love the richness it adds to quick breads and muffins, but was worried when the cookie dough had a very strong molasses smell and taste  (yes, I do sample my cookie dough!)

But all of that seemed to mellow out when they baked in the oven. And I ended up with one of the best cookies I have made in quite some time.  Everyone who tried them loved them!

Decadent Chocolate Chip Cookies                                                            

 adapted from Two Peas and Their Pod

3 cups flour
1 tsp. sea salt
1 tsp baking soda
1 1/2 tsp. baking powder
1 cup butter, softened
1/2 c. sugar
1 1/2 c. muscovado (molasses) sugar*
2 large eggs
2 tsp. Vanilla Bean Crush extract (King Arthur)
1/2 c. milk chocolate chips
1/2 c. bittersweet chips (King Arthur Flour - or any dark chips)
3/4 c. butterscotch chips
3/4 c. Heath Toffee Gits and Heath Bits o'Brickle
Extra sea salt for sprinkling on top of baked cookies

*You can certainly substitute light or dark brown sugar, depending on your taste.

Preheat oven to 350.  Line a cookie sheet with parchment paper and set aside.
In a medium bowl, whisk the flour, sea salt, baking soda and baking powder; set aside.

In the bowl of a stand mixer, cream butter and sugars together until light and creamy, about 5 minutes.  Add the eggs and vanilla and beat for an additional 2 minutes.  Slowly add the flour mixture to the butter mixture.  Add a little at a time and mix just until blended.  Stir in all of the chips and toffee pieces.

Drop about 1-2 tablespoons of dough (depending on how many cookies you want to make) onto the prepared cookie sheet, placing the dough balls about 2 inches apart. Bake for 12 minutes or until the edges are slightly golden brown.  Remove from oven, sprinkle with a pinch of sea salt,  and allow the cookies to cool for 2-3 minutes before removing to a wire rack to cool completely.


Cookie dough perfection!


Just the right amount of sea salt on top (with another dusting after baking.


Fresh out of the oven...


Rich, delicious, and I dare you to eat just one!!

Pin It Now!