Thursday, October 30, 2014

Halloween Birthday and New Foiled Overlay


My oldest granddaughter is FOURTEEN years old today - what the heck???  She can't be that old..........  Luckily she is still a sweet girl and the early teenage years have not ruined her......yet!  Although I do think she would need surgical intervention to be "removed" from her phone, but that unfortunately seems to be a sign of the times..........  I love technology and the convenience, but I don't love that we often fail to have face to face conversations and text or email instead. I am guilty of it as well and trying to improve on making REAL connections.......... but enough of my editorializing!

It is her birthday and I tend to do a Halloween theme since it falls the day before - and I have been having so much fun experimenting with the Silver Bullet and the FoilMaster that I turned once again to both. I had an idea to make a foiled overlay and just let me say - this will NOT be the last time I do this - too much fun!!

So.... I found some royalty free clip art on the internet (so grateful that others can draw) - and traced the witch and the moon in SCAL and cut out.  The witch is black luster card stock from Paper Temptress and the moon is from paper scraps.  The background sky is mica card stock also from PT that has been embossed to look sort of spooky!

Now to the overlay.  I used SCAL to create stars scattered over a rectangle the same size as the embossed rectangle and placed them around the witch and the moon so they wouldn't detract from them.  I did a print and cut of the stars, foiled them in silver with the FoilMaster and then cut the rectangle with the Silver Bullet.I placed some small glue dots under the stars so the transparency would adhere without visible signs of adhesive. I so love how this turned out.  It was super fun and super easy and looks so much better in person.
I hope she loves this special birthday witch!


The stars are really silver but reflecting the light in the photo. 
I can hardly wait to do an overlay again.


The greeting is just a font cut out of silver mica and placed over black and silver sparkly ribbon.  
The sparkle cardstock from PT pulls all of the pieces together as the card base.


HAPPY BIRTHDAY, KENDRA!!


Pin It Now!

Saturday, October 25, 2014

Coconut Maple Almond Granola

As a teenager, I can remember seeing my Mom, who rarely snacked on anything, utterly obsessed with Quaker granola. Like most of us at that time, she thought it was good for her.  All granola was good then right?  Life was so much simpler then too..... or so we thought!

I guess the love of granola lay dormant in me for decades and recently resurfaced.  I love snacking on it plain, eating it for cereal with just a little milk, topping my homemade yogurt with it - but like my Mom, it was not as healthy as I thought it was. Sure I bought it at a health food store (no guarantee there!), but it was still loaded with sugar and who knows what else.  So I finally decided, after seeing blog after blog share a favorite recipe, that it just couldn't be that difficult to make.  And you know what?  It was even easier than I imagined.  And you can customize it however you want.  Best of all, you know exactly what is in it.


ready to go in the oven...


COCONUT MAPLE ALMOND GRANOLA
adapted from Organize Yourself Skinny

3 c. rolled oats
1 tsp. Penzeys Baking Spice or cinnamon
1/2 tsp. salt
1/2 c. unsweetened coconut shreds
1/2 c. unsweetened coconut shavings*
1 c. honey roasted sliced almonds (Trader Joe's)
3/4 c. pure maple syrup - Grade B (more intense flavor)
1/4 c. coconut oil, melted
1 tsp. almond extract

*I liked the different textures from coconut shreds and shavings (larger pieces) but you can use one or the other too.

Preheat the oven to 325..  In a large bowl, mix the oats, baking spice or cinnamon, salt, coconut and honey roasted almonds.  Mix it really well and then add the maple syrup, coconut oil and tsp of almond extract.

Spread the granola mixture on a baking sheet lined n parchment paper.  Bake for roughly 30-35 minutes.  After 20 minutes, stir well and then stir about every 5 minutes.  It is done when lightly toasted.  It will cook more and get crunchier as it cools, so don't overcook it (like I did the first time!)


Lightly toasted...


When it is cool, store in a large airtight container.

I added raisins to the cooled batch before storing.  I had raisins to almost everything - I love them.  Chopped dates would be great as would diced dried apriocots.  Customize to your own tastes.  So good!


All mixed with raisins and ready to eat


I store mine in a cereal keeper. And I label everything.
You should see my pantry with all of the flours I am trying..... all labeled. 
Anything that is immobile for a period of time ends up wearing a label! :)
Full disclosure!!


Pin It Now!

Wednesday, October 22, 2014

Greek Yogurt Fascination - Homemade

I love yogurt.  But I have come a long way from what I first loved about yogurt and what I ate.  As a little girl, I remember there was always yogurt in the refrigerator. My dad came home for lunch every day and would always grab a  yogurt - the fruit at the bottom kind.  I loved those too and used to mix up just enough in the rest of the yogurt so I would have a layer of that "sweet" fruit at the bottom of the cup.  It tasted so good. Sure it did - it was pure sugar!!  Of course I had NO clue then nor did I care.  And I continued to love those until..... well for a long time!

So when did it all change?  When I found my new yogurt love - Greek yogurt. I thought it was a magical concoction of thick yogurt goodness.  Little did I know there was even remotely mystical about it.  Fresh strained regular yogurt = Greek yogurt. No special ingredients - nothing.  So when I started making my own yogurt about six months ago I did a lot of experimenting, to try to get the right consistency and flavor. I learned the longer I cooked/cultured  it the tangier it got, and I am not a fan of plain yogurt. But that is how I made it because it was more versatile that way and I could use it in a variety of ways - baking, cooking, eating as is.  And it's simple - whole milk  (makes a better, more satisfying yogurt but lowfat milk can be used, dry whole milk powder, and yogurt culture  - that's it).

I love the Cuisinart yogurt maker  because I don't have to babysit the yogurt.  It processes the yogurt and then chills it until I have time to attend to it -love that feature and it was worth every penny as I make a quart at least once a week

Now when I make yogurt I often do two batches, one plain so it can be a sour cream substitute, and one with vanilla (and sometimes honey) so I just need to add a little fruit and/or granola to have it ready to eat!


I love that it is all natural and that I control what is in it.  I love that I can leave it as is, or strain the whey off for four-six hours and then have Greek yogurt.  It makes me smile because now it is really good for me.


phase one - regular yogurt on left made with whole milk


into the strainer to start the process from regular to Greek!


you can see the whey dripping off the yogurt as it drains...


after about 4-6 hours, a much thicker yogurt emerges - Greek yogurt!


ready for the fridge...... and to eat!


Some favorite taste treat add-ins: (all  of the below with vanilla extract and Truvia or honey added):
  • raspberries and a sprinkling of granola
  • blueberries, stevia and granola
  • diced peaches or nectarines
  • peaches, a little almond extract and honey roasted almond slices
  • sliced strawberries
  • coconut shavings, mini chocolate chips, honey roasted almond slices
  • a tablespoonful of homemade low sugar jam (mixed berry, blueberry, or strawberry)
  • slivers of pineapple chunks and coconut shreds

this is made with homemade low sugar raspberry jam and a little vanilla extract.


I have also been making homemade ice cream and frozen yogurt.  It is perfect as a base for that - more on that in another post!  All I can say is YUMMMMM!

And I have to share something I recently tried. I am not a big fan of honey. I don't dislike it, it's just not the first thing I grab when I want something to go on toast or with peanut butter or - well you get the idea! It's just not my favorite thing (but it is great on hot biscuit :) )  Anyway, this base is greek yogurt and honey - that's it.  And it is amazingly good.  I love the gentle flavoring of the honey as it delicately sweetens the tang of the yogurt. OMG!  A new must have!

These are just a few ideas based on what I did with summer fruit.  Sauteed apples as fall sets in with a little cinnamon and vanilla would be sooooooo good . The possibilities are endless.


Pin It Now!

Tuesday, October 21, 2014

Happy Anniversary Scott and Megan!


Where does the time go?  It doesn't seem possible that my oldest son and his wife have now been married THREE years and are expecting their first baby in a few more months.  Life is just flying by too darn fast!

The card I decided to make them started out one way in my head and had quite a few adjustments along the way. The pattern is beautiful and intricate and is the work of Mary (Sophisticutz).  She has a variety of card patterns on the Thyme Graphics website.


I have never done a folded card like this so once it was made, I was not sure how to add a message.  So rather than create more work, I simply turned the card  into an embellishment and made a larger card!  I wasn't sure if it would lay correctly, but the right amount of foam tape made it all fit together!


The beautiful red cardstock used as the base is the incandescent line from Paper Temptress. The white lattice mini card is cut from the laser luster and then I just added a greeting at the bottom, all cut from the Silver Bullet Professional. The letters are very thin and the machine cut each of them out perfectly from text weight paper. I love being able to cut what I want and not have to rely on dies for whatever I need.

Hope the kids have a wonderful anniversary........  next year they will be sharing it with a precious little one!


Pin It Now!

Thursday, October 16, 2014

Birthday Greetings!


I have been watching some of my friends make some really fun cards with files from SVG CUTS, and since I have amassed quite a collection of those files, it seemed like time to put one to good use!

October has become a busy time for family cards - my daughter in law's birthday, their anniversary, and my oldest granddaughter's birthday right before Halloween.  So I have been busy trying to get them done in time and so far it is looking promising..... well sort of.  Megan won't actually receive her card til next weekend when I see them and can deliver her present as well, but hopefully the thought will make up for the tardiness of the actual greeting.

So there is a theme going on between the card and the present and that is ALL I am saying!  I know - it doesn't take a rocket scientist to fill in the blanks, but such was my inspiration for the card.  I thought the Luxury Purse set from SVG CUTS was so cute and immediately wanted to make the purse card.  It was simple and fun and went together easily.  Love it when it all works!  Hope you enjoy the pictures!

The purse base itself is Coredinations cardstock which I embossed with a preppy houndstooth folder.  I really like the added  texture.  The silver pieces are Mica paper from Paper Temptress (who else?!?)

I highly recommend giving these files a try - there are quite a few really interesting purses to create!


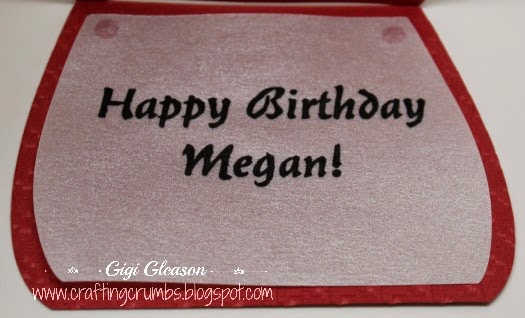
Inside was printed on vellum with inkjet printer and heat embossed.


Assembly was a breeze!


The final result - I added the little buckle (Prima embellishment) and the little tag.  
The Happy Birthday greeting is printed gold on silver with a Brother tape labeler.
 Brads were added at the handles to give the purse a little more interest.


Pin It Now!

Tuesday, October 14, 2014

Another Positive-Negative Card Experiment AND foiling - oh my!


I needed some inspiration so returned to my favorite files from Dominic to create two cards from one - I so love that technique and it's fun to see what I can do to make them different!

I chose the calendula flower as I love the detail and it lends itself to the reds,oranges and golds of the season. I used the Sparkle paper from Paper Temptress this time and it handled these files perfectly. So thrilled with the results.

The top image is what I refer to as the positive; the bottom is the negative


A closer look...positive...


And negative...


The negative again backed with double sided adhesive - ready for a deluge of glitter!


And the designs begin to shape up and take on their own character...


Once I backed the original image on the card base (Felt Grandee from Paper Temptress) I decided it needed a little more.  So, for an added twist, I used Dominic's butterflies file (there are all sorts of silhouettes of butterflies and an additional four with beautiful wing patterns) and foiled one on acetate and cut it out.  Yes I am really loving the foiled laser transparency of late - it looks great and gives such a nice embellishment to any card. Have lots of fun ideas running through my head of things to try - if I can just remember when the time comes!

The second card (negative) card is backed in the Mica card stock from Paper Temptress and utilizes a polished stone technique with alcohol reinkers to get a mottled colorful background on glossy paper.

Dominic's files cut seamlessly on the Silver Bullet Professional.  And I hope this tempts you to try foiling laser transparencies.  It really is addicting!


Pin It Now!

Sunday, October 5, 2014

Healthy Whole Wheat Chocolate Zucchini Muffins


I never thought my first really "healthy" new item would contain chocolate - but that makes all things better and bearable, right?  The funny thing is - I am not really a chocolate fan. But there is something about zucchini and chocolate.  And they pair beautifully with whole wheat pastry flour (ground soft wheat berries).  Yes I really have gone back to basics and even ground my flour for this recipe.  It was easy and the feeling that it was so fresh just made the whole experience that much more fulfilling.  I know that sounds kind of  strange, but I really did feel like I was doing something good for me through every step of this and I am excited about learning more and experimenting.


The original recipe was already pretty healthy, but I took it up a few notches with the flour, the coconut sugar, the coconut oil, and the Enjoy Life chocolate chips.

HEALTHY CHOCOLATE ZUCCHINI MUFFINS

adapted from  Whole and Heavenly Oven
3/4 cup coconut sugar
1/4 cup coconut oil (or butter)
2 large eggs
1 1/4 cups milk
2 tsp. vanilla extract
2 c. whole wheat flour (used soft wheat berries - ground)
1/2 c. unsweetened cocoa powder
4 tsp. baking powder
1/2 tsp. salt
1 c. tightly packed shredded zucchini
1/2 c. Enjoy Life mini chocolate chips and King Arthur burgundy chunks

Preheat oven to 425.  Lightly grease a 12 cup muffin tin.  Set aside.

In a large bowl, whisk sugar, oil, eggs, milk, and vanilla until smooth.  In a medium bowl, combine flour, cocoa, baking powder and salt.  Gently fold flour mixture into liquid mixture until just combined. (batter may be very thick).  Fold in shredded zucchini and chocolate chips.


Brimming with healthy goodness (ignore the floating chunks of chocolate...)


Divide batter between greased muffin cups and smooth tops.  Bake muffins at 425 for 5 minutes, then reduce the heat to 375 and continue baking an additional 15 minutes.

Cool muffins in pan 5-10 minutes and then finish cooling on a wire rack.

Store muffins in an airtight container at room temperature up to 3 days.  Muffins may be frozen up to one month.

Can you see how wonderfully glossy they are? That is all natural...


Definitely good enough to eat...


See??? Absolutely good enough to eat every bit!


Things I learned this week:

  • Neither the coconut sugar nor the coconut oil gave the muffins a coconut flavor, but they did have a beautiful sheen to them when fresh out of the oven.  One more thing about coconut oil - there are two very different kinds.  Regular and/or organic coconut oil has a mild coconut flavor. There is also a variety called "organic expeller pressed".  It has absolutely no coconut taste or smell and is often used for frying.  I actually love the flavor, but for those who don't, it was well hidden, probably from the chocolate and whole wheat flour.
  • I really love grinding my own flour. Yes, you have to plan ahead a little, but just a little. It doesn't take more than a few minutes.  I love the nutty freshness of the flour and the fluffiness.  I weigh it when I have those measurements so I can get the exact amount.  I really really love it and look forward to trying a variety of berries, including ancient grains like einkorn and kamut.
  • The Enjoy Life mini chocolate chips have no soy, dairy or preservatives and taste wonderful - no after taste.  I ordered mine from Amazon but have recently seen them in all of the local grocery stores and health food stores.  And they are about the same price everywhere.
  • And on the subject of organic..... I am quickly learning that just because it is labeled organic does not mean it contains the best ingredients. They may be individually labeled like "organic corn syrup"  but let's face it, corn syrup is one of those things that we are all better without if possible.  So I now really read the labels. And milk is one of the most confusing products.   So I am reading labels even more carefully and doing the best that I can.  I am not going to go crazy over it, but will try to be as healthy as I can be while I have control at home. Enough said!


These are equally delicious frozen and reheated - I could not even tell the difference!


Pin It Now!