Tuesday, July 19, 2016

Strawberry Cheesecake Ice Cream


I just found out this weekend that July is Ice Cream Month.  How convenient because I have quite a few ice cream recipes to share with you - and since I didn't know there was a whole month dedicated to ice cream,  I started my obsession with this frozen delight in June!!  I like to be early with things that are so good - and the recipes I am sharing with you are really THAT good - and I have more in the works so stay tuned.  I don't know why I have a fascination with ice cream these days.  The weather hasn't even been that hot (although reports are that a heat wave is coming the end of the week - yikes!)  so I cannot use that as an excuse....yet.  Maybe I just want to have all of my favorites figured out so when it is hot and miserable and the only thing that tastes good is a cold bowl or cone of ice cream, I will be totally prepared!  Makes sense to me!!  I currently have four different flavors in the freezer - how absurd is that?  The only redeeming (barely) fact is that I only make a quart at a time, so that makes it more acceptable in my book. If they were the half gallon size, then you could conclude that I have a serious ice cream addiction  - but quart size is totally acceptable. Right?  And I don't even eat it that often - that is the funny thing. You would think I would be attacking it on a daily basis, but since it's there in a variety of flavors, and I know I can easily make more, it just doesn't seem to have control over my whole being - at least not this week!  Will keep you posted on that one.

So - now that I have tempted you with the idea of more deliciousness to come, I will share this winner with you.  You do need an ice cream machine to make this one, but it is worth it.  The next time I make it, I would add graham cracker crumbs for a little more cheesecake texture - but it is fabulous as it is.

Strawberry Cheesecake Ice Cream

adapted from Hip Foodie Mom

8 oz. cream cheese, softened
3/4 c. organic cane sugar
1 c. cold heavy cream
8 oz. strawberry Greek yogurt
1 T. fresh lemon juice
3 T. strawberry jam (good quality)
1 t. vanilla extract (I use Vanilla Bean Crush from King Arthur flour that has bits of vanilla beans in it)
2 heaping cups of fresh strawberries, hulled and chopped.

OPTIONAL:  If you don't want it to freeze quite so hard, add 1 T. vodka when you are mixing all of the ingredients. Alcohol doesn't freeze, so that makes it a little easier to scoop out.

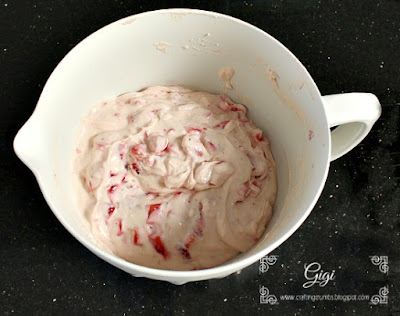
With a stand mixer or good hand mixer, use the whisk attachment and blend together the cream cheese, heavy cream, sugar, strawberry yogurt, lemon juice, and vanilla extract and beat until smooth, scraping down the sides of the mixing bowl as needed.

Using a rubber spatula, fold in the chopped strawberries gently until well combined. Cover with plastic wrap and chill well in the refrigerator - for about an hour.  Pour into your ice cream canister.


When done processing, put it in an airtight container and freeze for at least 6 hours before heating (although licking the ice cream beater when it is finish in the machine is certainly acceptable - and even necessary!


Pin It Now!

Wednesday, July 13, 2016

No Knead Skillet Rosemary Parmesan Bread... ON THE GRILL!


I love making bread.  I grew up with a grandmother from Austria who was the most incredible baker. She made everything without a recipe - and it was always delicious. I can still smell the aroma of brioche fresh out of the oven.  It was intoxicating!  I wish I had inherited her baking abilities, but perhaps my love of "dough" in general comes from her. I like to think so!

So when this recipe came across my computer screen, I was intrigued.  I have made no knead bread before, but always in a Dutch oven.   This had a much shorter rising time and was baked in a skillet.  So I just had to try something new. And because I didn't want to heat up the kitchen, I decided to put my outdoor grill to work and see if it could indeed bake.  I am happy to say it did not disappoint!  I am now quite eager to do more cooking on the grill, especially as the sun becomes more intense.  I love the idea of being able to bake all year long. 

The thing I love about no knead bread is the ease in which it is made.  You just do a little mixing with a wooden spoon.  It looks rough and like it needs more attention (aka kneading into a nice smooth ball), but it actually is quite happy to gently rise in the bowl it was mixed.  Then you shape it, bake it - and voila - hot homemade herbaceous bread!

If you are at all hesitant to try your hand at bread baking, this is a great place to start.  It is simple, VERY forgiving, and well worth the little attention. And the end result make it enormously gratifying.

You just have to try this!

No Knead Rosemary Parmesan Skillet Bread

adapted from Handle the Heat

Ingredients:
1 pkg. (2 1/4 t.) instant yeast
2 c. lukewarm water
4 1/2 c. regular flour
2 T. chopped fresh rosemary (plus extra for sprinkling on top)
1 1/2 t. fine salt
1/4 c. Parmesan cheese
olive oil (2-3 T)

In a large mixing bowl, combine the yeast and lukewarm water.  Add about half the flour and stir with a wooden spoon. Add the rosemary, salt and remaining flour and stir until combined.  It won't be pretty - sort of shaggy looking, but that's ok.  Cover with plastic wrap (spray the underside of the plastic wrap with cooking spray so the dough won't stick if it rises too high!) and let it rise in a warm place. This should take about an hour.


Brush the bottom of the cast iron skillet (10" or 12") with about 2 T olive oil and set aside.
Dust the dough and your hands with flour before shaping it into a round disc.  The dough will be sticky.  Don't worry about creating a perfect circle - it still has to rise one more time.  Place it in the skillet, cover loosely, and let rise until puffy, about 30 minutes.

While the dough is rising, preheat the oven to 400 degrees. (I set the grill to 375 ).

When ready to bake, drizzle or spray the top of the dough with olive oil.  Slash the dough with a sharp knife in an "x".  Sprinkle with a little more chopped rosemary.  Bake for 20 minutes.  Remove from the oven (or grill), sprinkle with the Parmesan cheese, and bake for an additional 20 minutes or until a golden brown (I did 25 minutes in the grill).


Remove from skillet and enjoy every morsel!


Pin It Now!

Saturday, July 9, 2016

A Couple of June Cards

The end of last month brought a need to make a variety of cards, so I decided to showcase the two together -  a birthday and a get well .  Actually there was a third - a sympathy card, but I must have sneezed when I tool the photo as it was THAT much out of focus.  So when I make another one like that (and I used a new to me technique too) I will share.  And since I have not been able to find a really good spot in my beach condo to take photos, I have ordered something that will help me immensely and hopefully you will see the difference in a couple of weeks - at the most!

The birthday card was for the mother of a dear friend - I grew up on the same street and she was one of my mother's special friends.  Her daughter has been a dear friend since we were both three years old - and we are both well beyond that now!  I spent many of my childhood hours/days/months  at her home - I was an only child so life with a family of five brothers and sisters  was much more exciting!   I wanted to live there.  We seem to want what we don't have, especially when we are young, and realize many years later just how lucky we were to have exactly what we needed...... I guess that is what getting older  maturity - does for you.

So here is the card for my dear friend's mother.  In later years, I have called myself the adopted daughter since I was always hanging around there - whether or not they wanted me to!  She celebrated her 88th birthday and that is such a joyous occasion.


This is spirella that I have not done in a while - it's addicting.
The ribbon is really purple, it just isn't showing well in this photo. 
All of these beautiful colors are from the PopTone collection at Paper Temptress.
Next -- in my own back yard, one of my "new" neighbors is recovering from a hip replacement, so I wanted to let him know I was wishing him well.    He knew my father well, so we bonded immediately when we met almost a year ago now.  He has an affinity for vintage cars, so I found  an illustration online, traced it, cut out the various parts and put it all together to make a  "get well soon" card for him.  I handed it to him this week - just 11 days after his hip replacement and he was walking around with barely the use of a cane.  I was and still am in awe!  Good for him!


This was fun to do and was easy to trace with the SCAL software.

Each of the cards is quite different, but it was gratifying to push myself creatively and try some new things, while reaching out to special people to let them know I care...


Pin It Now!

Thursday, July 7, 2016

Cinnamon Sugar Blueberry Banana Bread


If you have bananas that are ripening way too fast (especially in the summer) and some fresh blueberries, then this recipe is for you!  Most of the work is done in the blender so it is easy and delicious too.


Cinnamon Sugar Blueberry Banana Bread

adapted from Crazy for Crust

Ingredients:
3/4 c. cane sugar
1/2 c. butter, softened
1/4 t. salt
2 overripe bananas
2 eggs
7 T. buttermilk
1 t. vanilla extract
1 t. baking soda
1/2 t. baking powder
2 c. flour
2 c. fresh blueberries

Topping:
1/4 c. cane sugar
1 t. cinnamon

Directions:
Preheat the oven to 375.  Grease a 9x5" loaf pan and dust with sugar.  Set aside.

Cream the butter and 3/4 c. sugar with a hand mixer. Set aside.

Add the bananas, eggs, buttermilk, vanilla, salt, baking powder and baking soda in a blender jar and process until smooth.

Pour half the banana mixture into the butter mixture, along with 1 c. flour. (Remove 1 T. flour from remaining cup and toss with blueberries).  Mix with hand mixer just until incorporated.  Add the remaining banana mixture and flour.  Mix just until combined.  Gently fold in the floured blueberries (this prevents them from falling to the bottom of the loaf while baking).  Pour mixture into the prepared pan.

Combine the 1/4 c. sugar and cinnamon in a small bowl.  Sprinkle evenly over the top of the batter.

Bake for 45-50 minutes or until a toothpick inserted in the center comes clean.  The edges should be a dark brown with a crack down the middle.

Cool completely before removing from the pan.  This keeps for quite a while. Put it in the refrigerator after a day (if you are lucky enough to have any left!  Enjoy!


Pin It Now!