Monday, September 29, 2014

More Card Foiling on Transparencies - ADDICTING!!


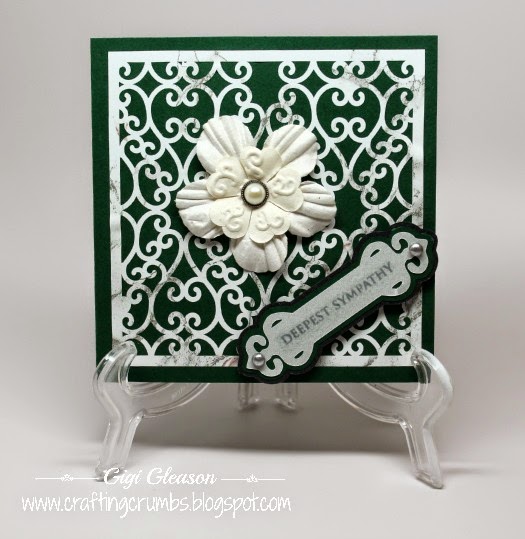
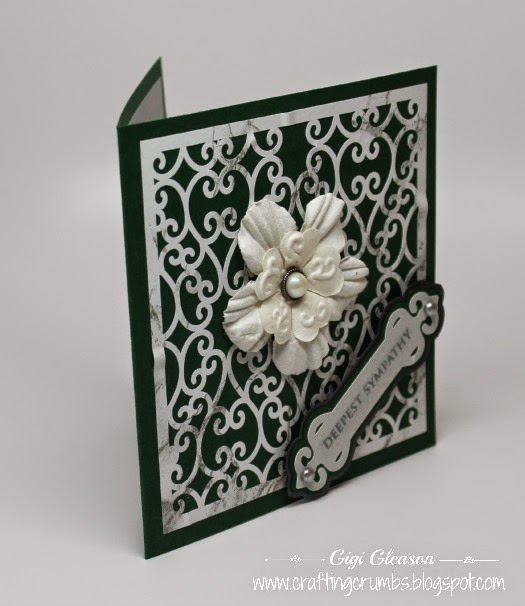
Yes I am addicted - seriously addicted to foiling on transparencies, foiling in general, and print and cut.  I honestly haven't had this much fun making cards in a long time and I feel it has opened up a whole new world for me.

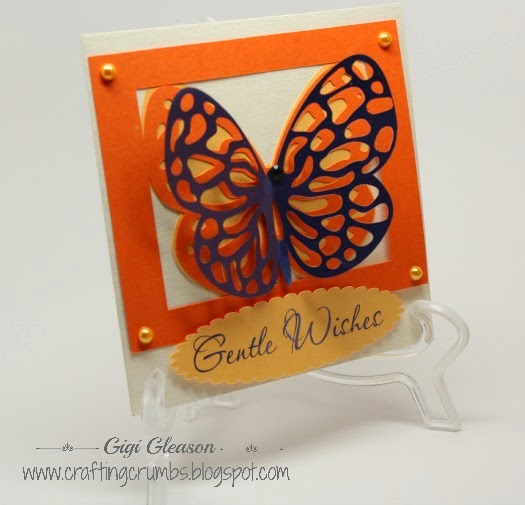
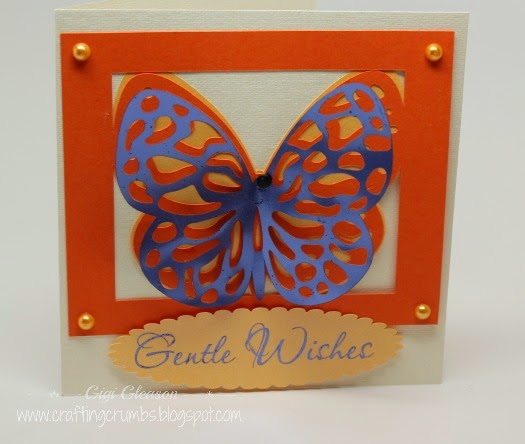
Before I get on with the details of the card, I have to say that I am literally blown away with the detailed print and cut that I can get with SCAL (Sure Cuts A Lot). I was really timid about foiling the butterfly first and then cutting it out and even toyed with the idea of filling it all in with foil and then cutting out the detail. But as you will see, I did it the way I was supposed to and the accuracy of the software coupled with the precision of the cutter was just downright amazing.

My inspiration came from Dominic (Crafty Vectors) and his butterflies file (there are many fluttering delights to choose from) .  Playing with this one gave me all sorts of ideas for future cards - so this will not be the end of spotlighting Dominic and his talents.  I am such a fan.

I started by taking one of the beautiful butterflies, created several shadows, and welded one of the shadows to a frame.  I then printed the detailed silhouette of the butterfly on a laser transparency so I could foil and then cut it out - all using the print and cut method in SCAL.  I really was afraid that the detail would not be captured.  I just didn't think the cut could possibly be accurate enough, especially on the transparency using multi cuts - but it was!!  I was so excited to see the idea come go life.


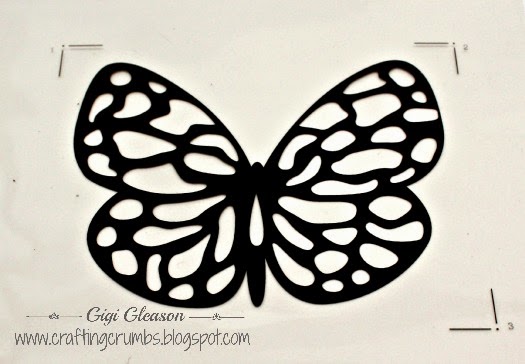
The file laser printed on transparency


The foiled print and cut


All cut  out perfectly...


Once the foiled focal point was cut, it was just a matter of cutting out the other parts from Paper Temptress and assembling using papers from the Sparkle, Mica and Incandescent lines.
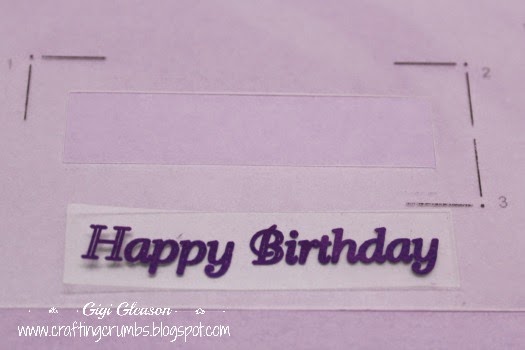
The greeting tag was also a print and cut using a reconfigured nesting shapelie from Penny Duncan Creations and the words were foiled in the same lilac as the butterfly.  The font is one of my favorites thanks to my dear friend Ducky of Ducky's Designs.  She introduced me to that font several years ago and I love the elegance of it.


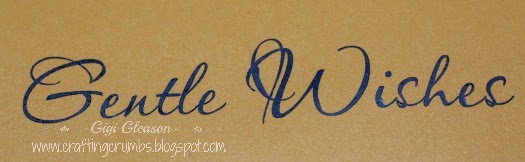
Foiled greeting on Mica paper


This will definitely not be the last time foiling or acetate will be part of my cards... I really do think I am addicted and can hardly wait to develop the next idea!

 
I really love this card and hope you do too.  Hope you will try adding transparencies to your cards!


Pin It Now!

Sunday, September 21, 2014

Embarking on a new journey.......

With the encouragement of friends, I have decided to share with you my new food journey.  For now I am planning to share every couple of weeks about the ups adn downs and the back stories.  In between I will continue to cook and bake and make cards and do all that I enjoy. You will undoubtedly see some changes in the ingredients I am choosing to use in my cooking and baking.  This is an experiment and whether or not it works, I hope it will help others who have similar issues and/or are wondering some of the same things that I have been over the past few months.

So what am I doing?  It's not faddish or trendy, at least not as I see it.  It's not weird - ok parts of it may be a little unusual, but it makes more sense to me than a lot of food trends out there now.  Let's just call my new life plan - "Back to Basics".

For many years now I have been buying what I considered to be "good" ingredients".   I now question it so much that I am putting it to the test. When I think back about our predecessors and how they made their food and ate from the land, I believe they had the right idea.....

I have been making my own bread, yogurt and ice cream.  But..... I wasn't necessarily using the best ingredients - the natural, unprocessed REAL ones.  I was cooking many things "from scratch" so that had to be good, right?  Wrong!  My ingredients were not pure - they had additives and many had been chemically treated - yuck!  Now I am not advising or advocating that everyone jump on the same bandwagon that I have.  These are my choices, and only time will tell if they are as helpful as I hope. And if I can get healthier from these major alterations, I will be shouting it from the rooftops!

What is driving these changes? My age...my body...diseases I am unsuccessfully fighting... and pain. The short story is that I have had cervical torticollis for 19 years.  I woke up with it one morning.  That's all I will say about it right now. But that has led to my whole body suffering over time. Sometimes the pain is unbearable and it never goes away - not completely - not ever.  The past year things have been on a downward spiral with stomach issues, more pain in my back, and on and on. The doctors can't seem to figure out what to do and I have seen many. Pain pills are out of the question because they will make the stomach condition worse.  Besides, I don't want to live my life on narcotics. That is not living.

So I have decided to take my control back.  I am determined to try to eat as healthy and as real as I can.  Whole unprocessed milk (raw when I can get it), cream, butter, grass fed meats,wild fish,  pastured eggs (not just cage free), organic fruits and vegetables as recommended , minimal refined sugar, and a conviction to avoid additives as much as possible.  If I go out, I will eat what is there to eat - I am not going to go crazy over this. But when I am home, I will control what I eat.

I am grinding my own flours using three different varieties of organic wheat berries.  I am making my own bone broths - beef and chicken to help heal my stomach.  And I am continuing to cook and bake from scratch, only this time it will be truly good for me.

Have I bored you to tears yet?   I will stop here and add more next time.  I will continue to share recipes, but expect to see a change in the ingredients. I cannot wait to see the difference in the food I make and eat.  I believe that there will be many changes for the better.  I want to be the best I can be.  I am excited to get started............. Pin It Now!

Friday, September 12, 2014

New Cards and New Technique - Again!

You know by now that I love getting two cards out of one design, and I get excited when it works.  And this time it did.


The card stock is of course from Paper Temptress and combines the shimmery mica with the vibrant pop tones.   I totally forgot to get a picture of the negative until the card was made. As usual, I used the double sided adhesive to pull the left over (negative) pieces off the mat and filled in with iridescent glitter.

The colors used are similar of course but I think they have a different feel and stand on their one,  The card on the right uses the shimmery mica over an amethyst mica to pack a lot of soft glow.  The white flower is from my "need to use up" stash of Prima flowers with a purple rhinestone center.  The white Luster mat along with the flower and thin ribbon gives the card a touch of freshness.


But the part I am most excited about is the Happy Birthday on the ribbon.  It mimics a rub on, but it is actually a piece of laser transparency that was printed, run through the Foilmaster with purple foil, and then cut with the Silver Bullet Professional using the print and cut method.  I was terrifed the acetate would melt when it encountered the very hot temps of the Foilmaster, but it held up beautifully.  I was beyond thrilled as that opens up so many ideas that I cannot wait to try!


The second card with the glittered background was simple to put together. The multi-colored striped ribbon ties the colors together, and again - I used the Foilmaster and Silver Bullet Pro to do make the greeting overlay and pulled the background colors into the tag layers.  The white pearls hide (hopefully) the adhesive dots adhering the transparency!


If you have a Foilmaster, I hope you will try foiling a laser transparency. (I chose laser because I felt it had the best chance of holding up to the heat  of the Foilmaster -mine was set to 155 degrees for best results).


Pin It Now!

Sunday, September 7, 2014

Low Sugar Peach Crisp......heavenly!!


Have you noticed how sweet and juicy the peaches are this summer?  I mean they are usually delicious, but they are even sweeter this year - or at least they seem like they are!!

I love to make apple crisp in the fall, but often forget that other fruits taste delicious baked with that slightly chewy wonderfully buttery oat topping.  That is my favorite part of the crisp!

I decided that I wanted to try to reduce the sugar in this and I am so glad I did because it tastes just as good as the full sugar recipe but it's healthier (as long as you don't focus on all of the butter that goes into the topping.  Can't win em all!!

I took my inspiration from a recipe on Cooking Classy, substituted the sugar with Truvia Baking Blend and Splenda brown sugar blend, and added a few more spice flavors.  For the final touch, I sprinkled some almond macaroon granola over the top to add a little extra crunch to the topping. I am so glad I did that!

I hope you enjoy it as much as I intend to!! (and as far as I am concerned, peach crisp is not only a dessert, but works well for breakfast with a spoonful of vanilla yogurt on top.  Anytime you want to entice your taste buds with peachy cinnamon goodness is the right time for this!

LOW SUGAR PEACH CRISP

adapted from Cooking Classy

Filling
3 lbs peaches (about 7 medium ), peeled, cored and sliced into thick wedges (about 3/4")
2 Tbsp. fresh lemon juice
1/8 cup Truvia Baking Blend
1/2 tsp. LorAnn Cinnamon Baking Emulsion (optional)
2 Tbsp. flour

Topping:
3/4 cup flour
3/4 cup regular oats
1/4 tsp. salt
1/2 tsp. cinnamon
1/8 tsp. ground nutmeg
1/8 tsp. ground ginger
1/4 tsp. apple pie spice (optional)
3/8 cup Splenda Brown Sugar Blend
10 Tbsp. unsalted butter, chilled and cubed in 1/2" pieces
1/3 cup granola (optional - for added "crunch")

Preheat the oven to 350.  Toss the peaches with lemon juice in a large bowl.  Sprinkle the Truvia Baking Blend and flour over the peaches and lightly mix to coat evenly.  Butter a 11x7 or 13x9 inch pan and pour the peach mixture into the pan.


Sugared peaches....


Ready to bake oat topping...

In a food processor (you can do this step by hand, but it's easier this way!), mix the flour, oats, salt, and spices.  Add the Splenda Brown Sugar Blend and the chilled cut up butter and pulse until the mixture is crumbly.  Pour over the top of the crisp and sprinkle with additional granola (if the taste and crunch is desired).  Bake for about 35-30 minutes or until the topping is golden brown and you can see the fruit bubbling.  Serve warm or cold with whipped cream, Cool Whip, or vanilla ice cream.


Fresh out of the oven...


Oh yummmmm....


And a dollop of whipped cream makes it even better...


And don't forget a dusting of cinnamon sugar on top.  You really need to make this now and enjoy every single bite.....  This is now the ONLY way I want to eat peaches!...


Pin It Now!

Thursday, September 4, 2014

Simple Sympathy Cards


Unfortunately I have needed some sympathy cards lately.  This first card has a background design from Birds Cards cut out of Duck Brand vinyl (it looks marbled).  The card also needed very little as the background was so detailed - just a Prima flower and a stamped sentiment completed it simply.


Once again the Silver Bullet Professional handles the detailed file with ease....


I love using this ornate cross from Mamaw's Legacy (no longer available) - it is one of the most elegant crosses I have found and cuts like a dream.     There is little I need to add other then the sentiment. 
The paper is the incandescent from Paper Temptress.It has beautiful subtle slivers of gold through it...
 Just some simple pearls adorn the cross.


Pin It Now!

Monday, September 1, 2014

Cinnamon Bread aka Snickerdoodle Bread

One of my absolute favorite cookies in the world  is the snickerdoodle - and fresh out of the oven makes it literally irresistible.  I think it is the perfect combination of butter and sugar and cinnamon and all things good.

But for those times when the cookie jar is empty (perish the thought) and you are craving something a little more satisfying that will make your cup of coffee taste that much better, this is the next bread you need to bake.Trust me on this one - it is fluffy and delicate and comforting and it's delicious too!

And making four little loaves so you can share makes this even more perfect -  a taste treat that many can enjoy (or keep them all and store in the freezer for when the craving hits!)

CINNAMON AKA SNICKERDOODLE BREAD

adapted from Lil Luna

2 1/2 cups flour
2 tsp. baking powder
1/2  tsp. salt
1 tsp. cinnamon
1 tsp. LorAnn Cinnamon Bakery Emulsion (optional but sooo good)
1 c. butter (2 sticks), softened
2 cups sugar
3 eggs
2 tsp. vanilla extract
3/4 c. plain Greek yogurt (plain or vanilla)
1 c. King Arthur Flour mini cinnamon chips

Topping
3 Tbsp. sugar
3 tsp. cinnamon

Cream butter, sugar, salt and dry cinnamon until fluffy and light.  Add eggs one at a time and mix well.

Add cinnamon baking emulsion, vanilla extract and yogurt and mix well.  In a small bowl, mix the flour and baking powder.  Add to the other ingredients and mix lightly until well blended.

Stir cinnamon chips into the batter and pour into 4 small mini loaf pans or one large pan, until about 2/3 full..
Mix the remaining sugar and cinnamon and sprinkle over the top of the loaf batter.

Bake the mini loaves at 350 for 35-40 minutes.  Let cool before removing from the pan.

Loving the little loaves...


Look at that luscious layer of cinnamon and sugar over the top...


Cinnamon inside and out!


YUM.......


Pin It Now!