Sunday, December 22, 2013

Christmas Money Cards


Finally I am made some cards, and accomplished a little Christmas baking.  It seems like no matter what I am focused on, there is something else nagging at me that needs to be done.  Tis the season.....

Every year I try to make a few simple cards for the special people in my life who consistently make it easier...people like the gardener, mail lady, UPS (yes we are on a first name basis - **shock** I know!), the cleaning lady and a few others.  They all go above and beyond and I want to be sure they feel thanked and appreciated, especially this time of year.

And of course every year the card needs to be different. Not sure they would remember or care, but I do! So this year I used a file from The Cutting Cafe that is a "thanks money holder card".  It was easy to cut with my Silver Bullet and Sure Cuts a Lot and  I like the touch of Christmas paper on the "thanks".  The papers are from Recollections at Michael's - I think I picked them up last year.  Yes I am trying hard to use what I have.

I kept these simple - and then printed their names on labels, affixed them to the other side and presented them in a clear envy.

The cut file from The Cutting Café


A better view of the pocket for the $$$


Added a closure to make it easy to open and close


These are easy to apply fasteners that work really well --


The finished card in green


Same card in red

These were fun and easy to do and the recipients seemed to love that they were handmade.
Pin It Now!

Thursday, December 19, 2013

Simple Iris Folding Holiday Cards


I am not at all sure who these cards are for.. but I was in the mood to do some iris folding (love playing with the paper patterns) so the rest came together quite easily.

I used a simple tree pattern in SCAL (Sure Cuts A Lot) and the Silver Bullet Pro and easily created my template for the folding.  I have a variety of iris folding patterns printed on transparencies so it is easy to know how to line up the paper strips.  The solid card stock is primarily from Paper Temptress; the patterned pieces are from a variety of sources!

These were fun to put together and strips of foam tape on the back make it easy to attach to the card (and all of the messy work is hidden that way!)  Not sure the photos capture it, but in the center of each is a bright metallic or holographic paper that is sparkly and pretty. This is where the "iris" folding comes from - the opening in the center is the iris like the center of the eye or a camera lens. And the spiral pattern in traditional folding resembles the layers in the camera lens - just a bit of trivia!

I think I want to do some snowflakes next, all in white, but with different textures of papers. Will see if I can pull that off.  If I could ever think of these ideas in time, they would make interestingly different Christmas cards.

Hope you enjoy!


Pin It Now!

Tuesday, December 17, 2013

Rosemary Garlic Olive Oil Bread

And as promised, here is one of the most delicious breads I have ever made.  I could make this bread once a week just to breathe in the magical blend of garlic and rosemary while it bakes.  It is intoxicating!

I love baking bread. Often I "cheat" and use my bread machine.  It certainly streamlines the process. But honestly there is nothing better than making the dough yourself, molding it into whatever shape you want, and putting your personal touch on it - literally!  And it is great therapy - I find the kneading very relaxing...
So try it - you may like it!


ROSEMARY GARLIC OLIVE OIL BREAD

adapted from A Hint of Honey

1 cup warm water (110 degrees)
1 Tbsp. sugar
2 tsp. active dry yeast
1 tsp. sea salt
2 Tbsp. chopped fresh rosemary
1/2 tsp.Italian seasoning
1/4 tsp. fresh ground pepper
2 Tbsp. garlic olive oil
2 - 2 1/2 cups bread flour with extra for kneading
1 egg, beaten with 1 Tbsp. water for egg wash
sea salt for sprinkling

In a small bowl, combine the warm water, sugar and yeast. Let sit 10 minutes to proof.

Stir in the salt, rosemary, seasonings, olive oil and bread flour. With the dough blade on the mixer, stir until the dough begins to pull from the bowl and then increase the speed and knead for about 5 minutes.  If dough is too sticky, add 1 Tbsp at a time until it forms a nice ball.

Place the dough in a lightly greased bowl; cover and let rise until doubled in size, about 1 hour.  I use the bread proof setting on my oven and that works beautifully.


You can see the chopped rosemary in the dough..... YUM!


Punch the dough down and form into a round loaf.  Place it on a cornmeal dusted pan or parchment paper; cover, and let rise until doubled in size, about 45 minutes.


Ready for the oven - next time will make it smaller and taller...


While the dough is rising, preheat the oven AND a pizza stone to 400.  Once the dough has risen, gently brush the top of the dough with the egg wash and sprinkle with sea salt (lightly).

Bake on the preheated stone for 20-25 minutes or until the top is golden brown and sounds hollow when tapped.

This is truly a taste treat!! And the kitchen smelled amazing while it was baking!


I cannot even find the words to describe how fabulous this smells


... and how fabulous it tastes...


And it was the perfect addition to the minestrone soup posted a few days ago.

ENJOY!!
Pin It Now!

Sunday, December 15, 2013

Snowy Cards

"Oh where oh where did my mojo go? Oh where oh where can it be?............"

Boy it's been a  LONG time since I even felt like I wanted to make a card, let along execute it.  So I think I have been cooking and baking to fill the void, but that doesn't work.  They are two entirely different kinds of creativity and one doesn't replace the other.

Well I think I am finally in a bit of a transition.  I actually cut out a few things today on my Silver Bullet Professional (I still so love that machine), and believe it or not, I used the pen tool "officially" for the first time!  That is embarrassing to admit. I have played around with it, but never really settled in and used it.  Wow - I love it!  Just have to remember to switch to WYSIWYG when I do that so it actually writes in the correct place! Don't ask........

This was the year I was going to make Christmas cards. It has been YEARS since I have done that. It was also the year I was going to finish a project for the three kids that has been in my head forever.  Note the use of the word "WAS".  Yes, unfortunately maybe next  year will be the year.  Darn it all - I really want to create the project for the kids and just have to set aside the time and DO IT!  But I seem to get so busy the last half of the year with volunteer commitments that personal projects go by the wayside. Maybe the coming year I can focus and get most of the work done early so there is not a lot left the last half of the year. That remains to be seen.... well enough of my whining. Here's to a productive 2014!! :)

For now, I have to be content with a few cards. This snowflake background pattern is from Birds Cards (her files cut so well) and the snowflake embellishments are also hers. I should have written down what font I used on the tag.....oops!


Pin It Now!

Friday, December 13, 2013

Minestrone Soup

it has actually been cold here in southern CA.  Yes it's all relative, but 32 degrees in the morning (yes that was the temp this morning) is truly COLD for us! BRRRRRRR). The saving grace is that  it does warm up to the 60s this time of year. And we can get crazy heat waves - like the 80 degrees forecast for early next week.  I don't like it when it gets that warm in the winter, especially during the holidays.  I want this time of year to feel brisk outside and I want to wear a jacket when I go outside.  I want to make a fireplace and curl up on the couch with the dogs. I love this time of year when I can settle down with a hot bowl of soup and be totally content.  It doesn't take much!

This recipe is a definite winter comfort food, made even better because the Ninja Cooking System did all of the hard work!

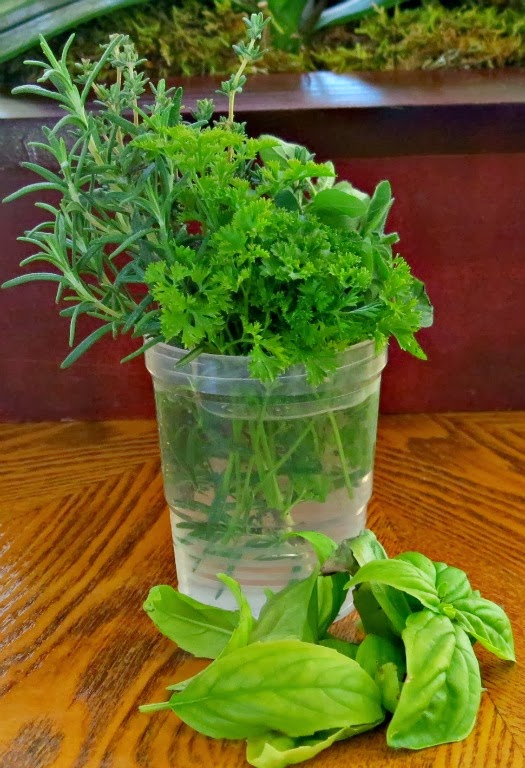
There were quite a few fresh herbs in this recipe so rather than hand chop, I used one of my favorite kitchen tools - the Kuhn Rikon Pull and Chop.  The two blades inside are VERY sharp (yes I found out the hard way!) and they easily mince herbs that are not always simple manage.  You can see how the herbs went from garden fresh to recipe ready.


Straight from my garden


 Ready for chopping


Mission accomplished - perfection!


MINESTRONE SOUP

Adapted from Cooking Classy

4 cups low sodium chicken broth or vegetable broth
1 1/2 cups water
1 cup red wine (optional)
1 (15 oz.) cans petite diced tomatoes
3 stalks celery, chopped
3 carrots, chopped
1 medium onion, chopped
1 zucchini, chopped
1 yellow squash, chopped
1 1/3 cups pasta (ditalini, shell, orecchiette - I used the latter)
5 garlic cloves, minced
1 (15 oz.) can dark red kidney beans, drained and rinsed
1 (15 oz.)  cannelini (white kidney) beans, drained and rinsed
1 (15 oz.) can cut green beans, drained
2 cups chopped fresh spinach
I Tbsp. fresh chopped parsley
1 Tbsp. fresh chopped basil
1 tsp. fresh lemon thyme leaves
2 tsp. fresh chopped oregano
1 tsp. fresh chopped rosemary
2 bay leaves
1/2 tsp. sugar
salt and pepper, to taste
shredded parmesan cheese to garnish or Sargento Italian cheese mix

Add stock, water, wine, tomatoes, celery, carrots, onion, parsley, basil, oregano, thyme, rosemary, bay leaves and sugar to the crock pot/slow cooker.  I used my Ninja Cooking System and it was perfect. Season with salt and pepper to taste and cook on low for about 7 hours.

When the vegetables are softened after the 7 hours, add the zucchini, yellow squash, pasta, garlic, kidney and cannelini beans and cook on high 30-40 minutes or until the pasta is done.  Add the chopped spinach and green beans and cook a few more minutes until heated through.  Serve warm topped with the Sargento Italian cheese mixture or Parmesan cheese.


Another look at the minced herbs and all of the yummy ingredients ready to become soup.


So satisfying and soooooooooooo good!


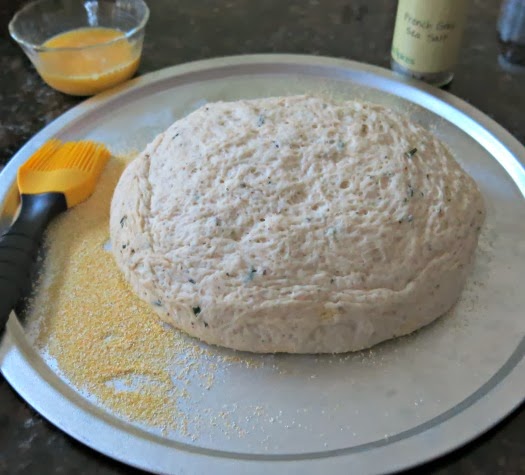
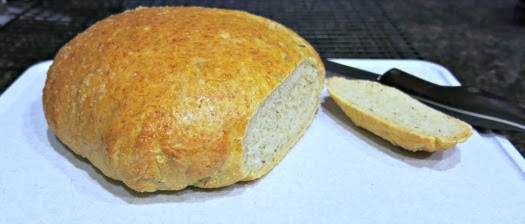
And since I had chopped extra rosemary, I decided to do a bit more and make a delicious loaf of garlic rosemary bread to go with the soup.  The aroma from this baking bread will have you swooning!

Stay tuned for that recipe to come soon!

Pin It Now!

Saturday, December 7, 2013

Banana Chocolate CHUNK Muffins! - low sugar

Again, I had a surplus of over-ripe bananas.  I often peel them and put them in the freezer to use in smoothies, but wanted to another fun muffin recipe. And I think I found my new favorite!  The batter itself is low sugar, so the chocolate chunks can be omitted to keep them lower in sugar and calories......but....if you can add the chunks, the intensity of the flavor is memorable... and addicting!

And I wanted to try a muffin recipe using self rising flour and I was amazed at how beautifully they rose.  It was easy to convert - you just  take out any salt and baking powder and as long as your self rising flour is fresh, they will rise perfectly.   It was fun to experiment and learn something new, even at my age!! :)


Dark chocolate makes everything healthy, right?


BANANA CHOCOLATE CHUNK MUFFINS - low sugar

adapted from King Arthur Flour Baker's Companion cookbook

1 stick butter (1/2 cup_
1/2 cup Truvia Baking Blend
1 large egg
1/2 tsp. nutmeg  (I used fresh ground)
1/2 tsp. allspice
2-3 medium ripe bananas, mashed
1/3 cup vanilla coconut milk (regular milk is fine)
2 cups self rising flour
1/2 tsp. baking soda
1/2 c. chocolate chunks (I used the Burgundy chunks from KAF)

Preheat oven to 350.  

In a mixer bow, cream the butter and Truvia baking blend until they are well-blended and smooth.  Scrape the bowl down, and add the egg, banana and milk.  In a separate bowl, whisk together the flour, spices and baking soda. Add the chocolate chunks and gently fold into the butter mixture. 

Spoon the batter into 12 greased muffin tins.   Bake the muffins for 20 minutes, or until a toothpick inserted in the center comes out clean. Remove from the oven and let stand for 10 minutes before removing from the pan.


Oven ready...


Oh the aroma!....


Patiently waiting for them to cool...


Look at that melty chocolate....... can you say breakfast decadence??
They warm up beautifully too and taste as fresh as the day they were made.

Try to find the time to put your ripe bananas to good use baking these muffins.  
I promise you will not regret it!


Pin It Now!

Monday, December 2, 2013

Creamy Tomato Tortellini Soup

All I seem to want to do lately is make soup.  When it's chilly and /or rainy, it is the one thing I feel that I could eat almost every night.  It fills me up and warms me from head to toe.  It's the perfect food no matter what ingredients are blended together.

In the recipe below, I used regular cheese tortellini because that is all I could find. I do think the mini tortellini would have been more appetizing and easier to eat.

And I decided that you probably don't need to see pictures of the ingredients anymore, so I won't bore you with those unless there is something unusual that I feel you absolutely need to see!! :)  I hope that makes the sharing a little easier.

I am also trying to get in my crafting mode again . The mojo just has not been there, but I am making a concerted effort the next few days to create some cards. Tis the season to get in the card making mood no matter what the occasion! So stay tuned for cards to come.... I hope! In the meantime, enjoy some great tasting, tummy satisfying soup!


CREAMY TOMATO TORTELLINI SOUP

Loosely adapted from Creamy Tomato Orzo Soup/ Two Peas and Their Pod

1 T. garlic olive oil
1/2 c. chopped shallots (2 medium sized)
3 cloves garlic , minced
2 bay leaves
1 - 15 oz. can diced tomatoes (I love to used the petite cut)
6 Roma tomatoes, diced
1/4 c. chopped fresh basil
2 tsp. Borsari seasoning (King Arthur)
1 pkg. fresh cheese tortellini, cooked and drained
8 oz. plain Greek yogurt (I like Yoskos)
shaved Parmesan cheese
chopped fresh chives for garnish, optional

In a large saucepan, heat the olive oil over medium heat and saute the shallots and garlic until tender, about 5 minutes.  Stir in the bay leaves.

Add the canned tomatoes and chopped Roma tomatoes.  Add the fresh basil and Borsari (or salt and pepper to taste) and simmer for 15-20 minutes or until the fresh tomatoes have softened.


Ingredients simmering before the yogurt and blending...


Remove the bay leaves.  Either blend the soup with an immersion blender or pour into a blender and puree.  I used an immersion blender and left a few chunks of tomato for the texture.  Stir in the tortellini to heat and fold in the Greek yogurt.


This WAS blended but I left some chunks on purpose because I like the texture...


Sprinkle with chopped chives and enjoy. Very filling and healthy too!

I served with Special K multigrain crackers. They are very low calorie and filling as well!


The finished product in better lighting!


Pin It Now!